BSST Team | ZWU
2024.6

BBST
Course→Web Build
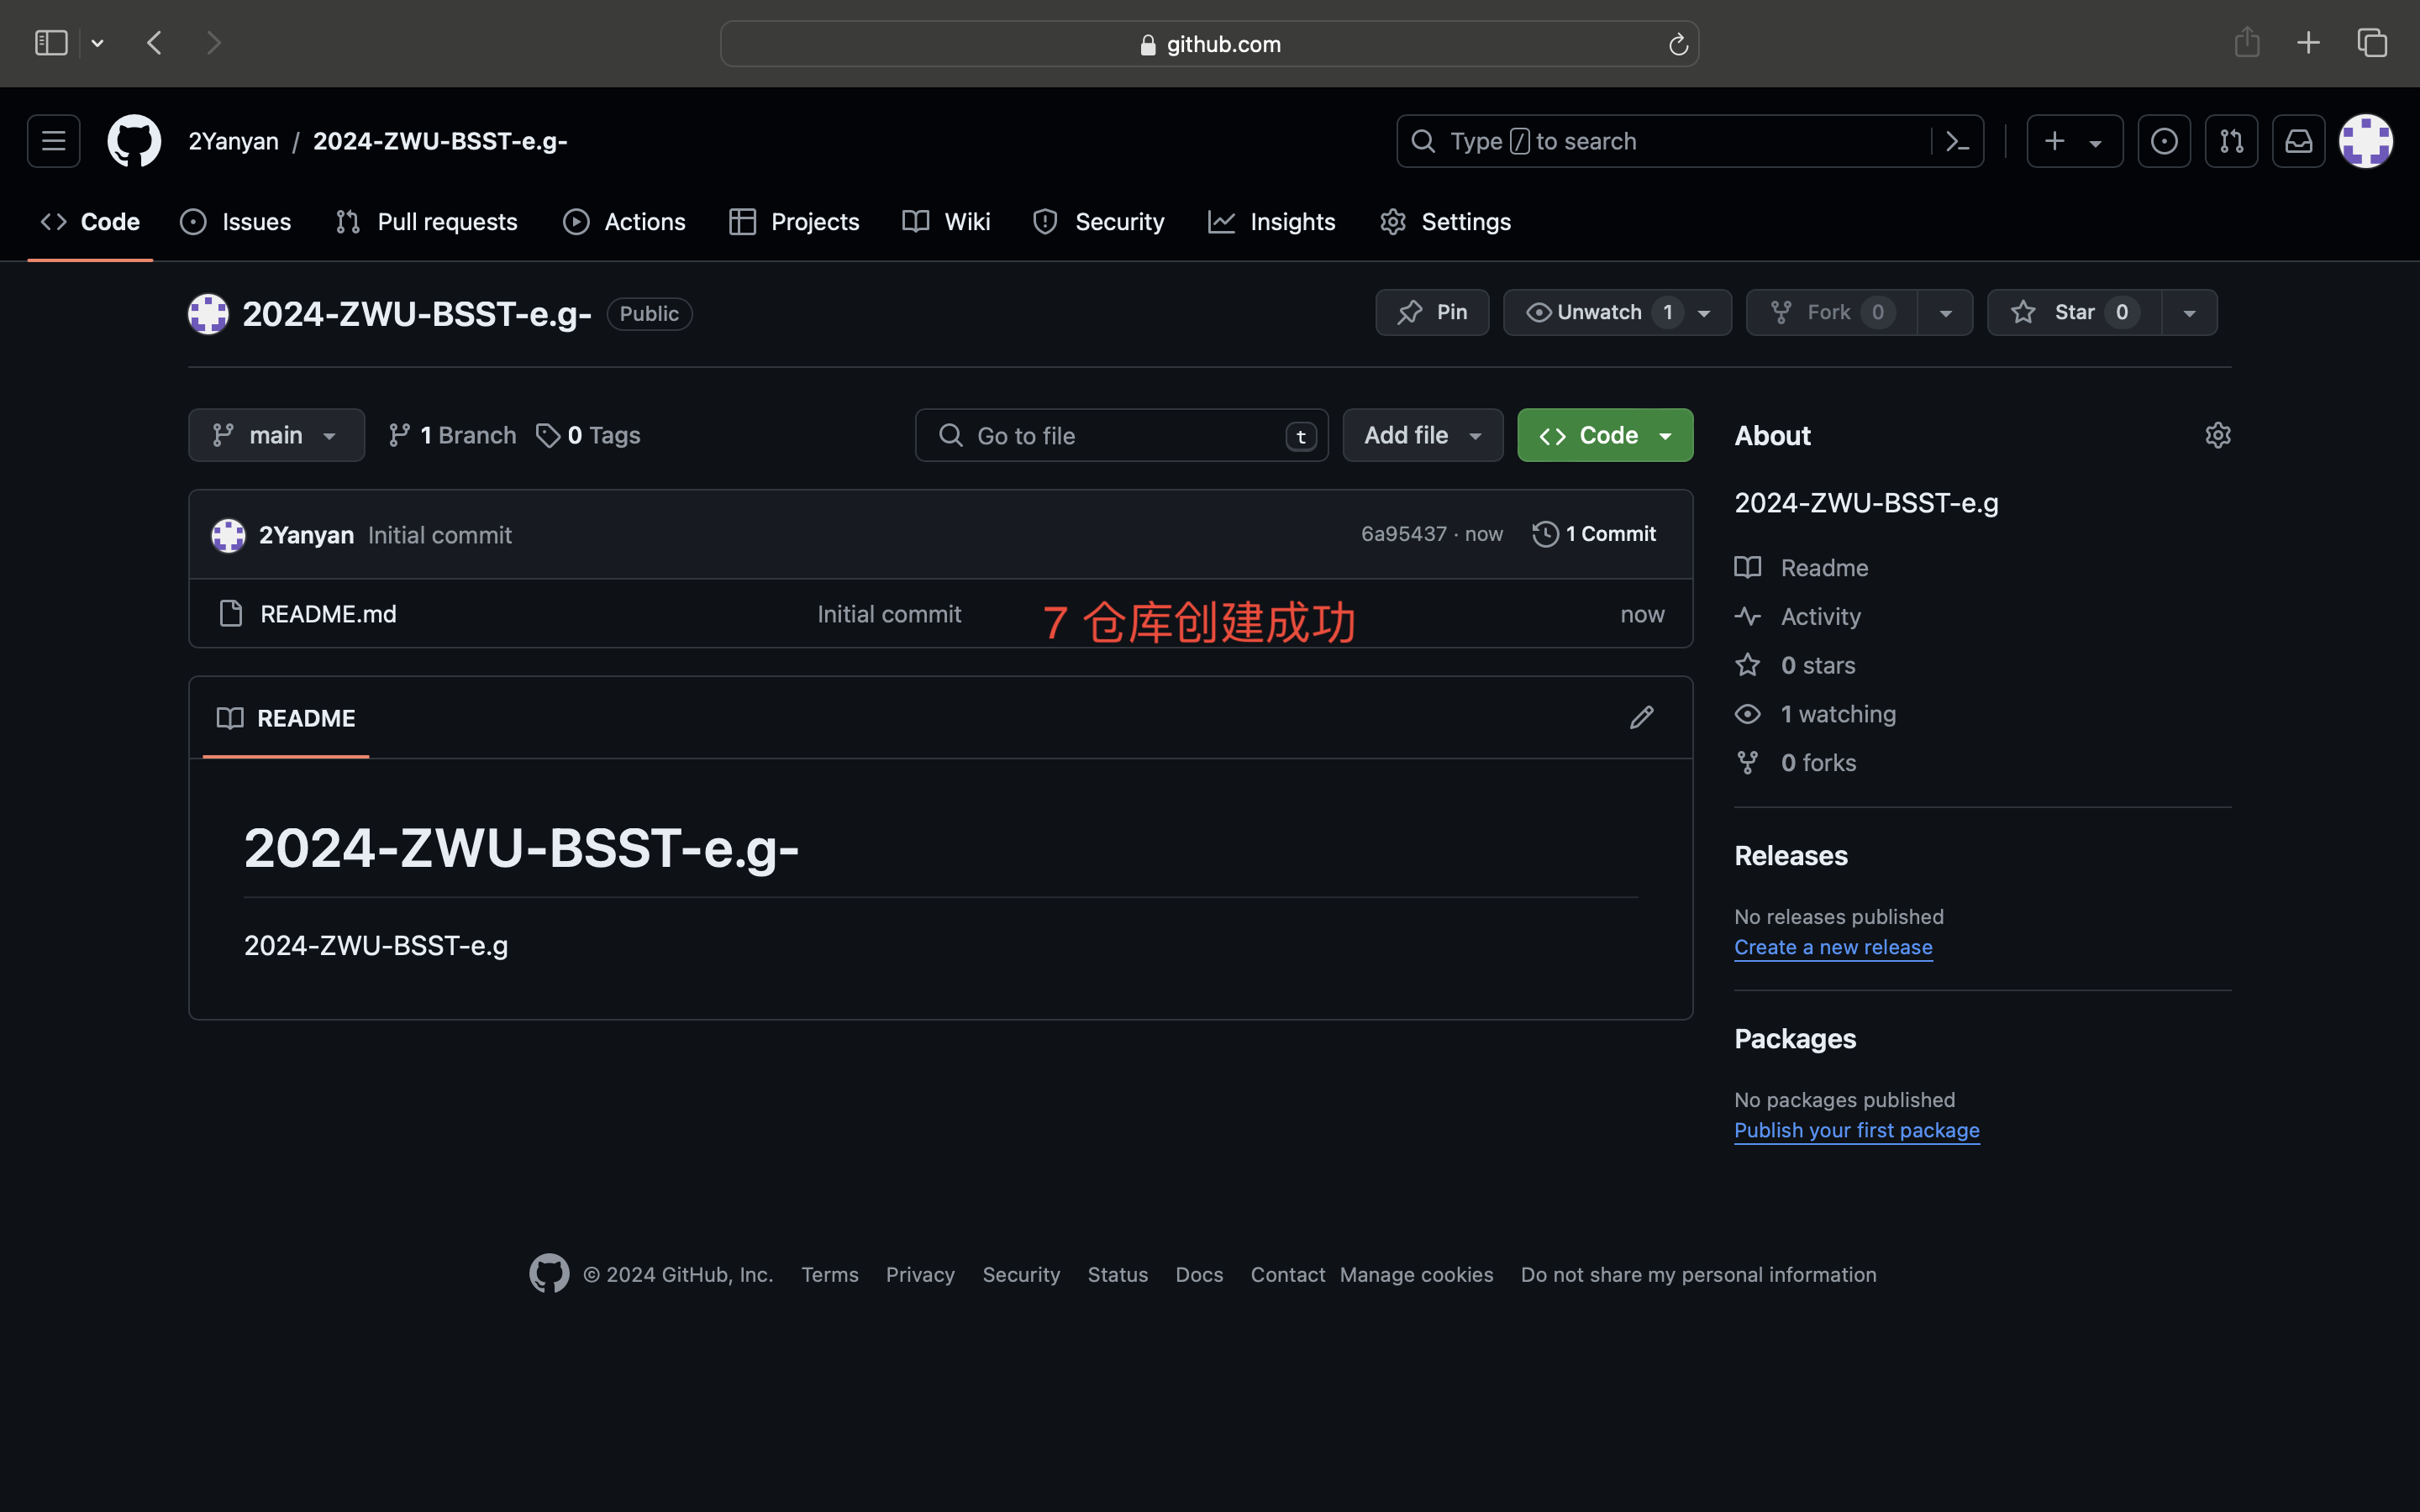
1.Create a Repository
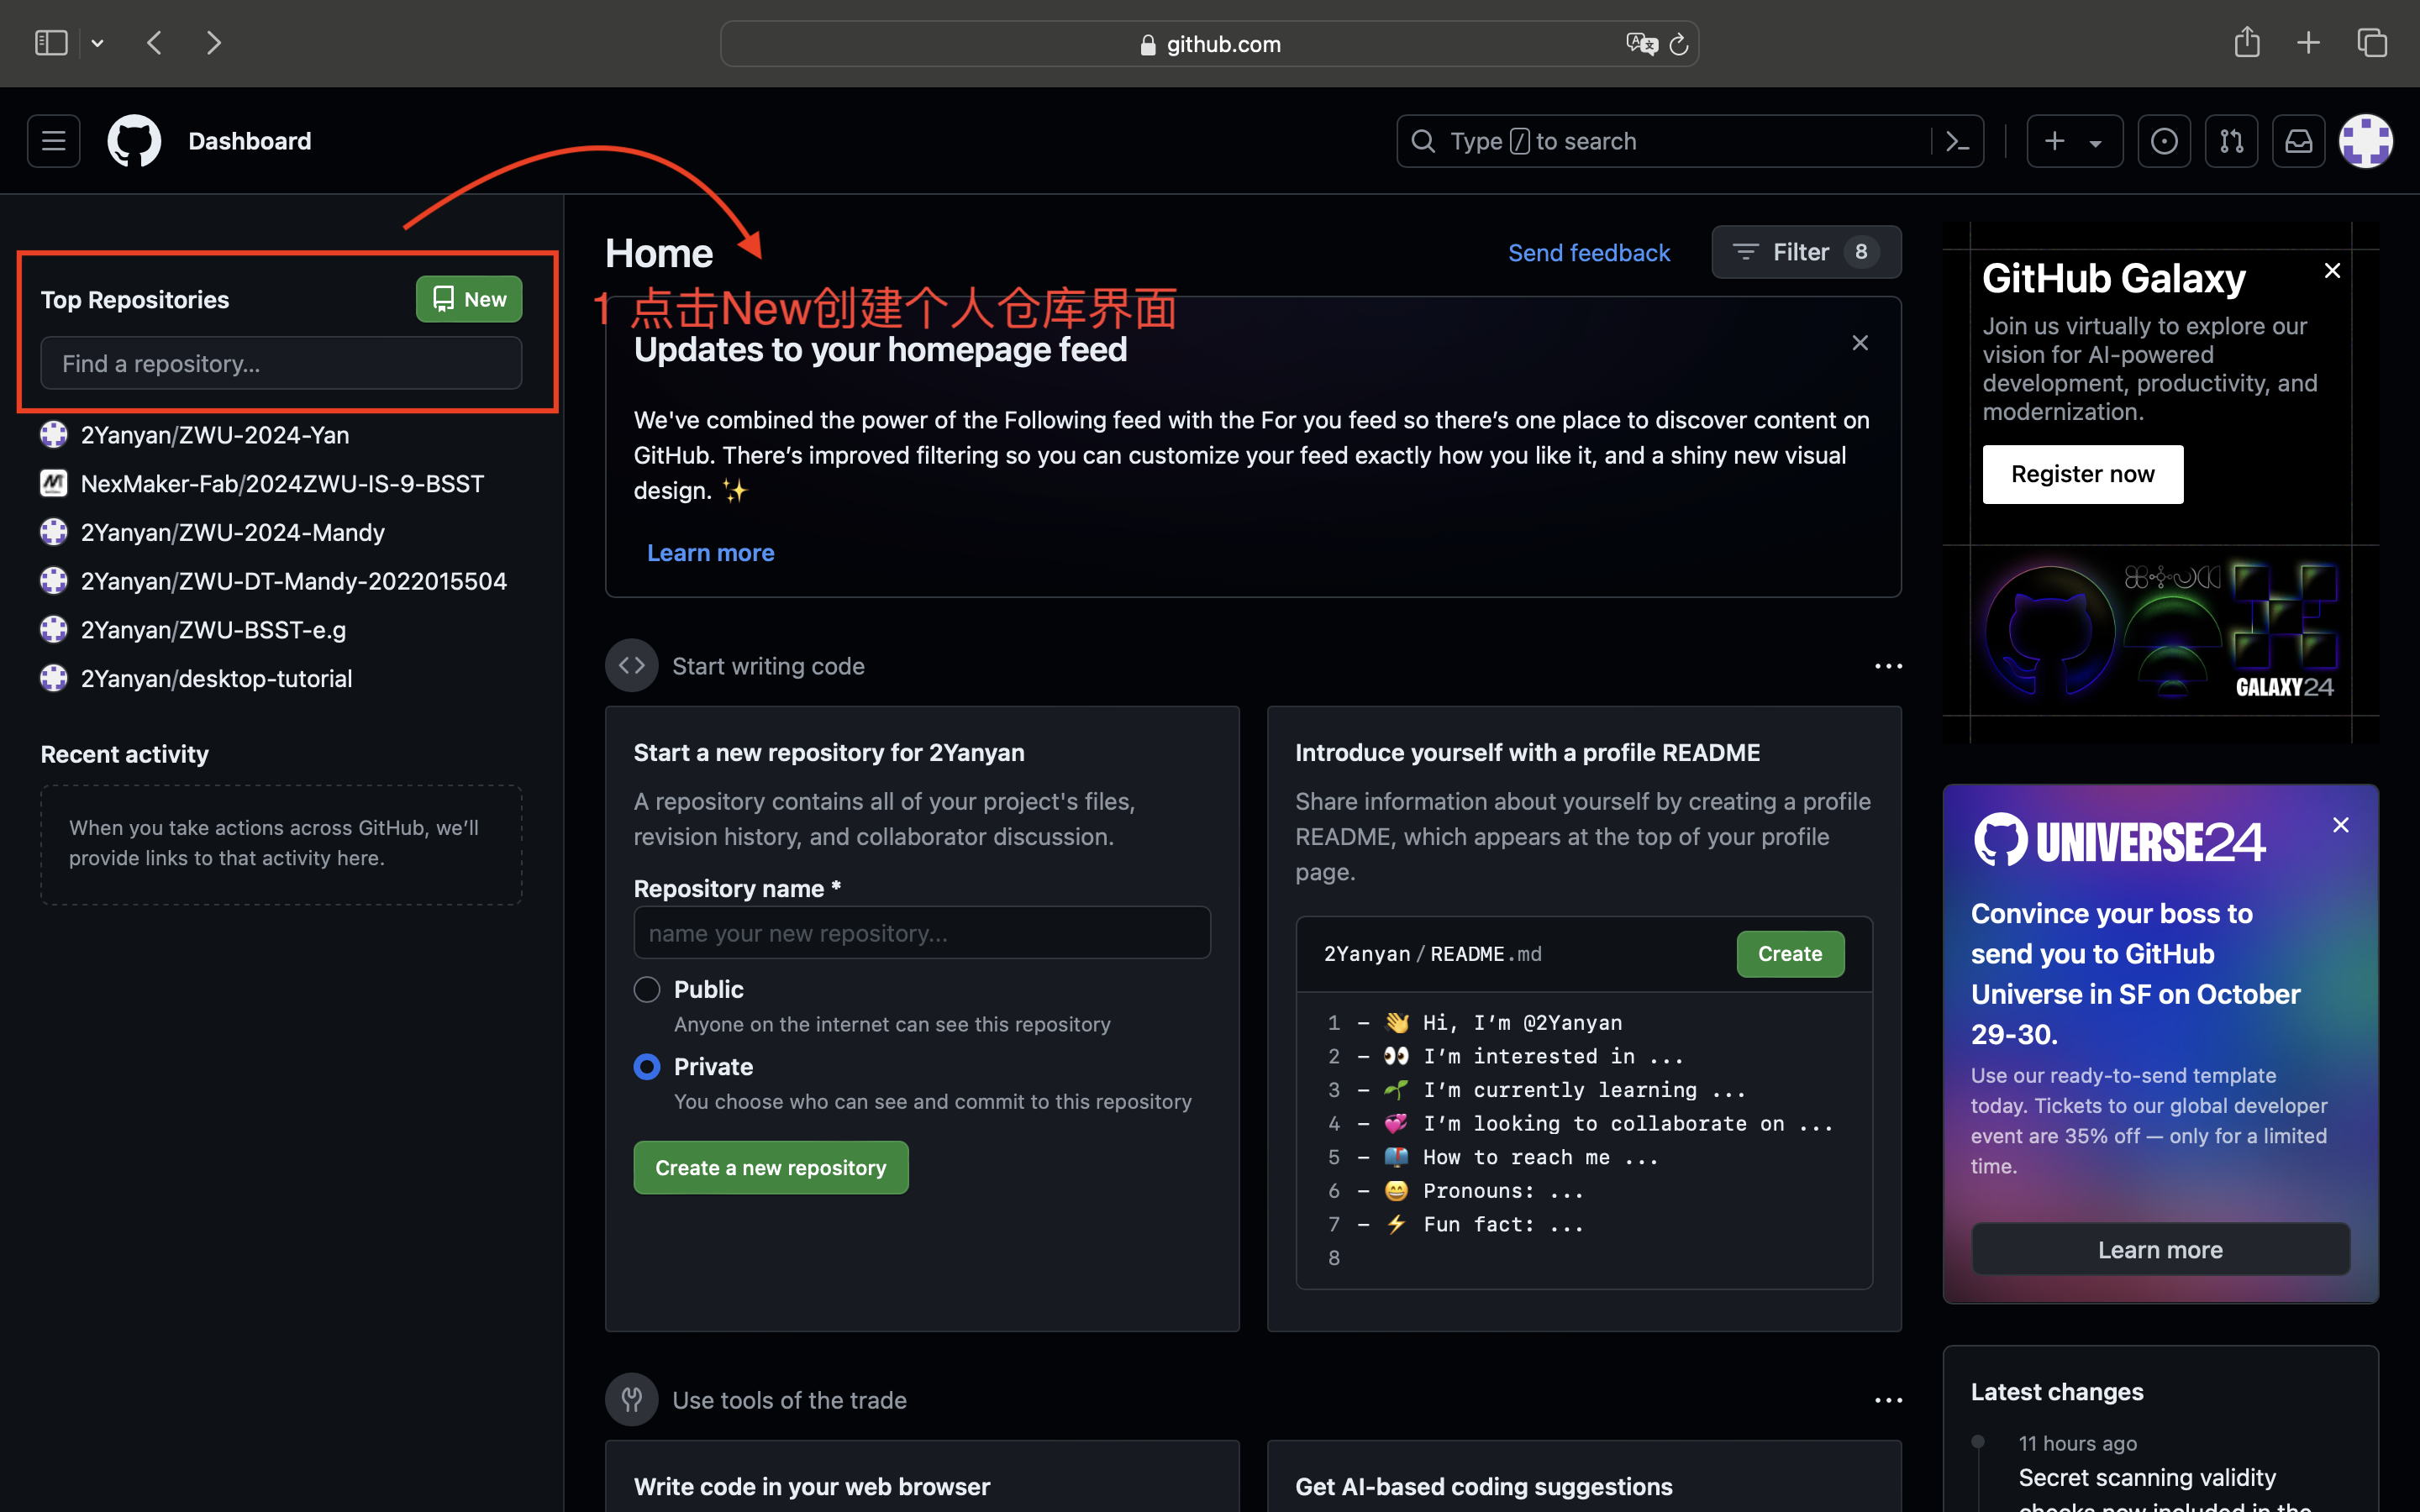
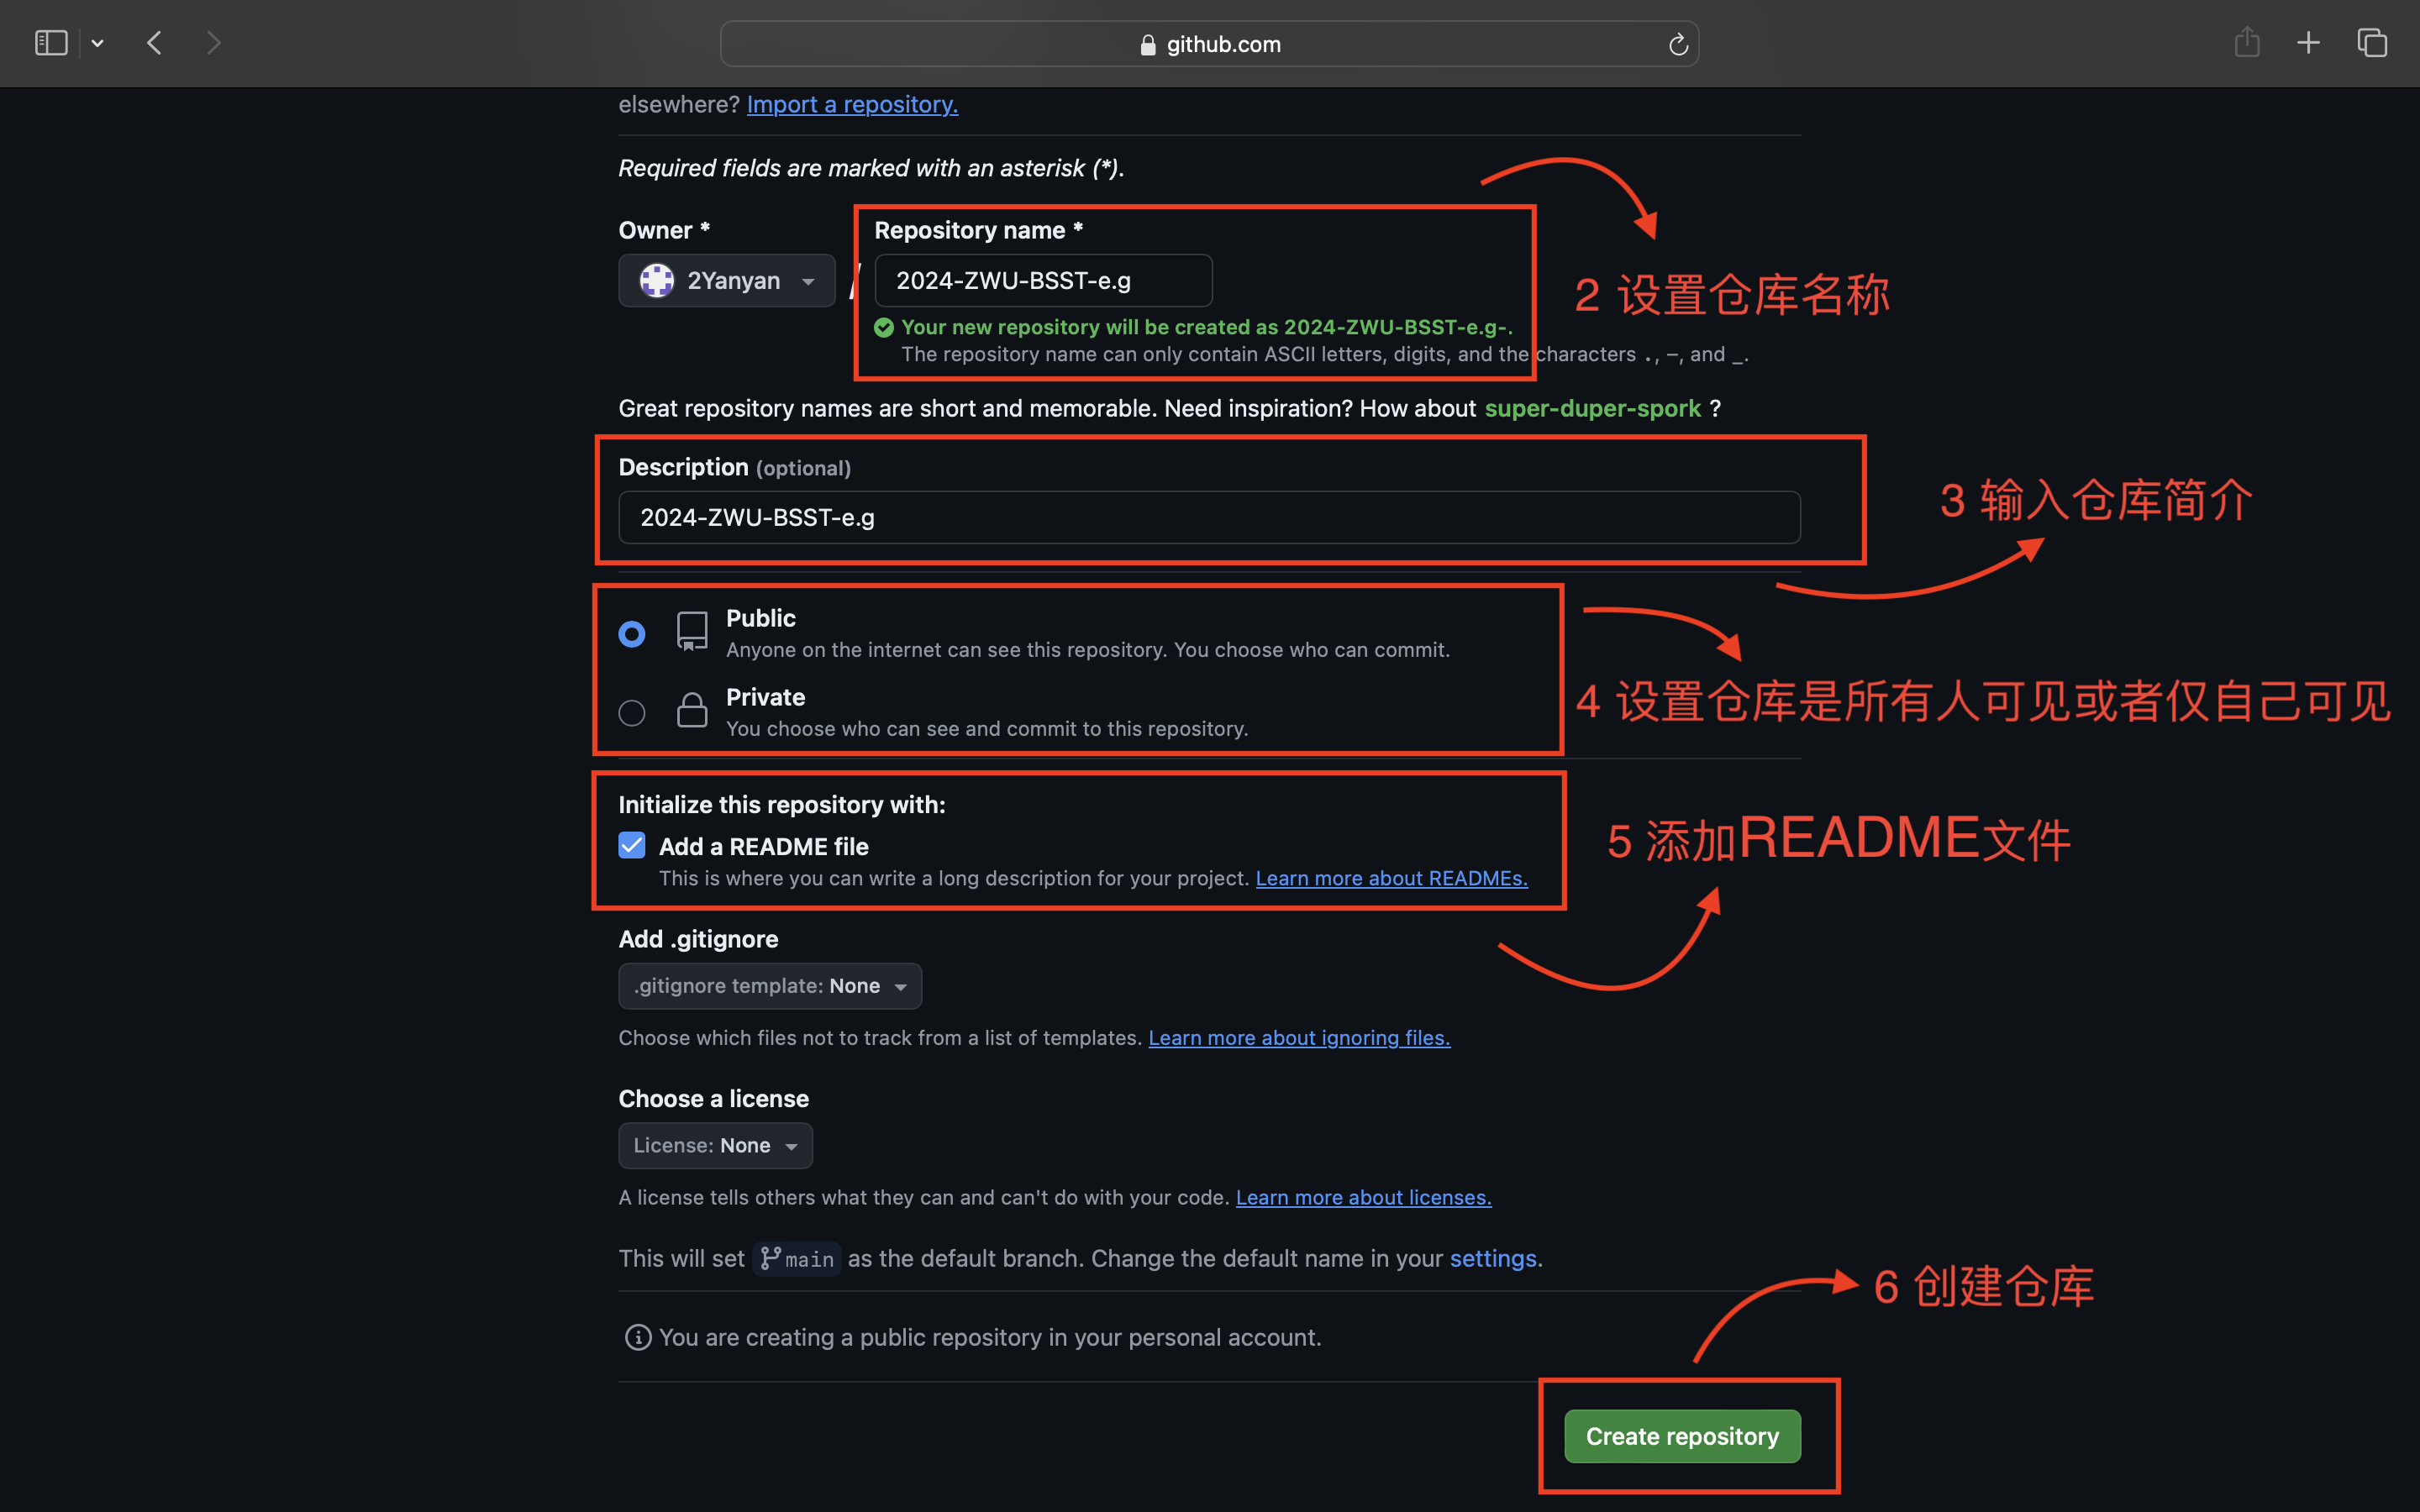
When creating a warehouse, it is important to choose Public or Private.
Public warehouses are visible to everyone, while private warehouses are
only visible to individuals.
If necessary, you can add an explanation file for the warehouse (Add a README file)
If necessary, you can add an explanation file for the warehouse (Add a README file)
2.Member invitation
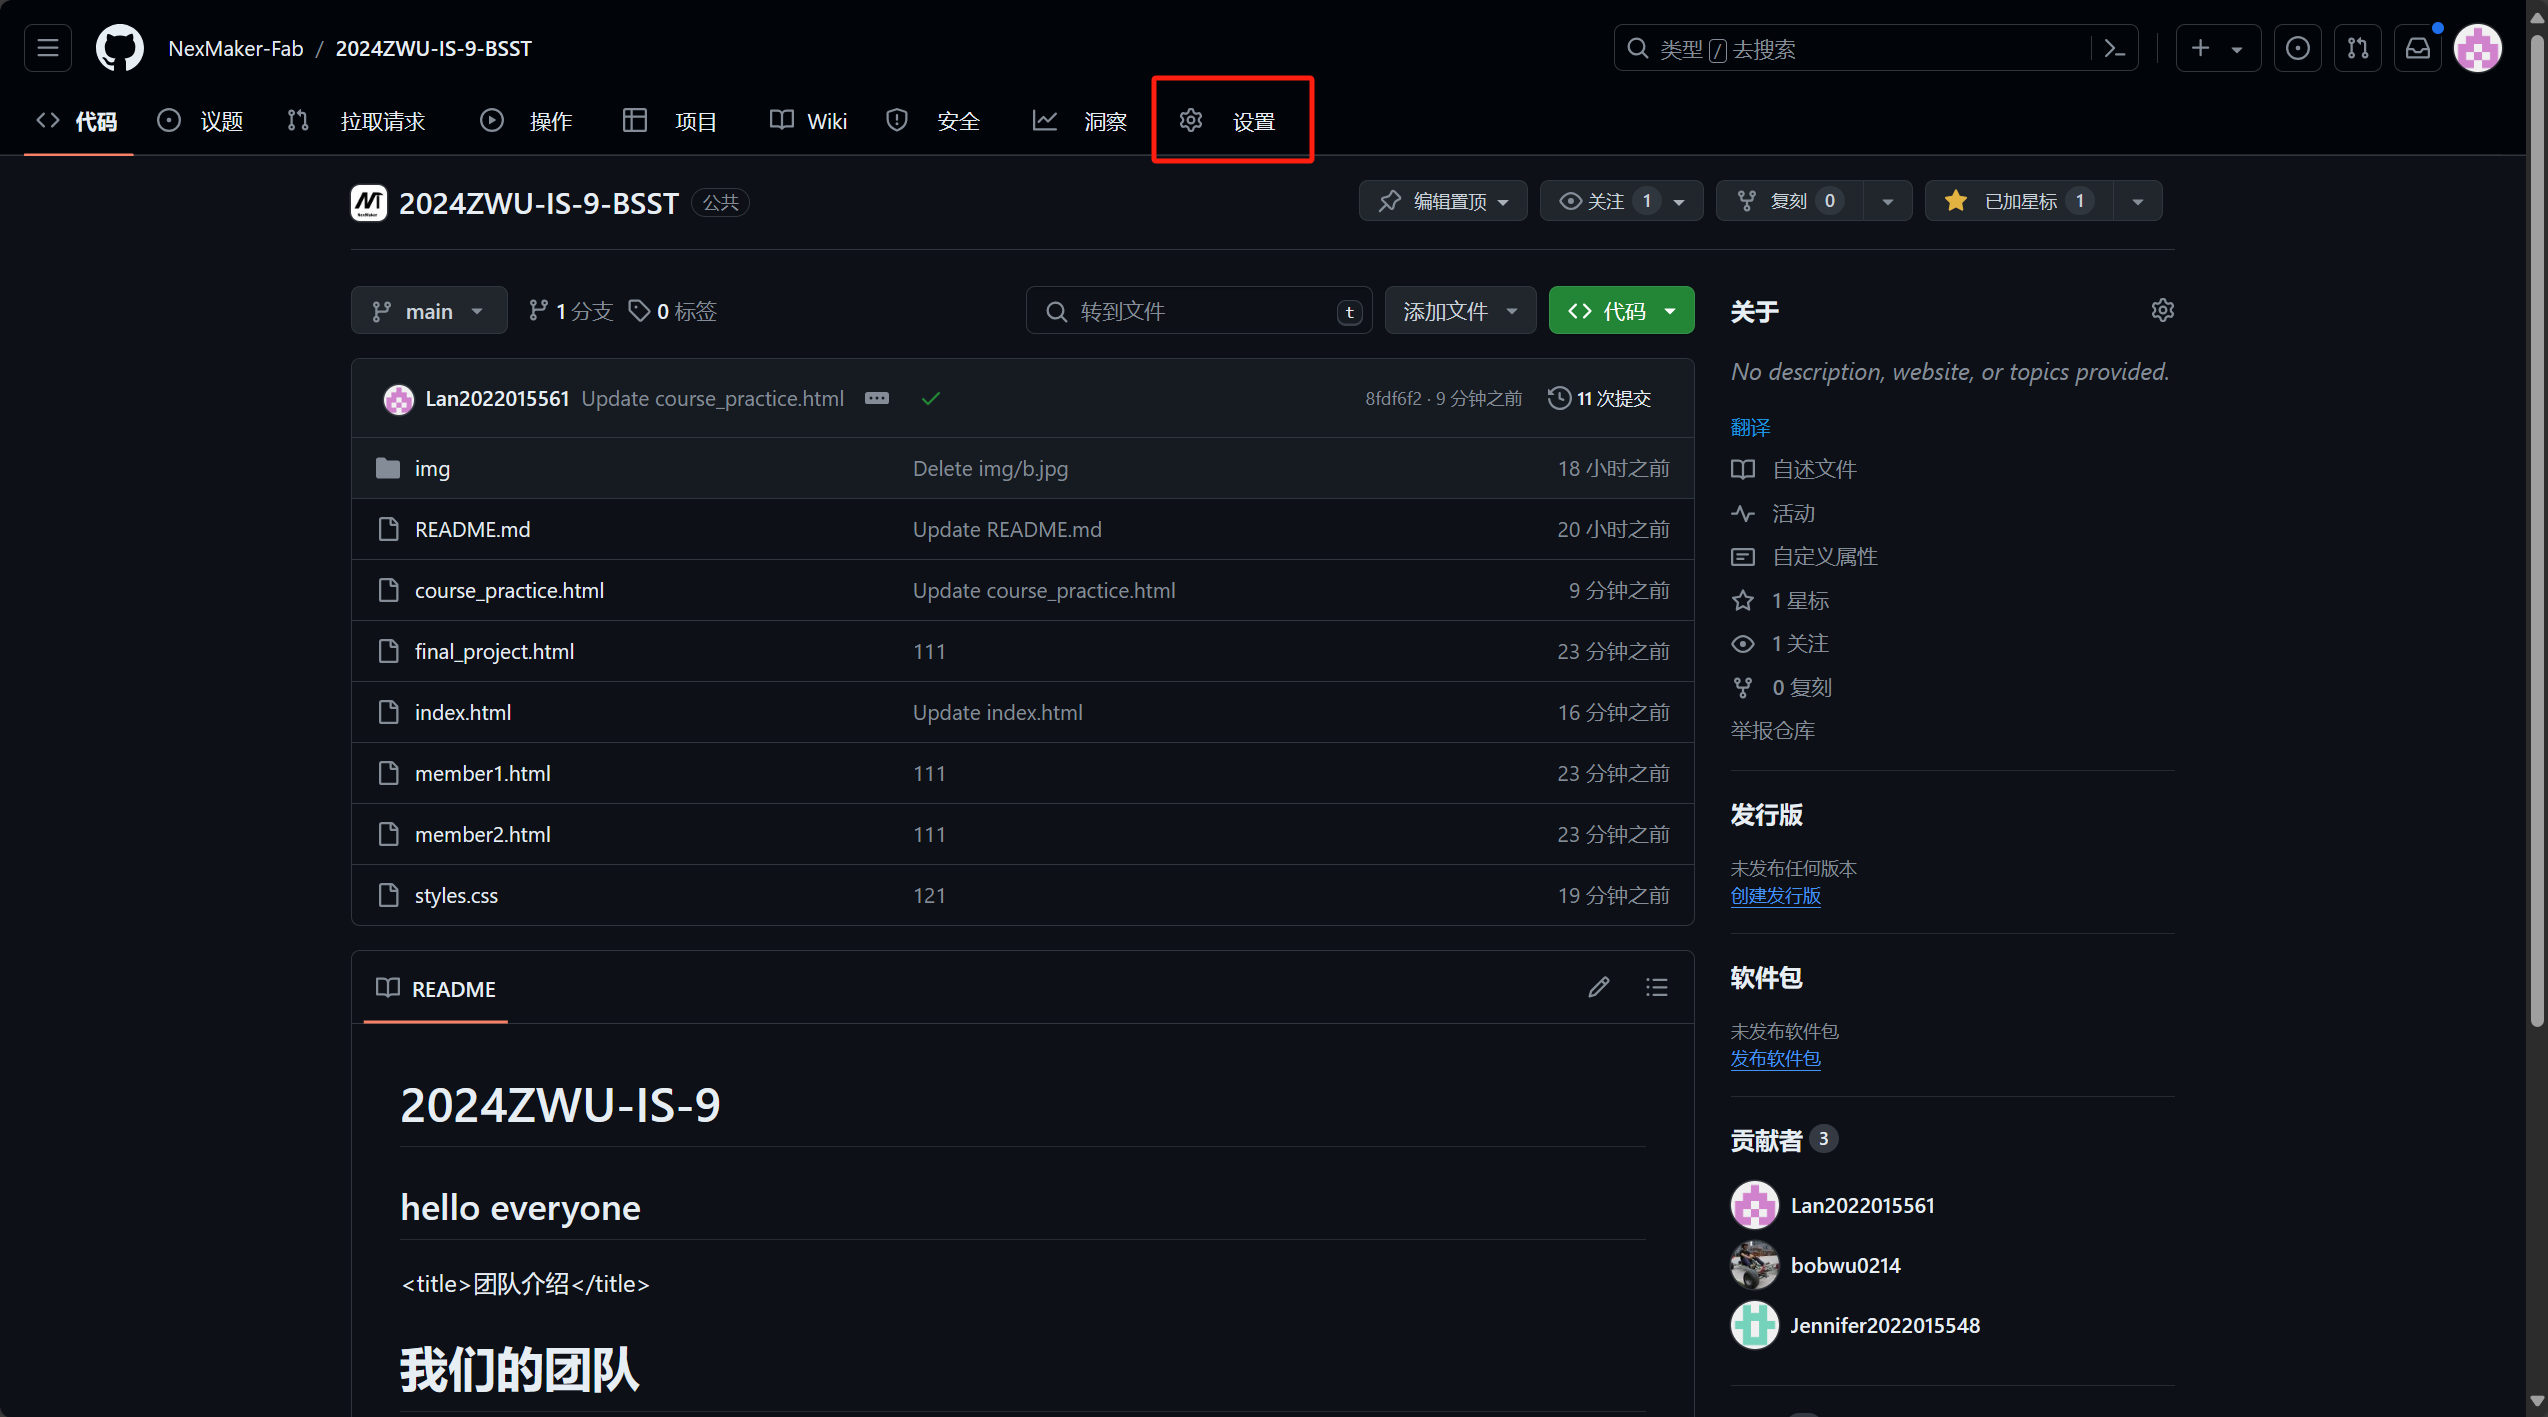
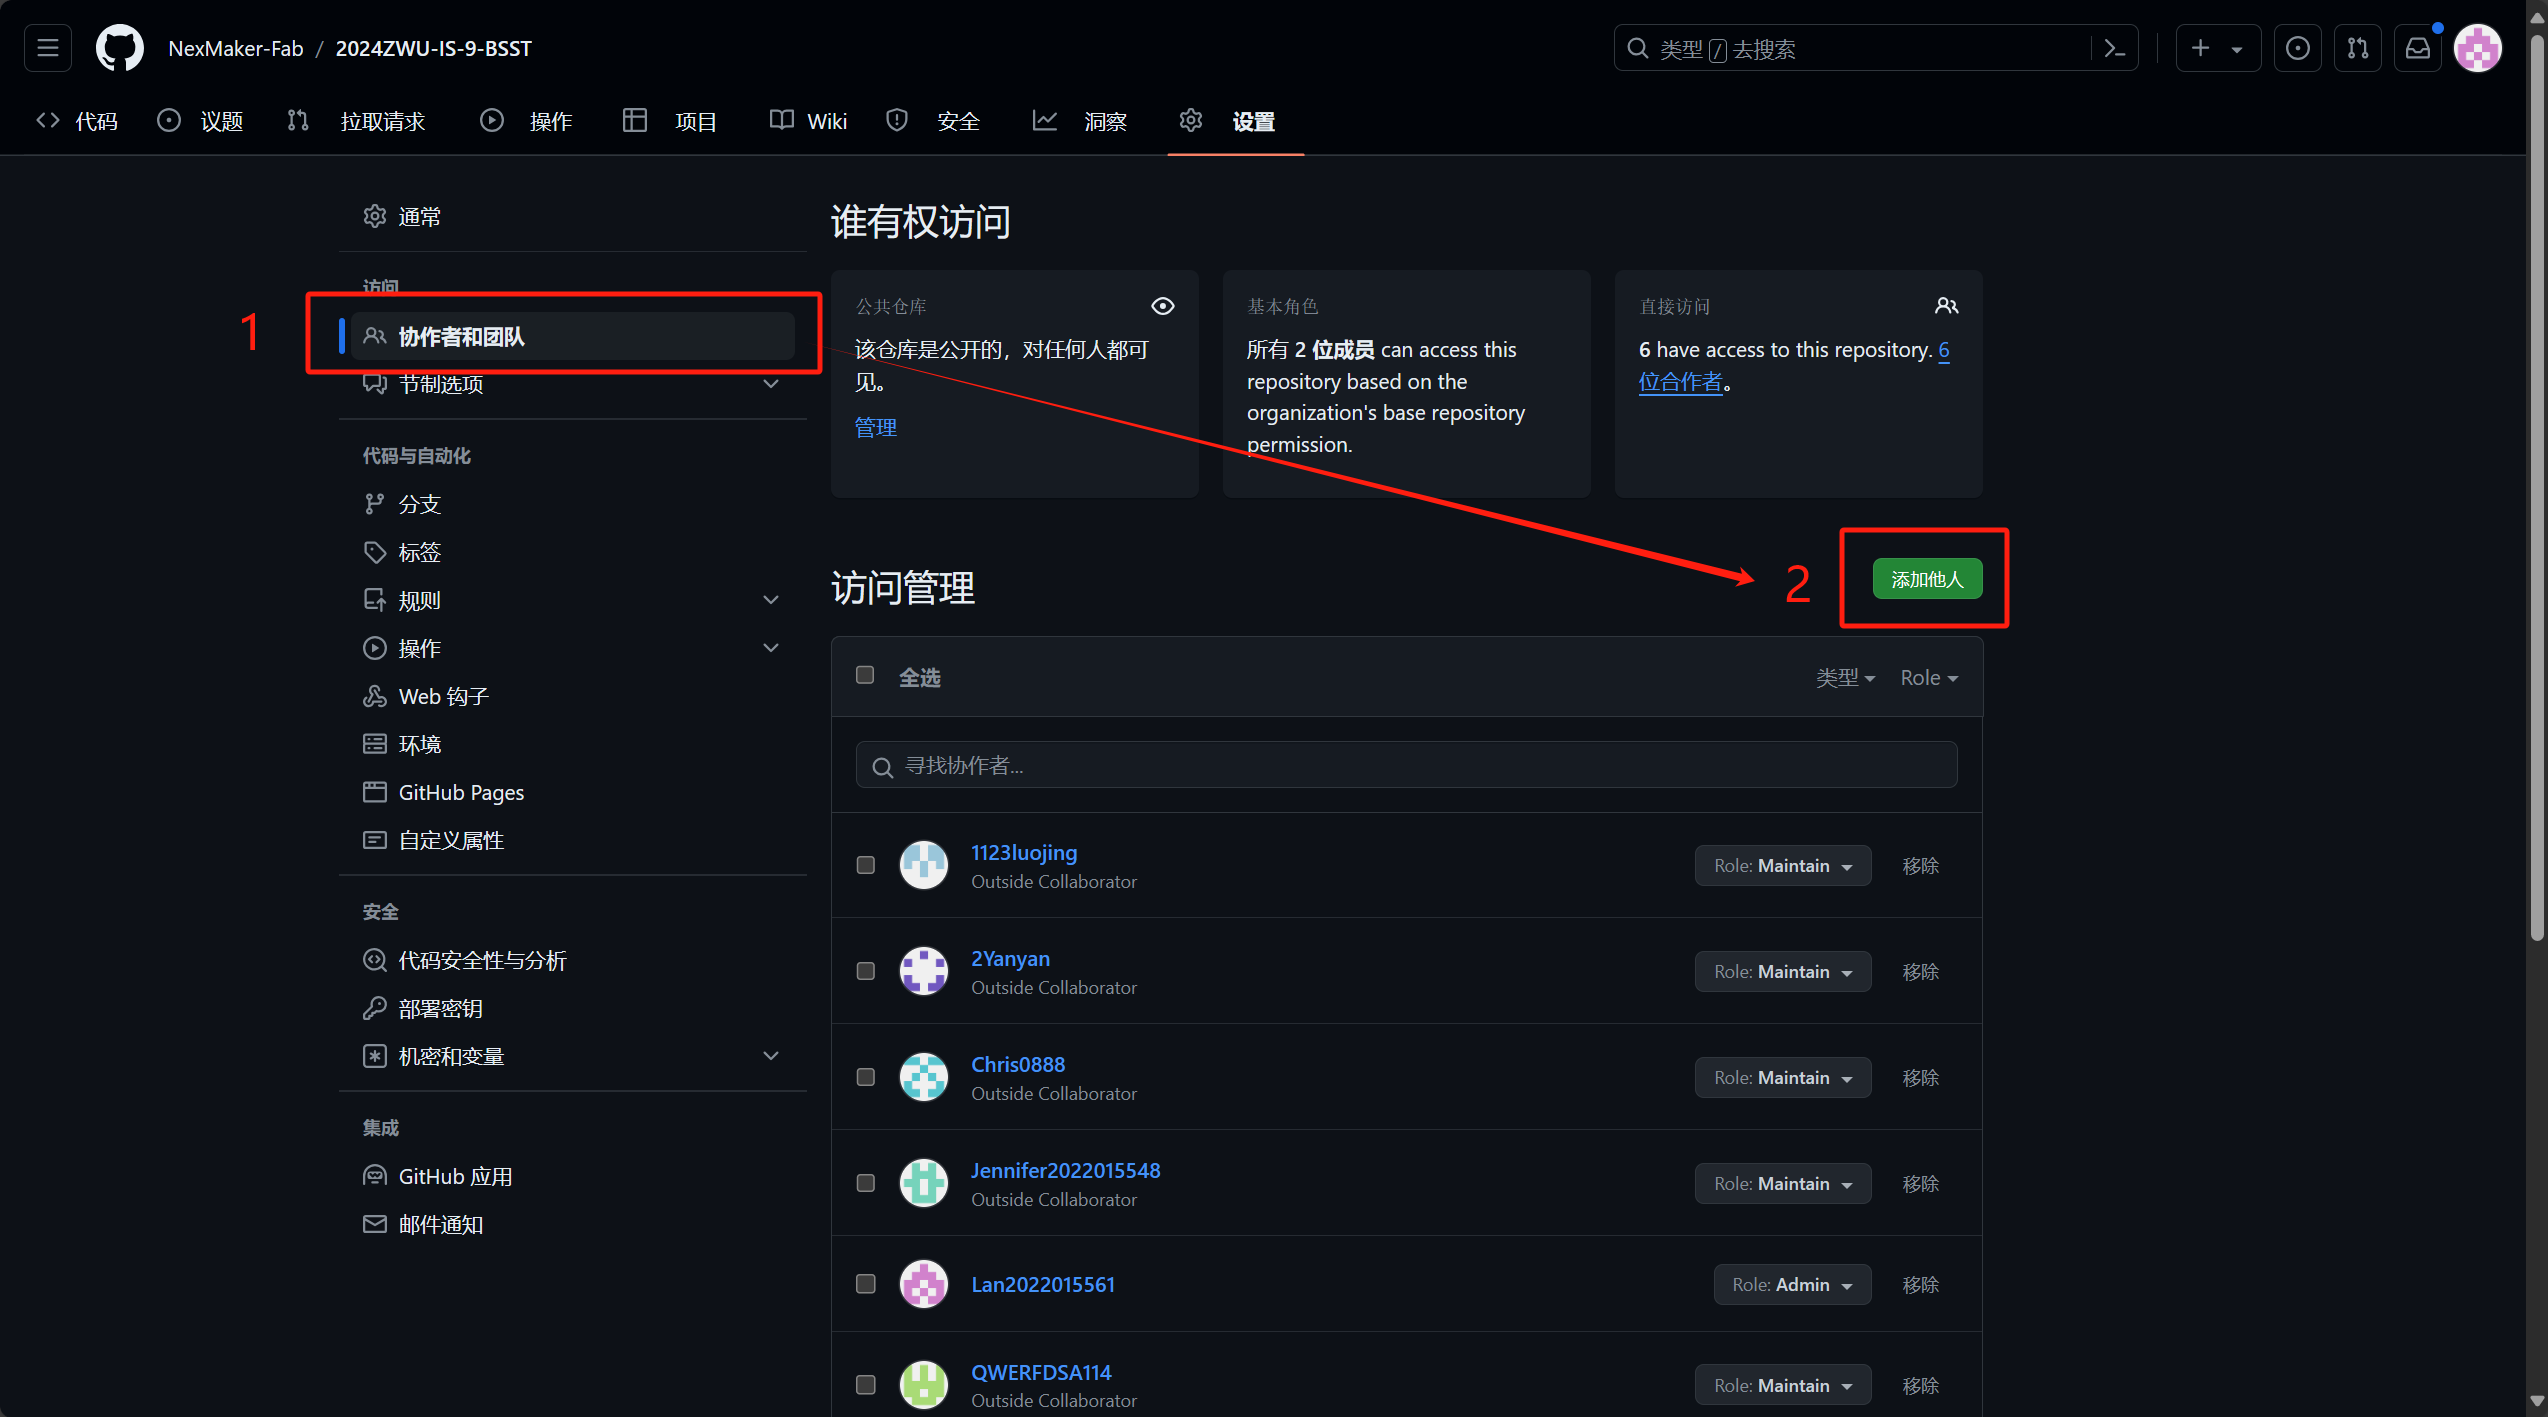
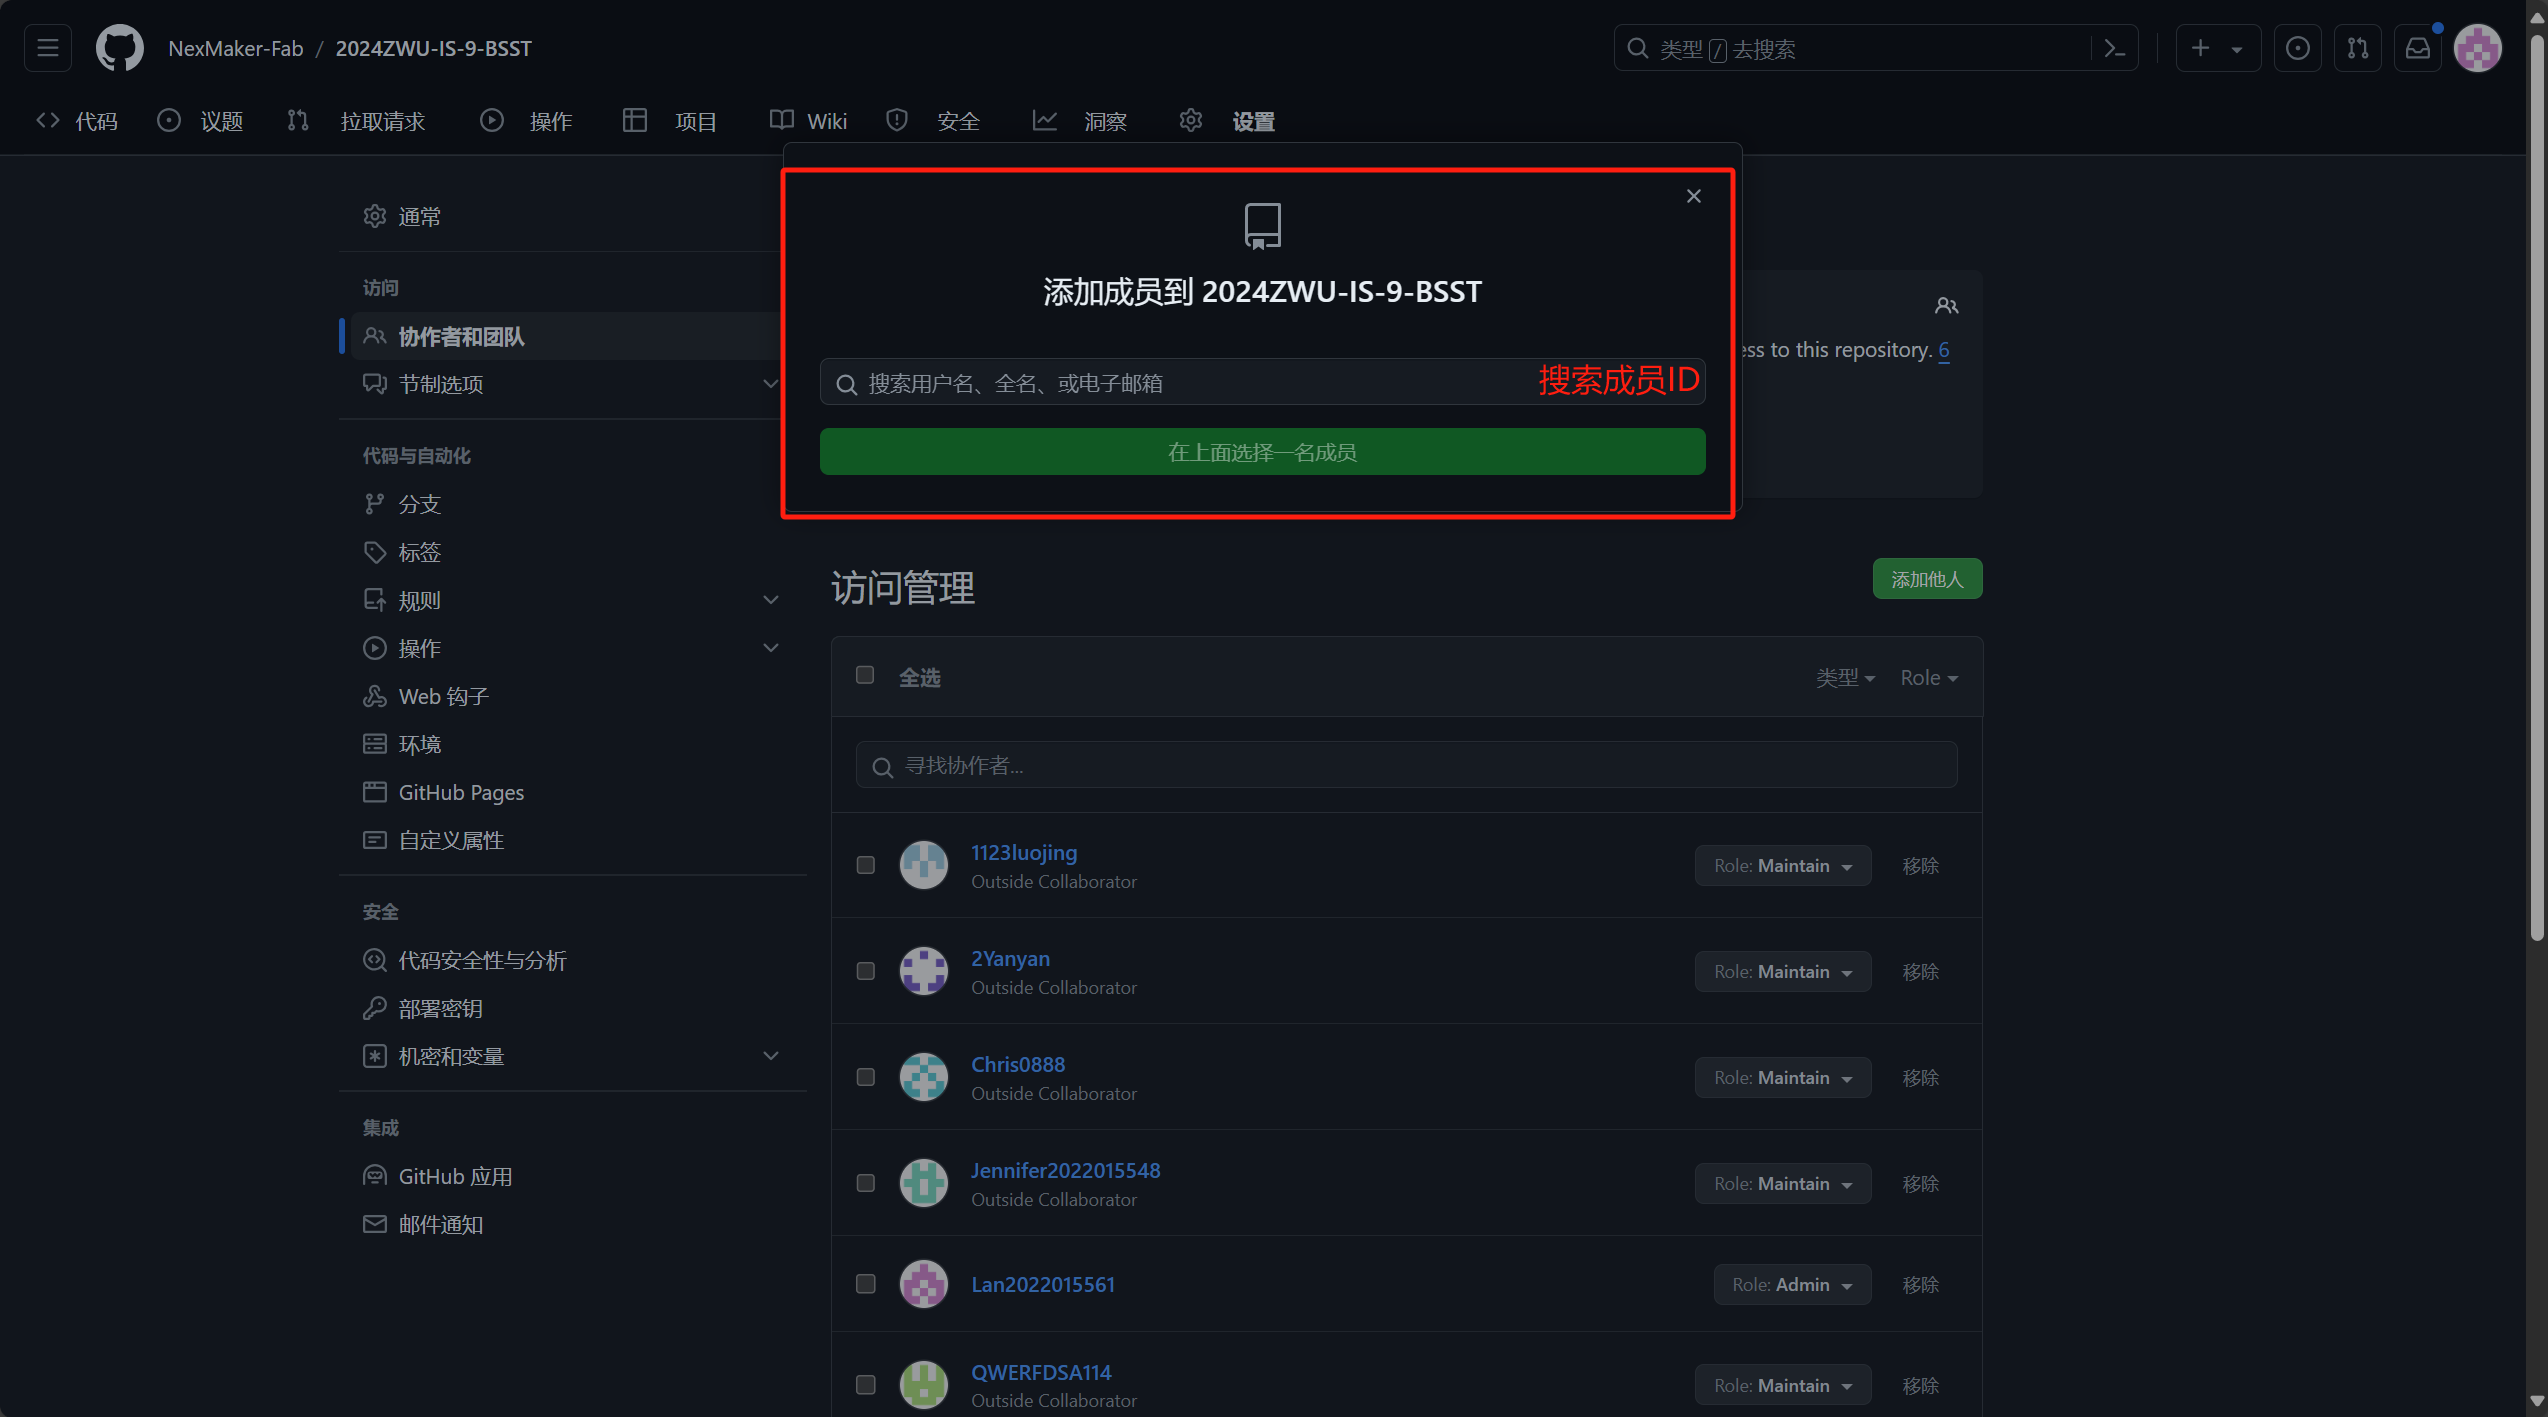
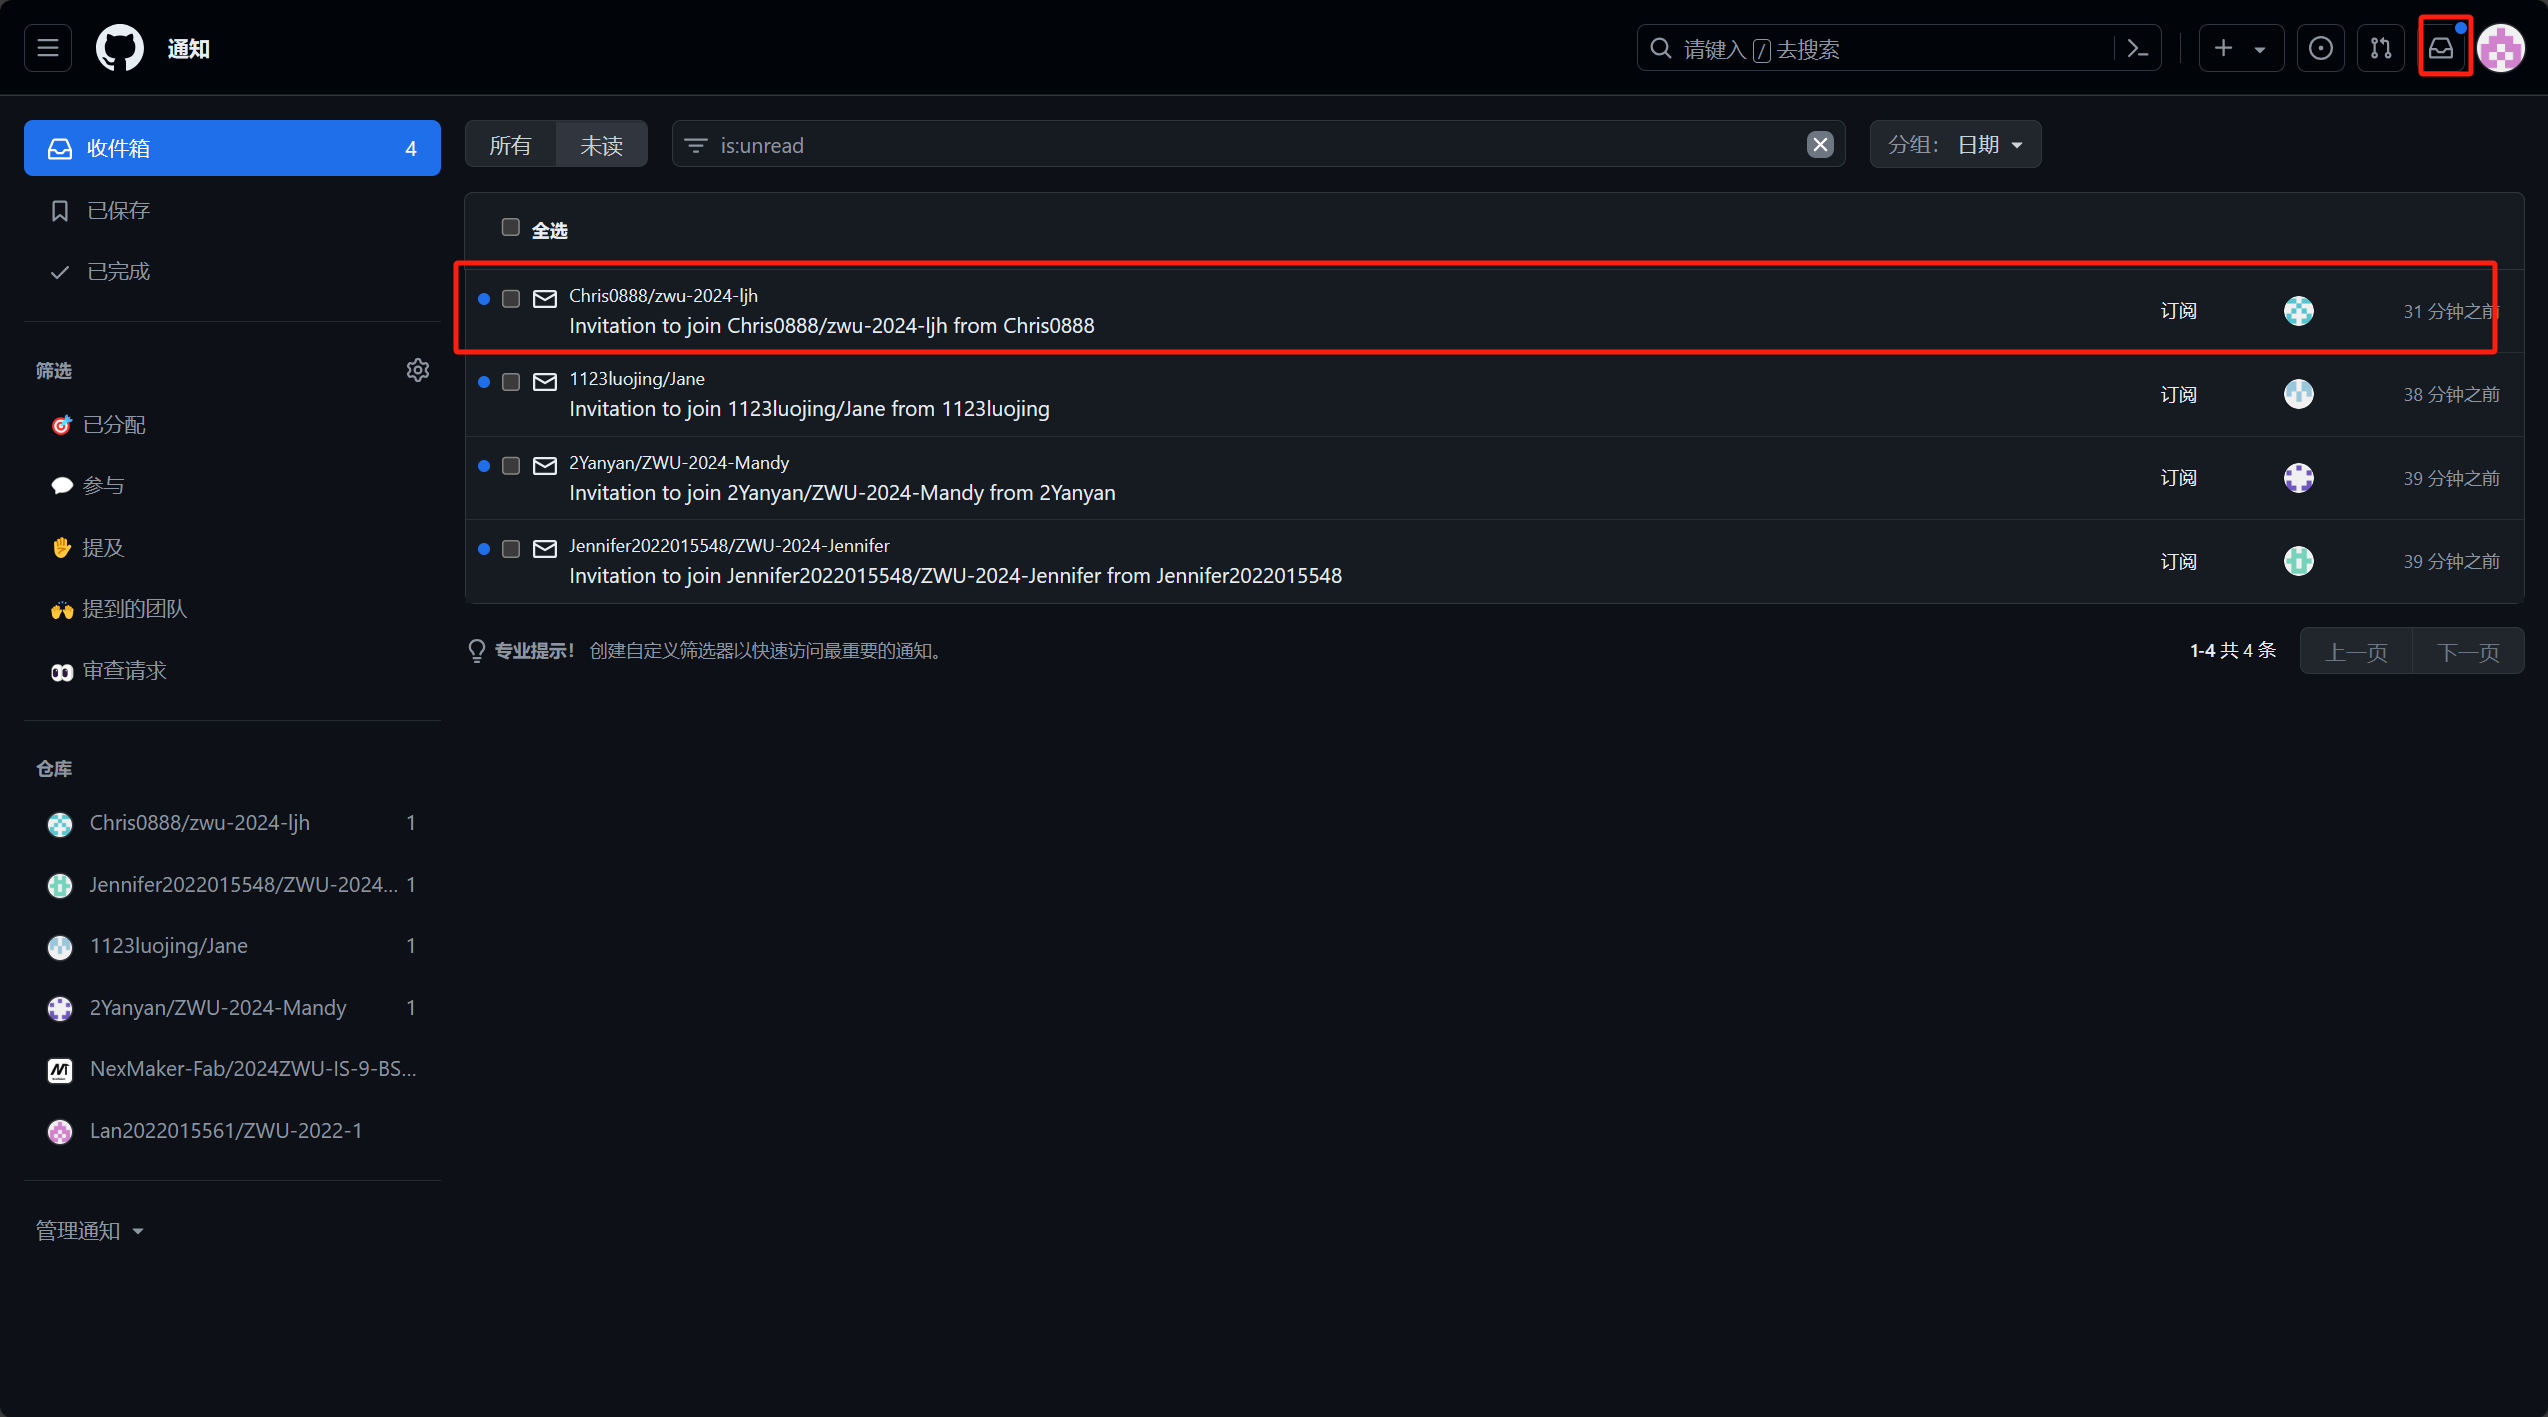
When inviting members, they should be given corresponding identities
(Admin and Maintain). Administrators have the right to retain and delete
warehouses, while members (Maintain) do not have the right to delete
warehouses
Note: The pages for administrators and members are different
Note: The pages for administrators and members are different
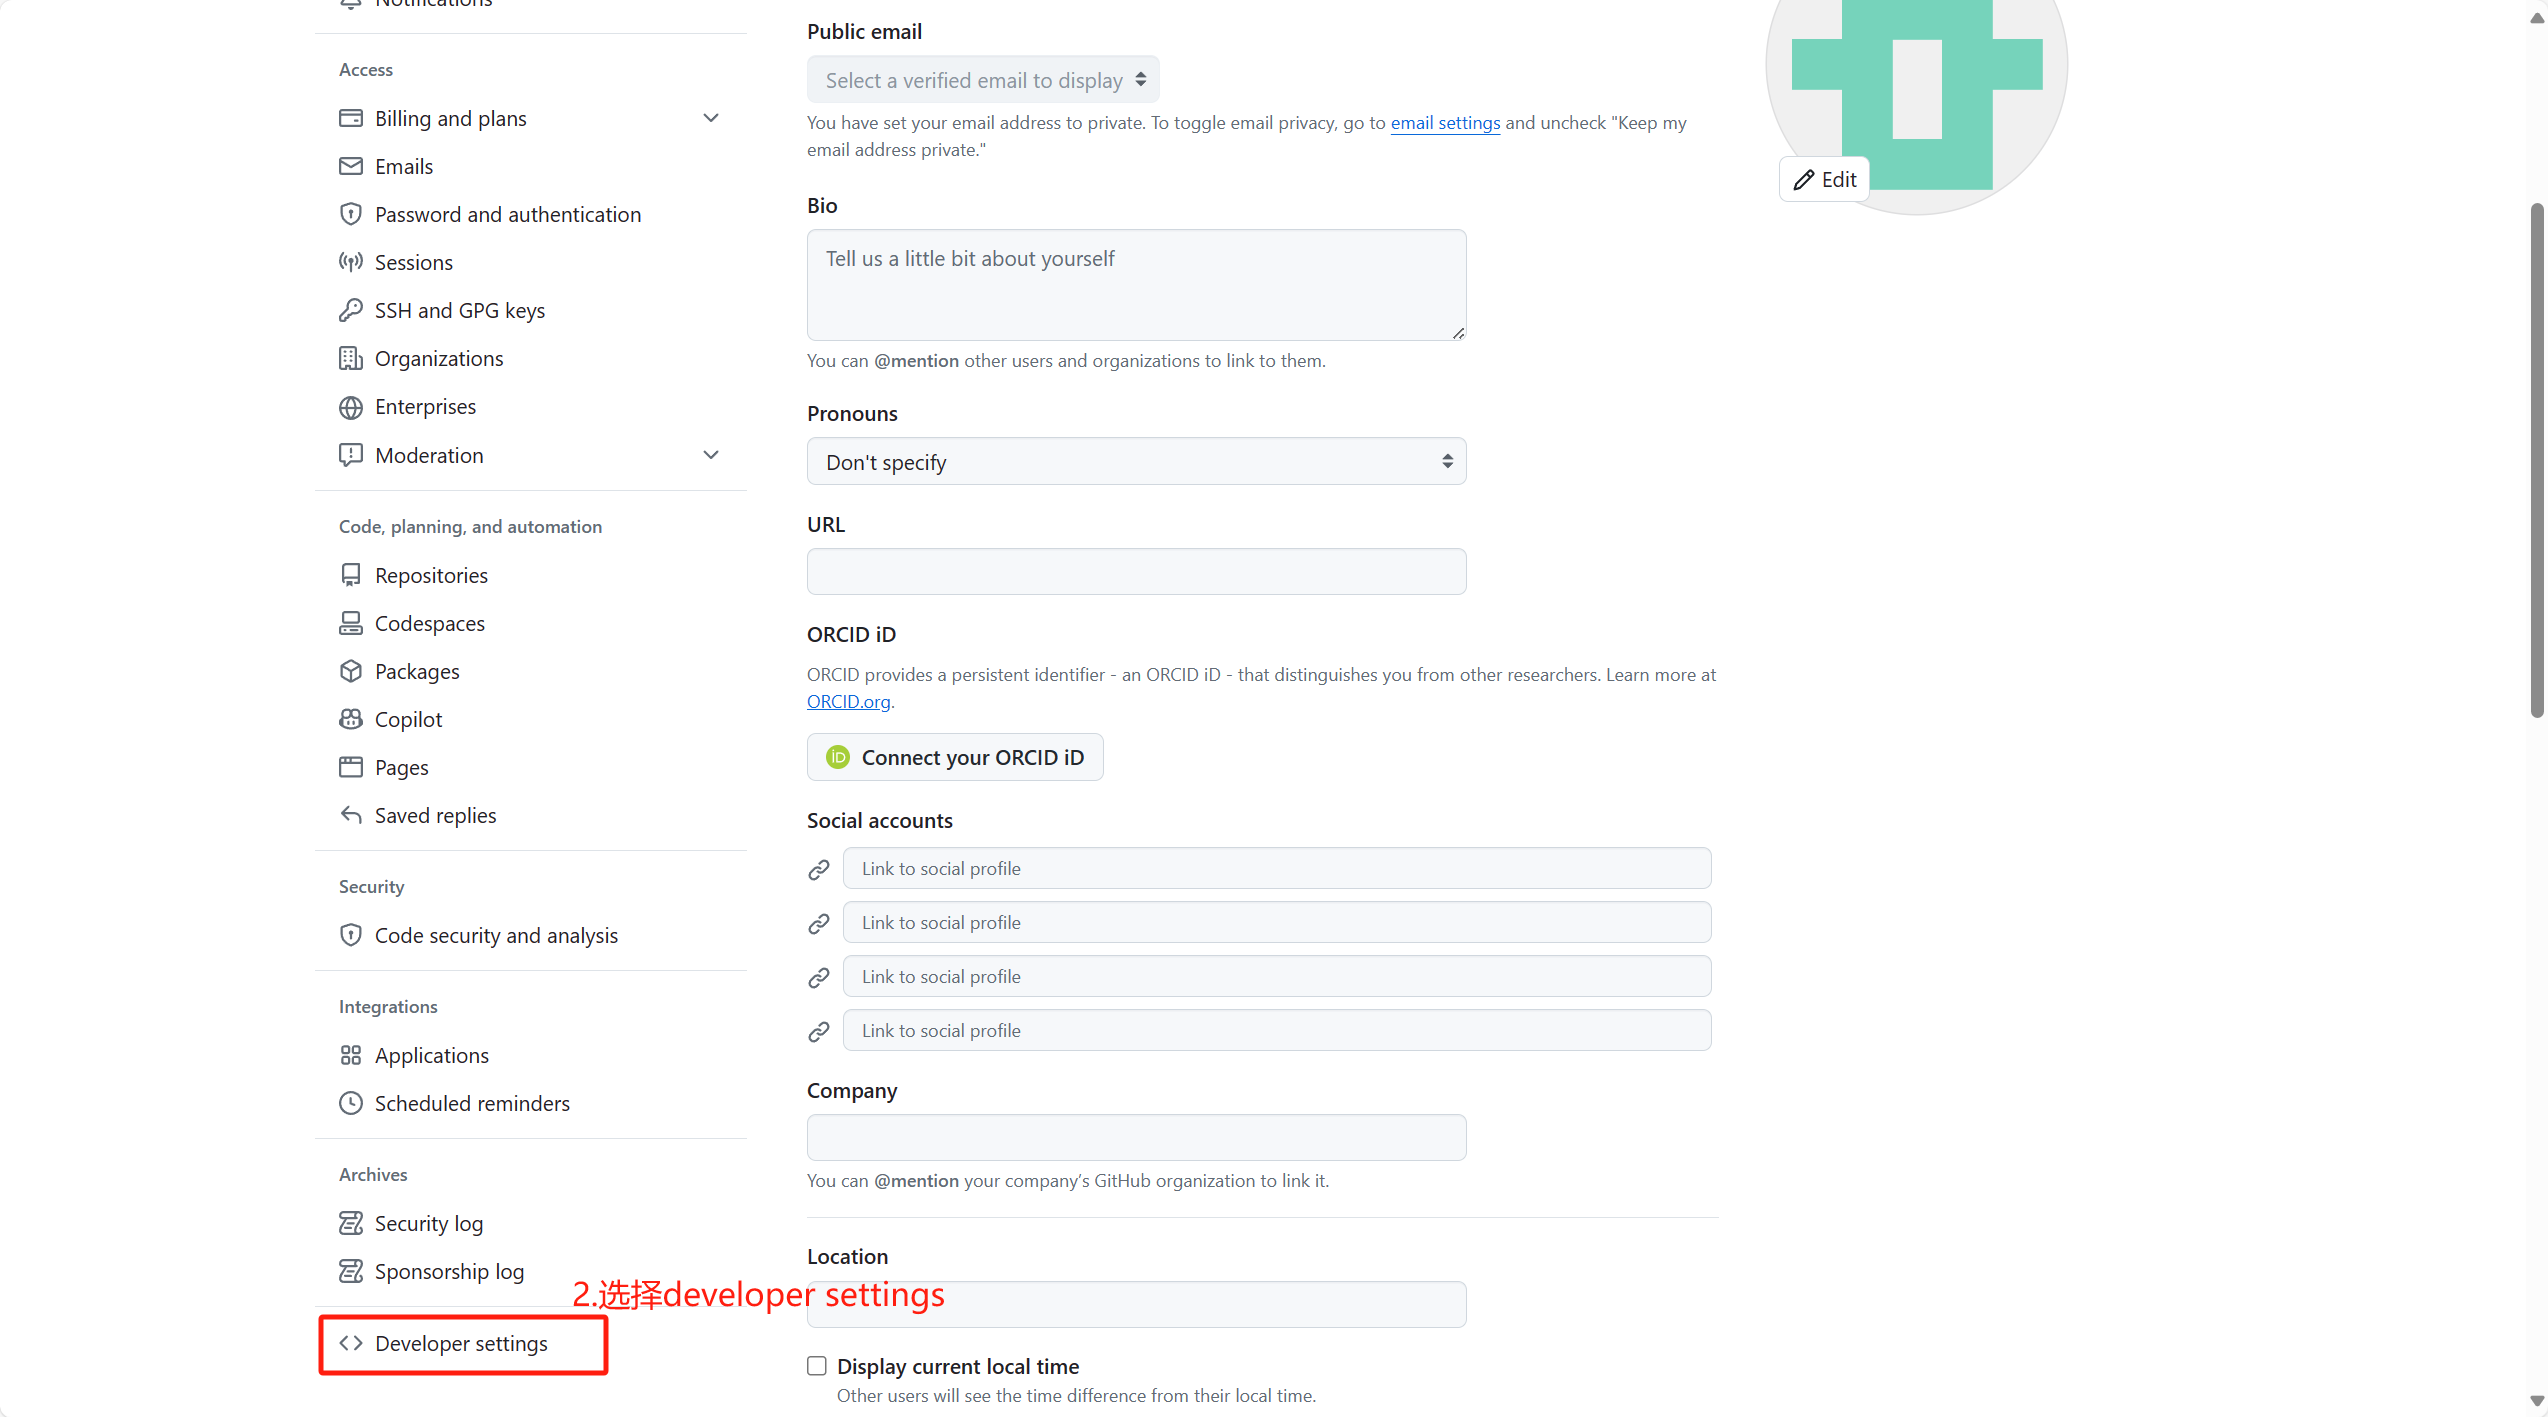
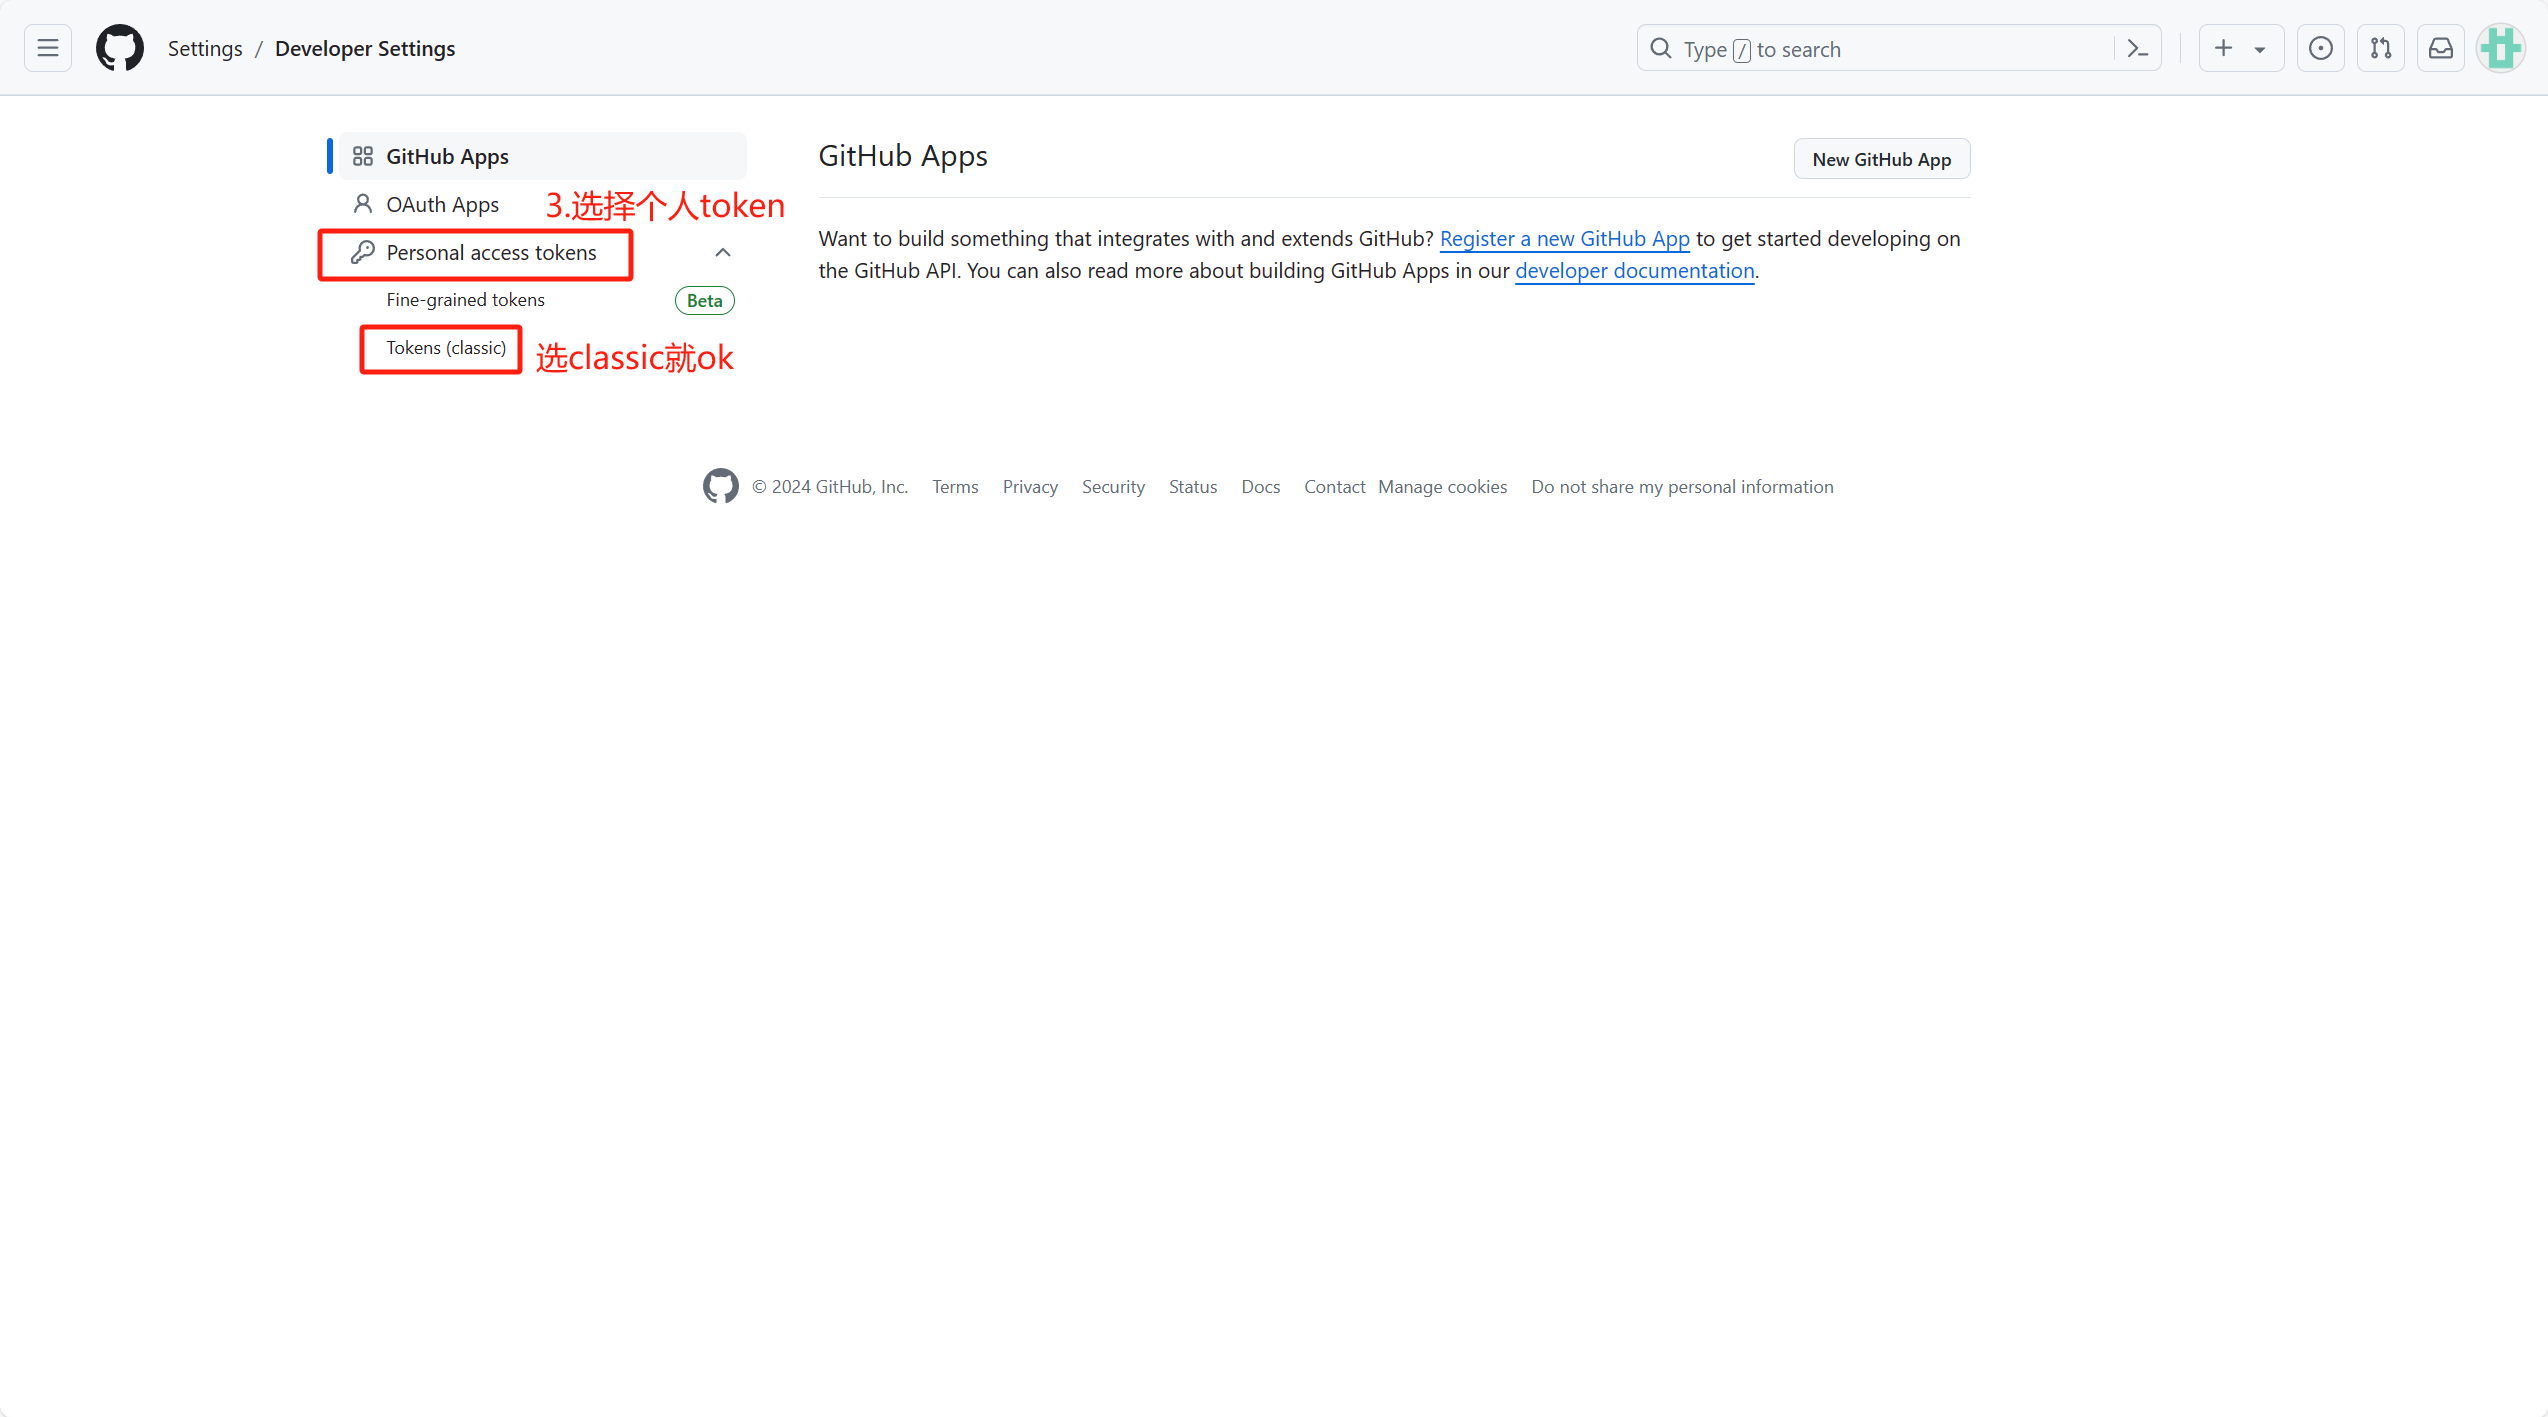
3.Token Setting
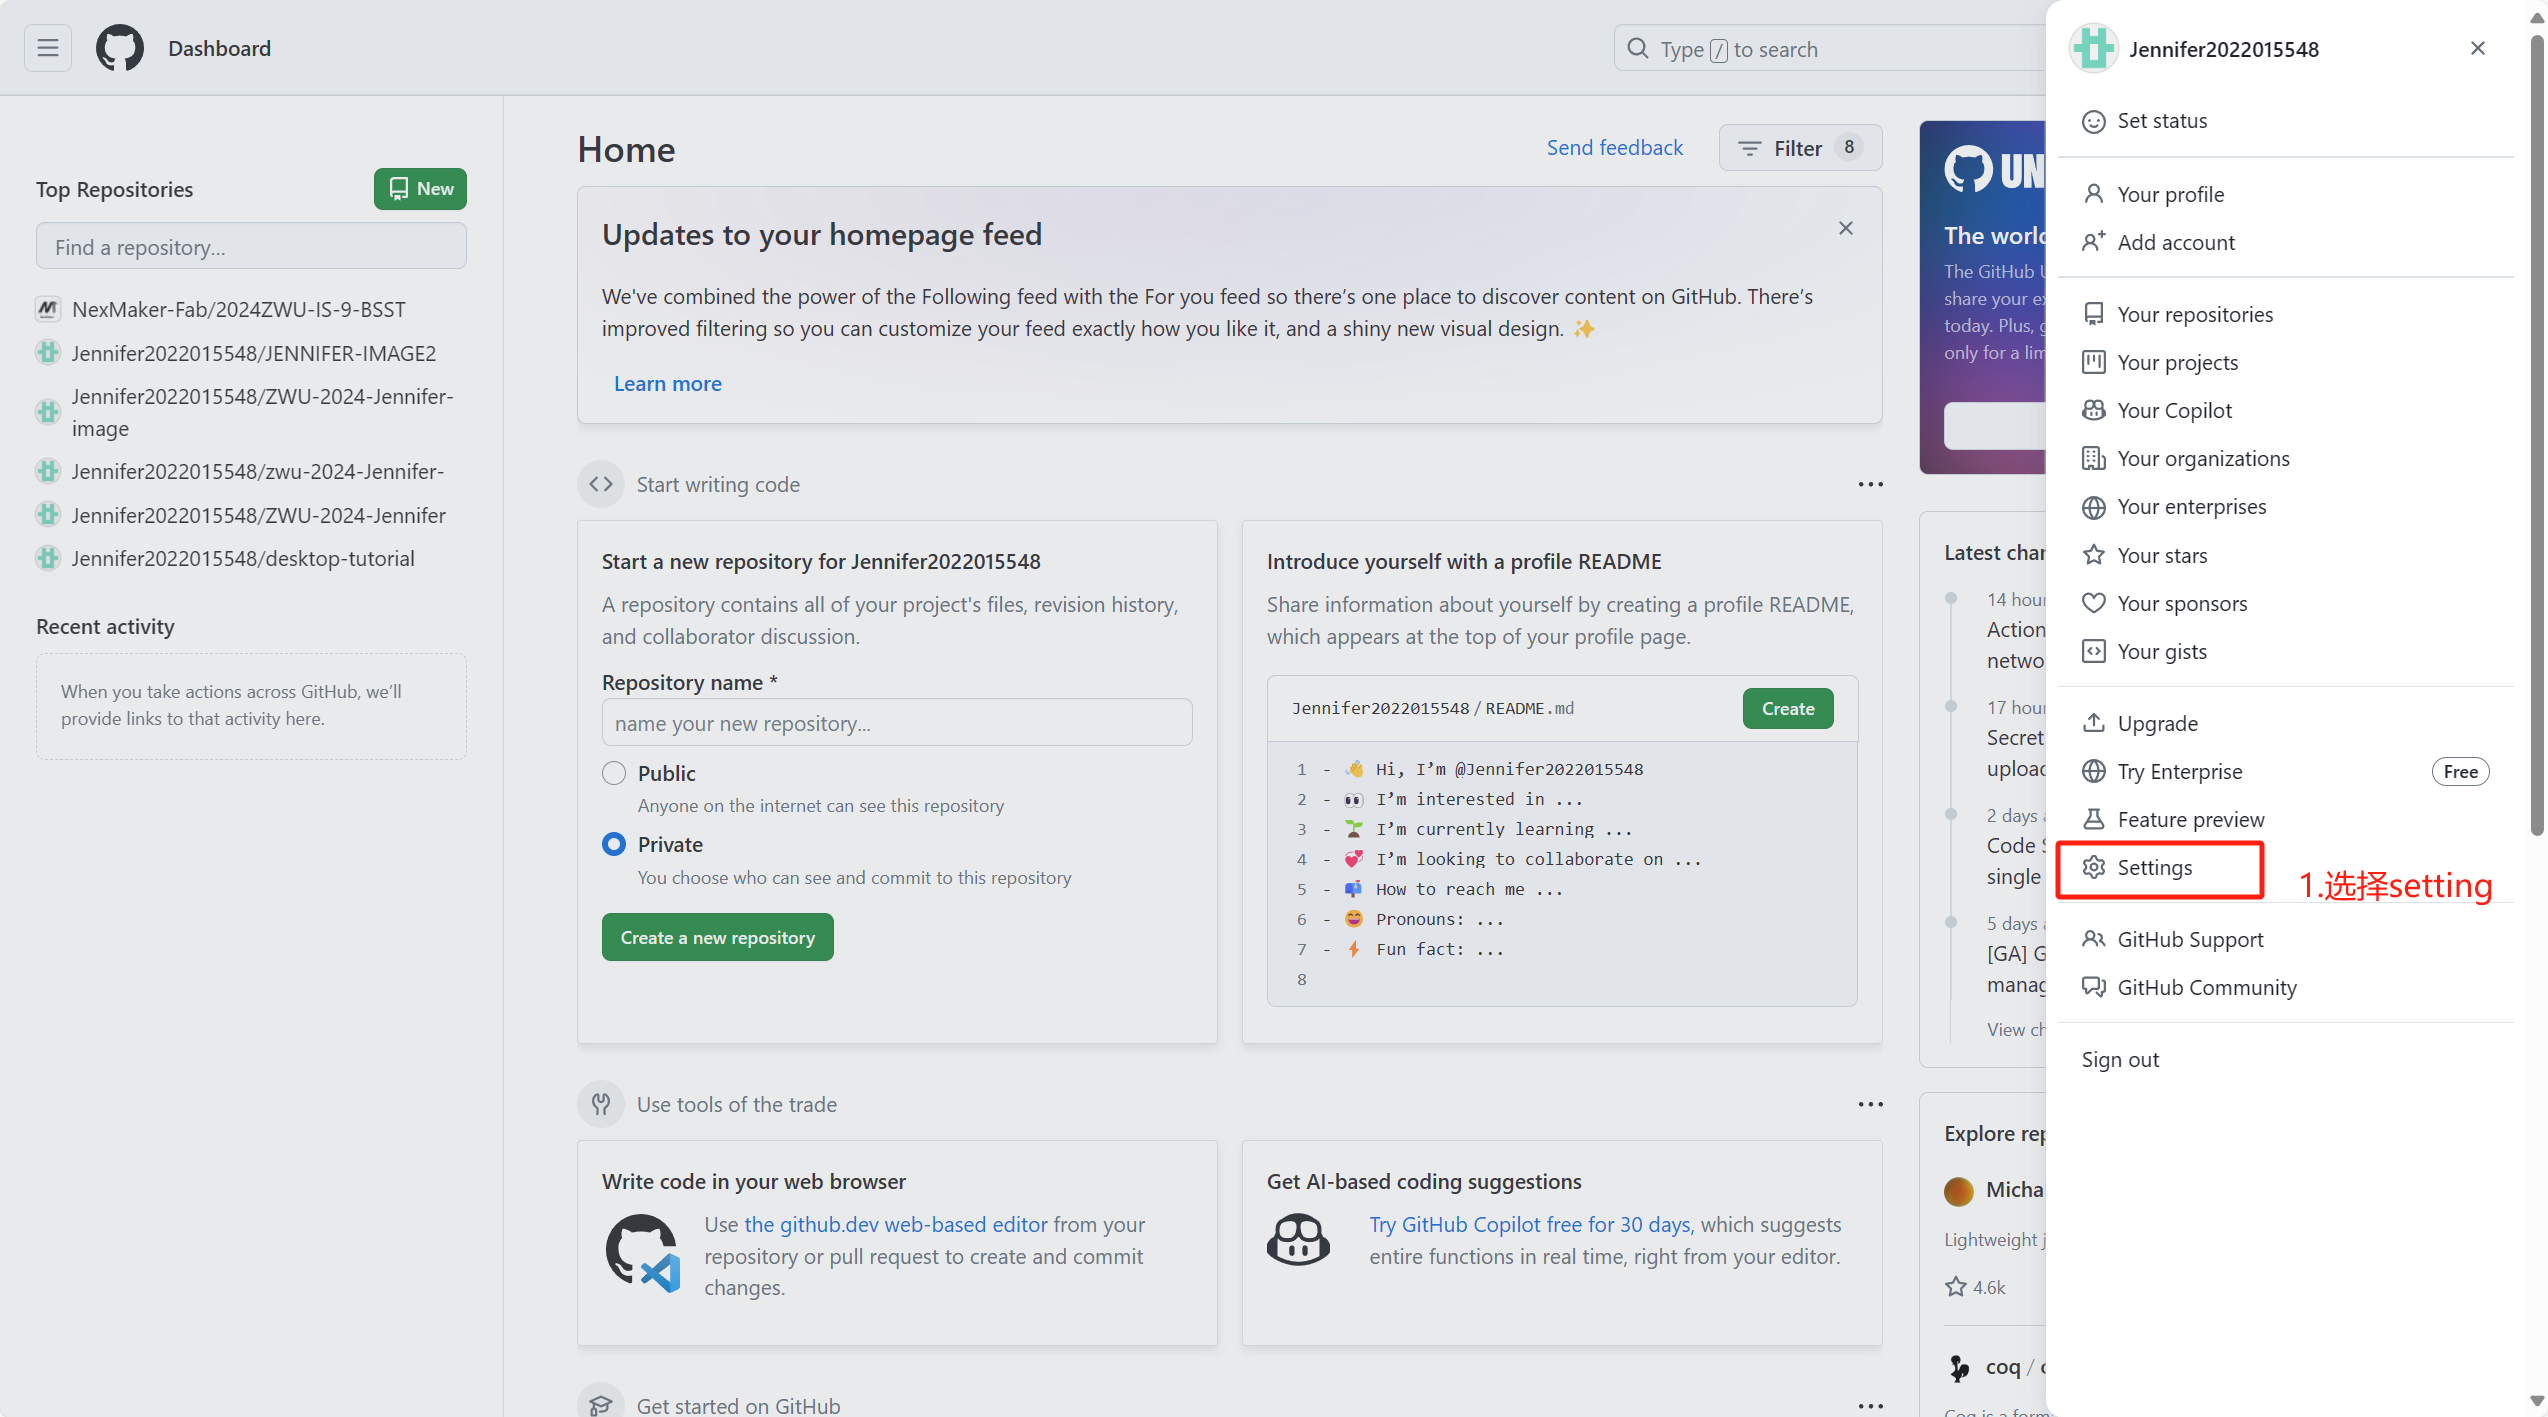
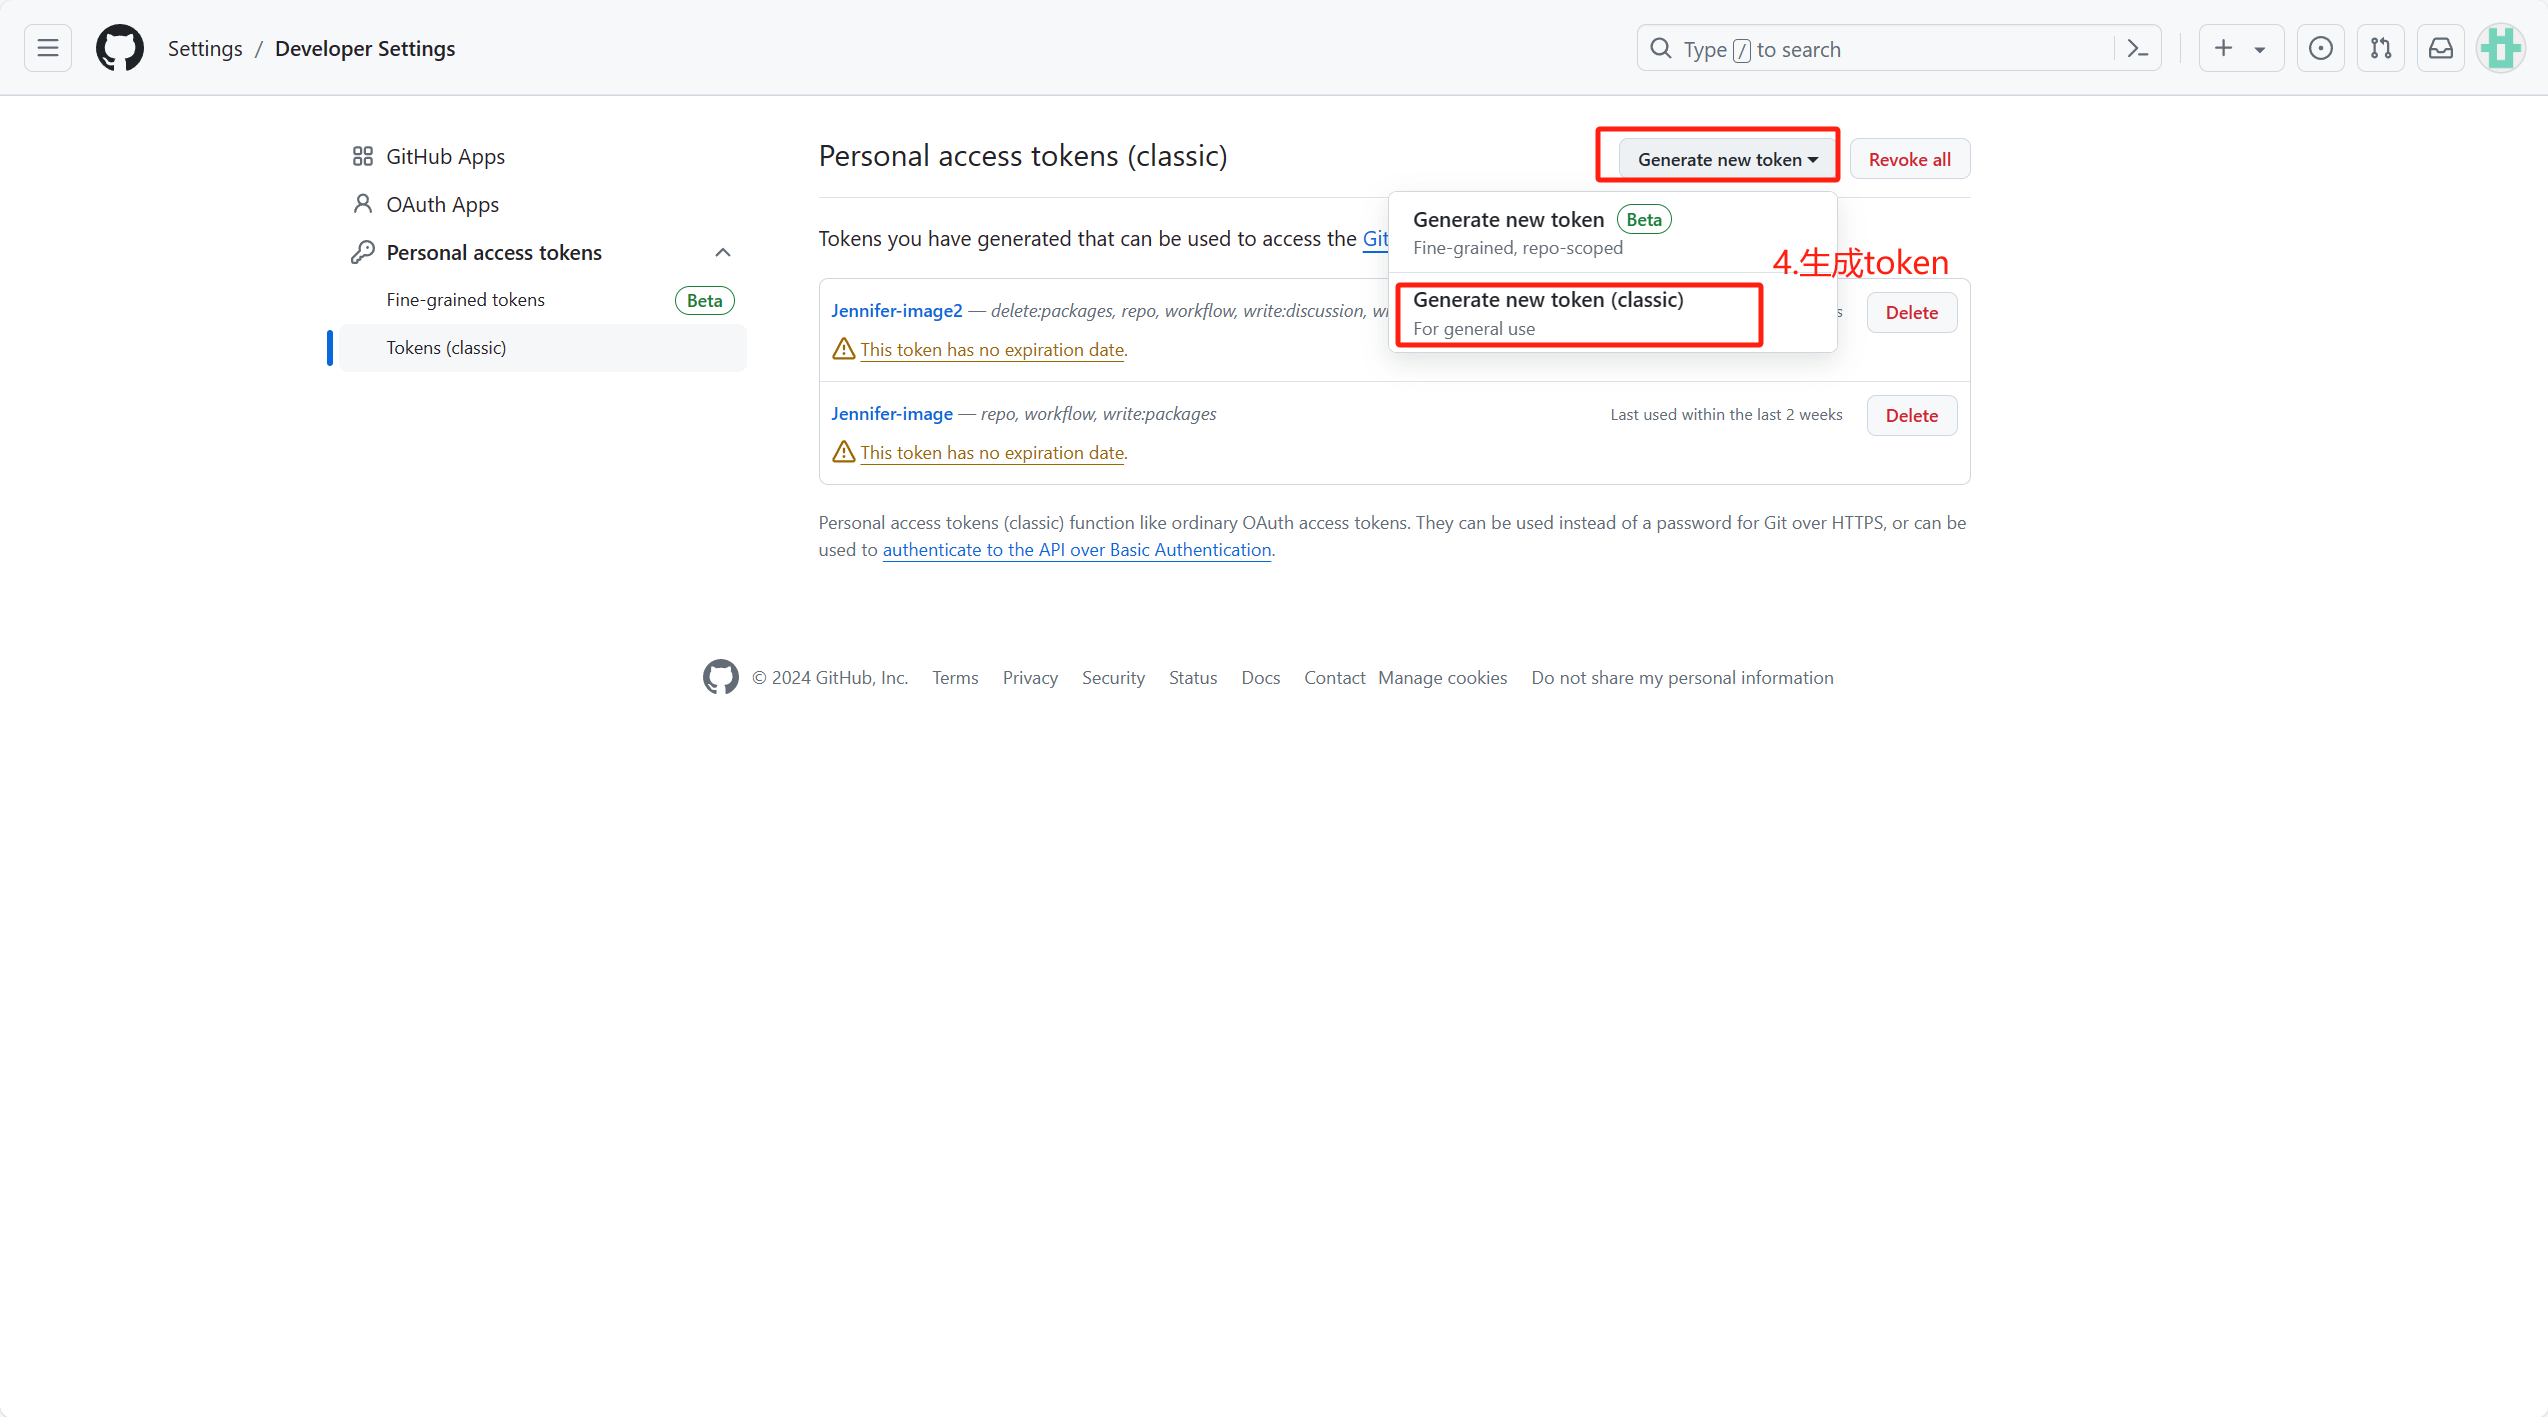

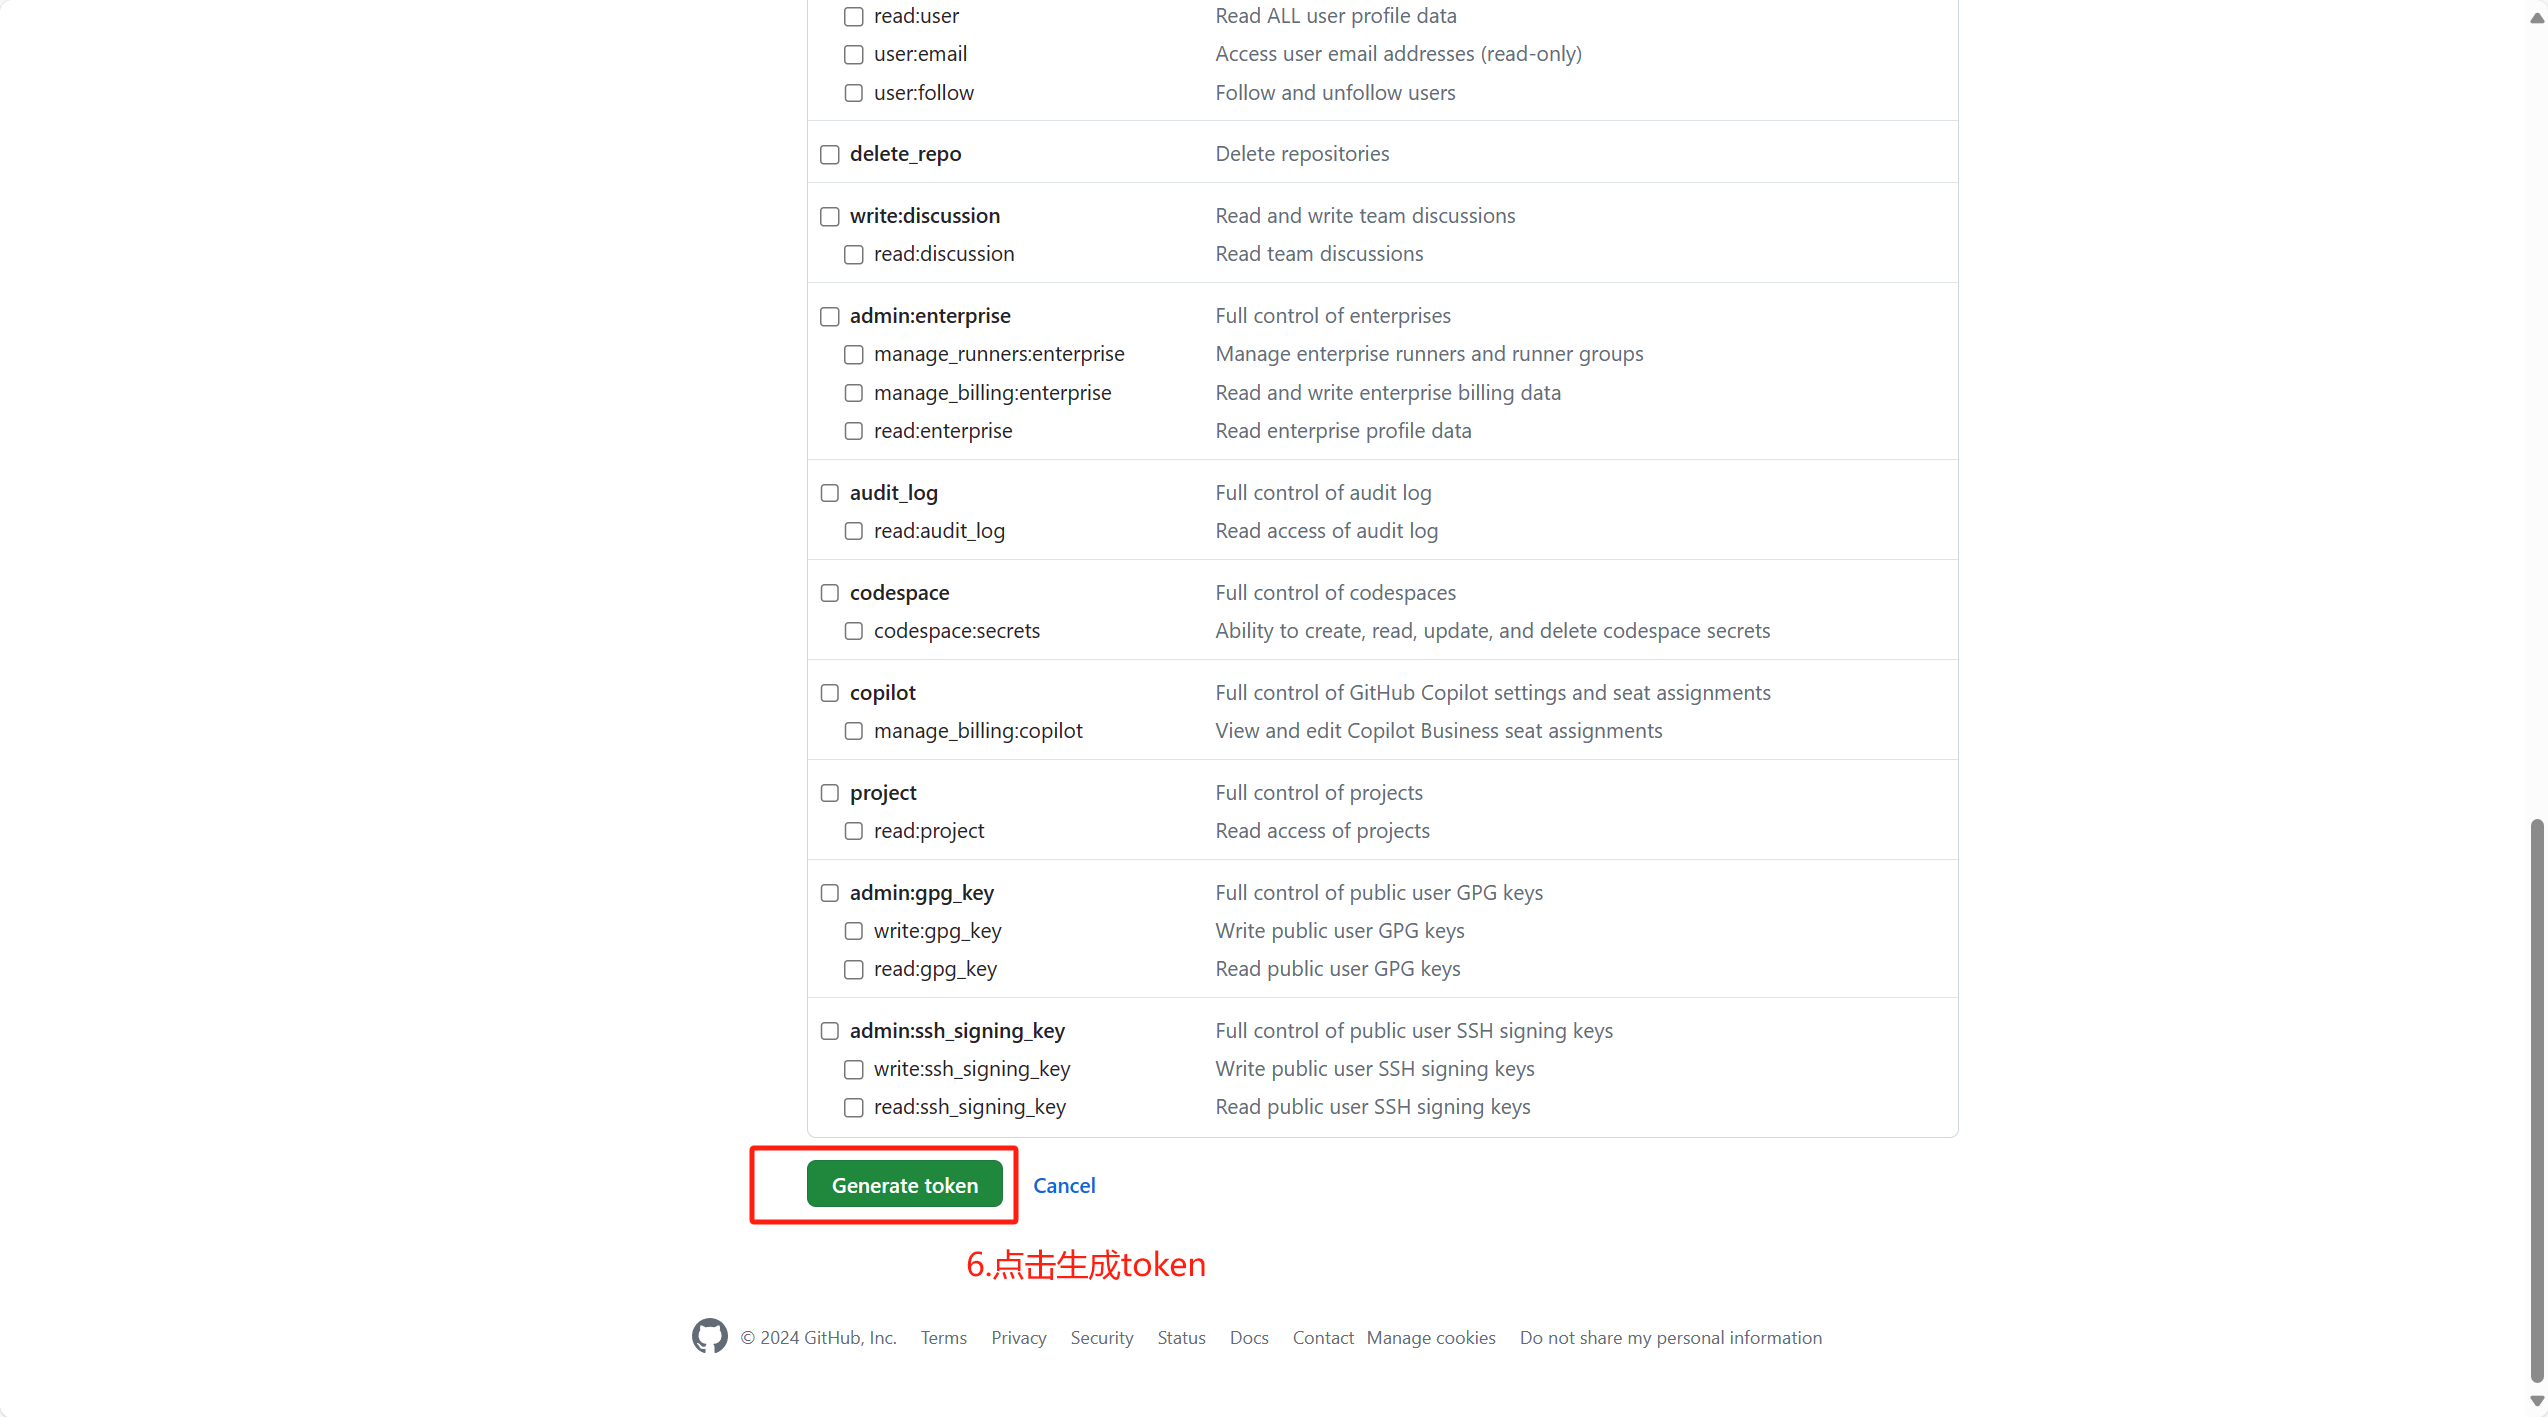
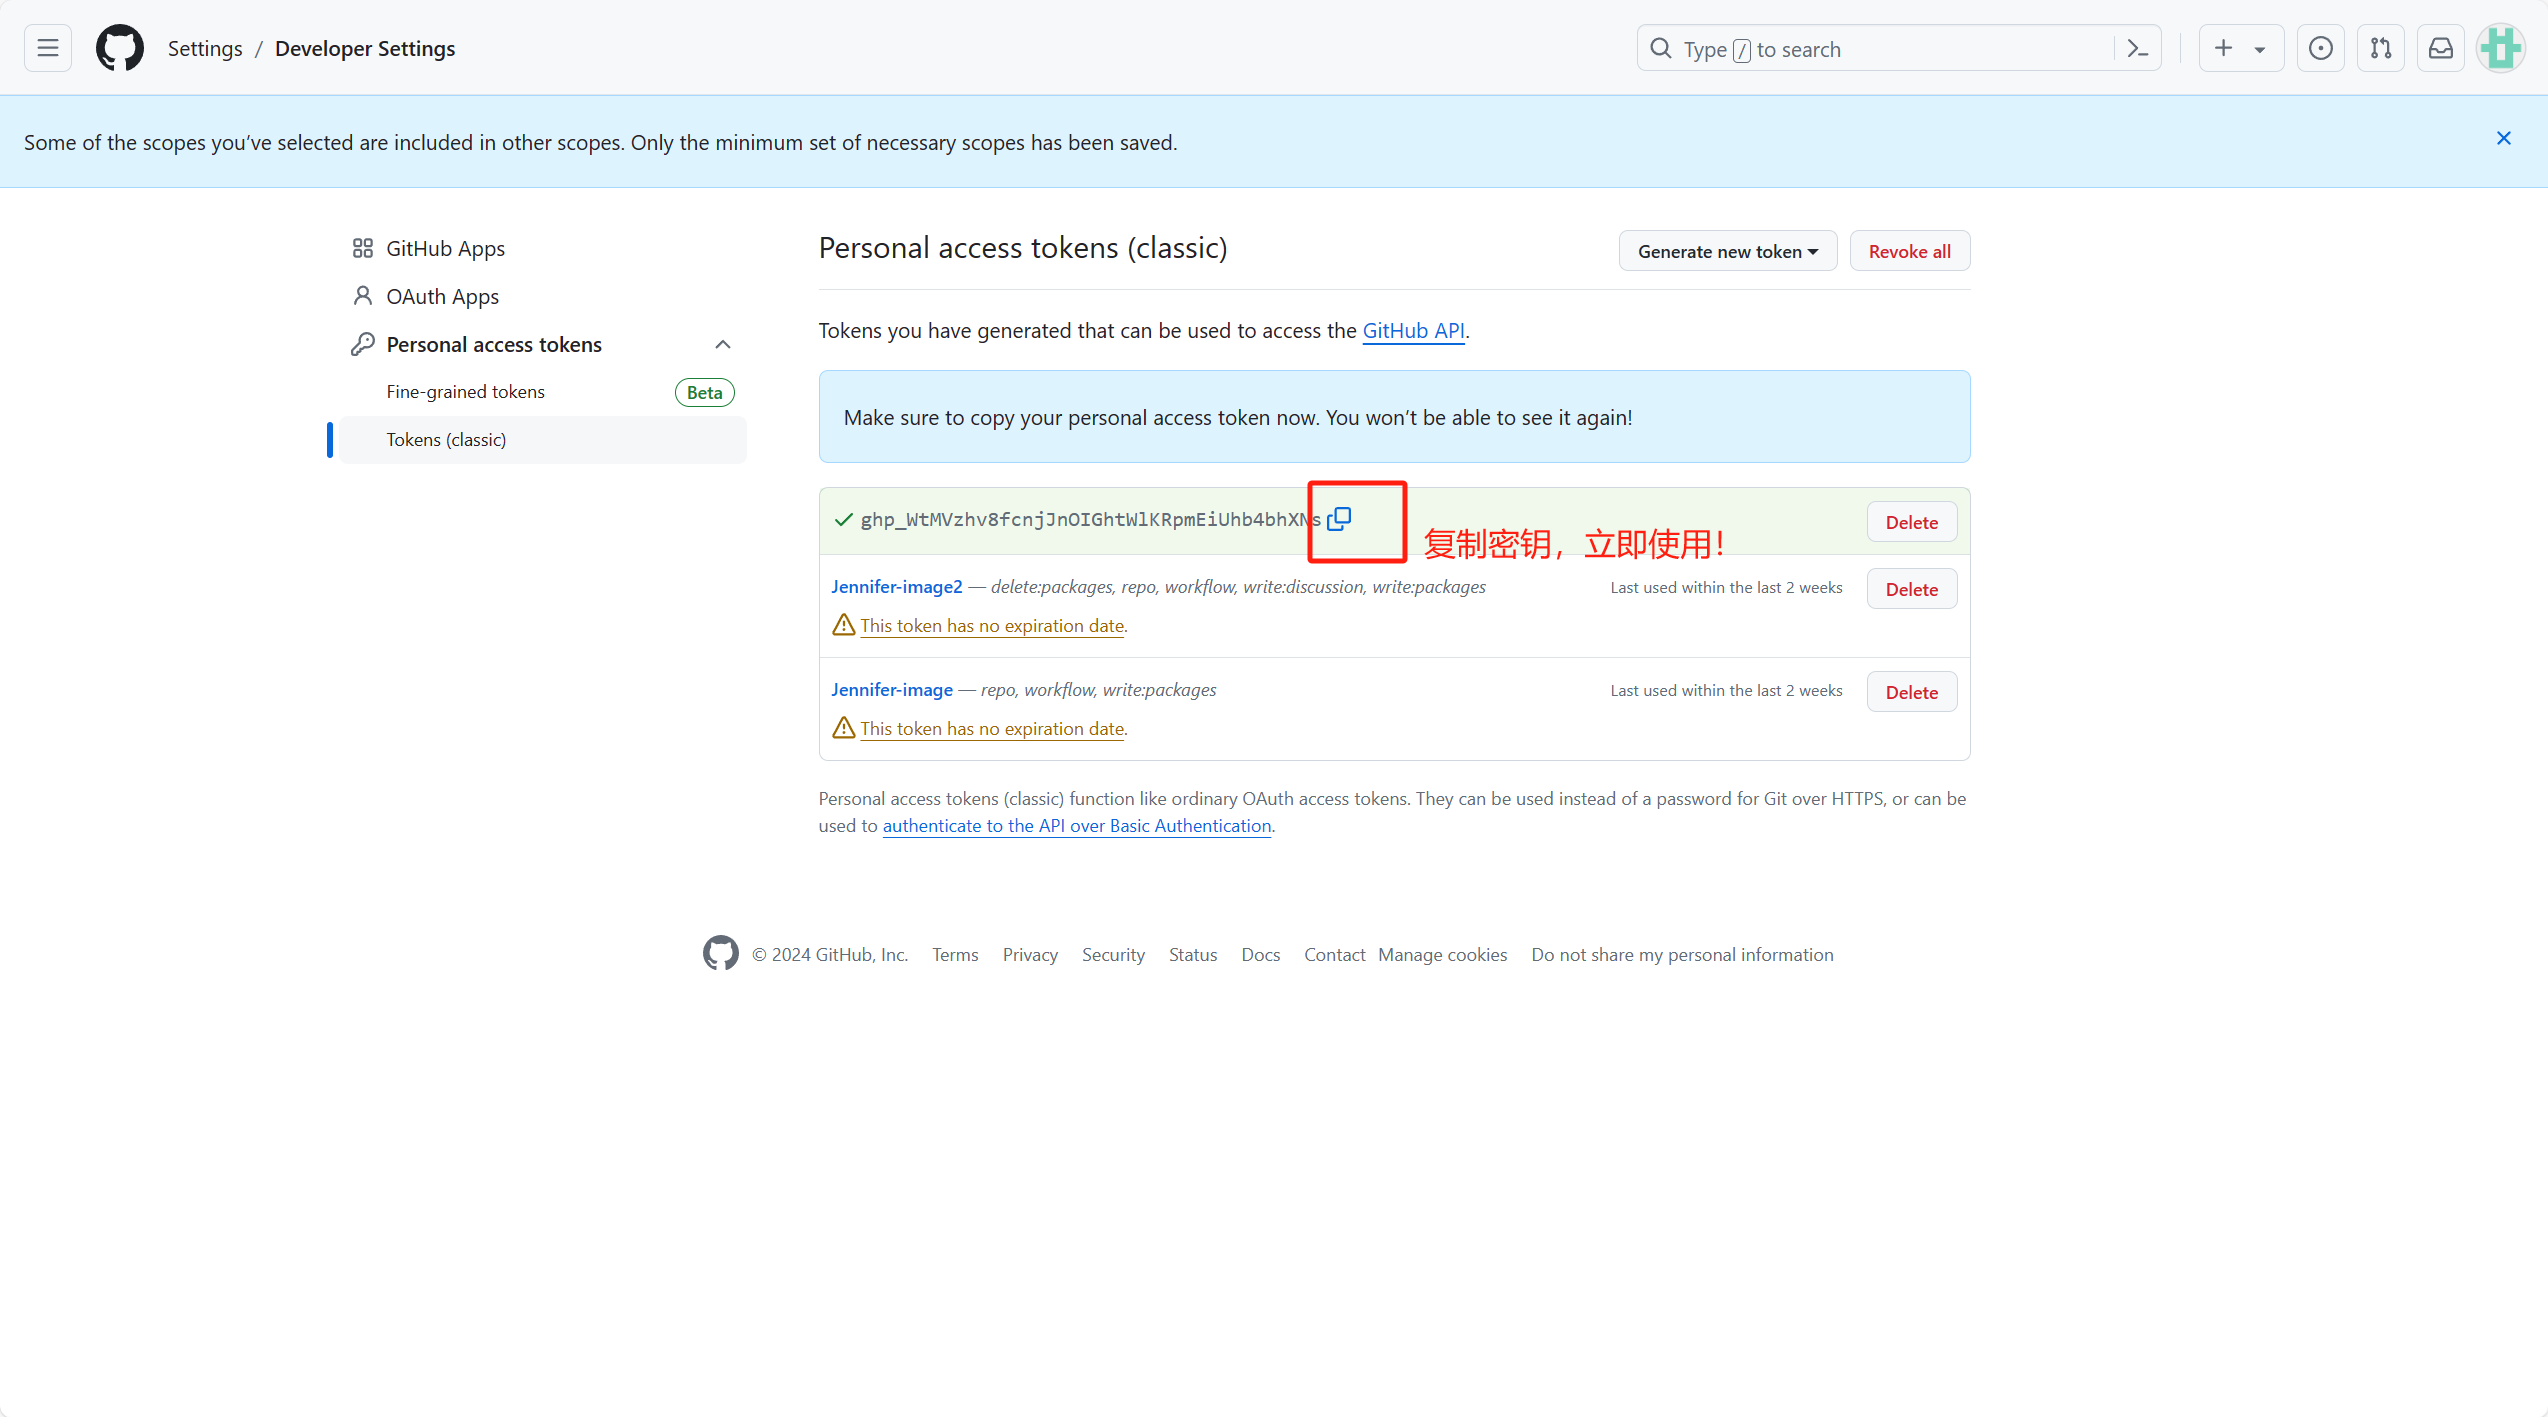

Note:
When selecting Expiration, select No Expiration
4.PicGo Setting
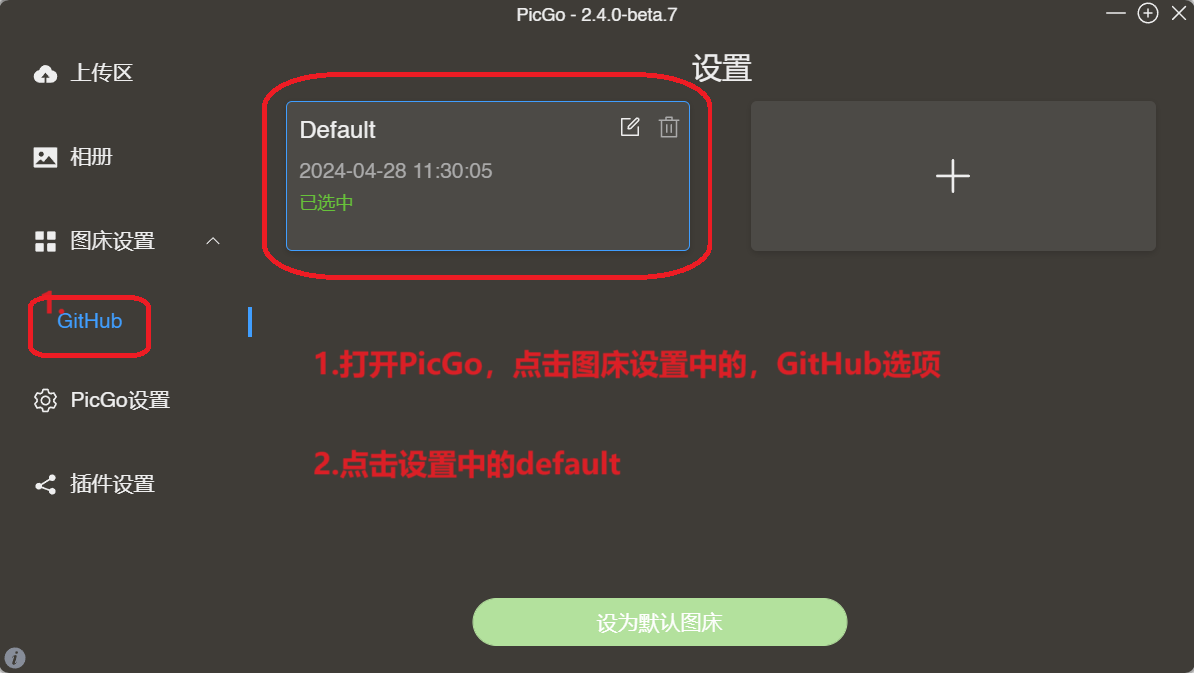
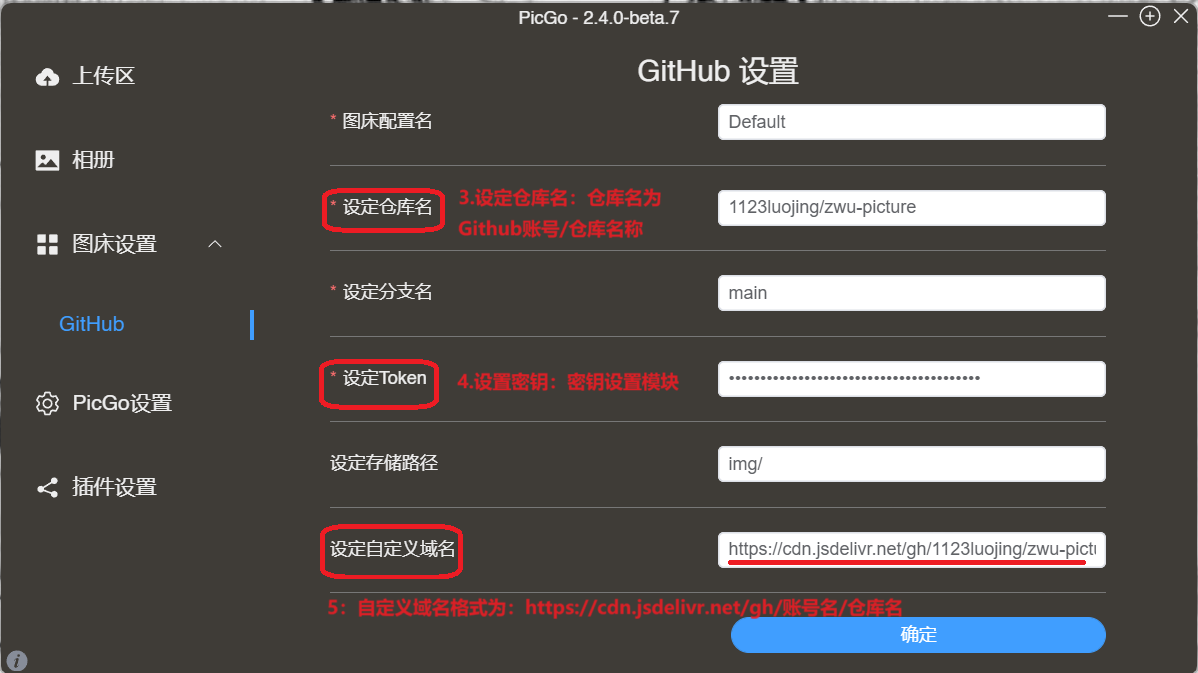
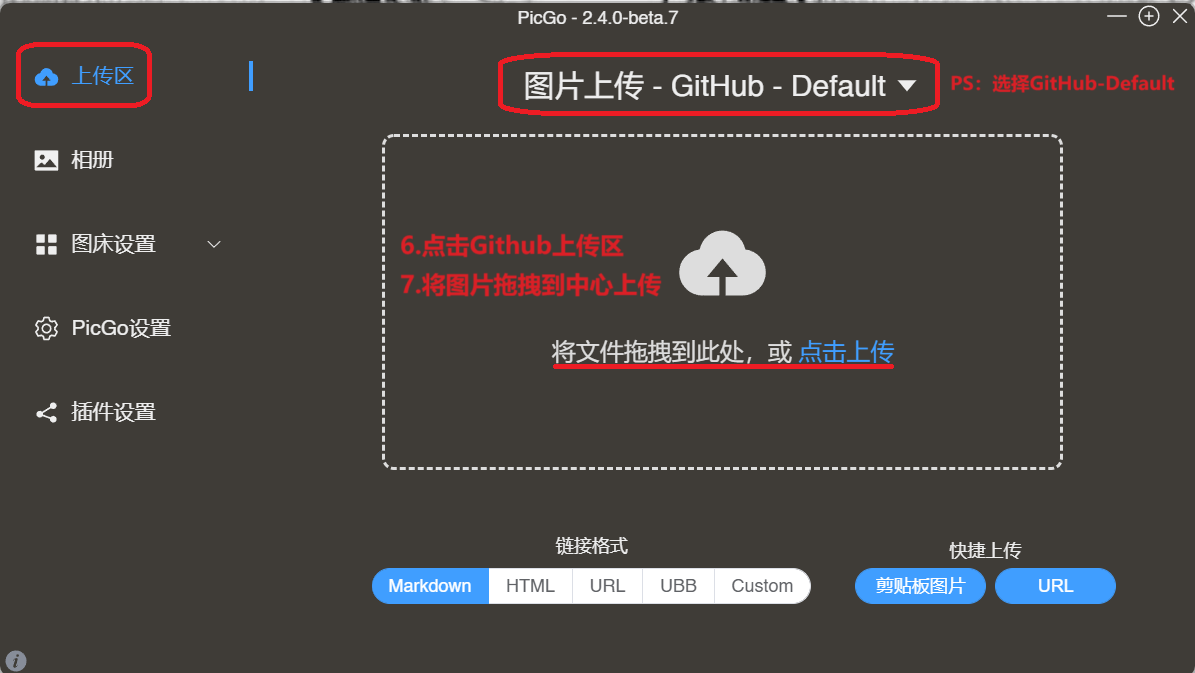
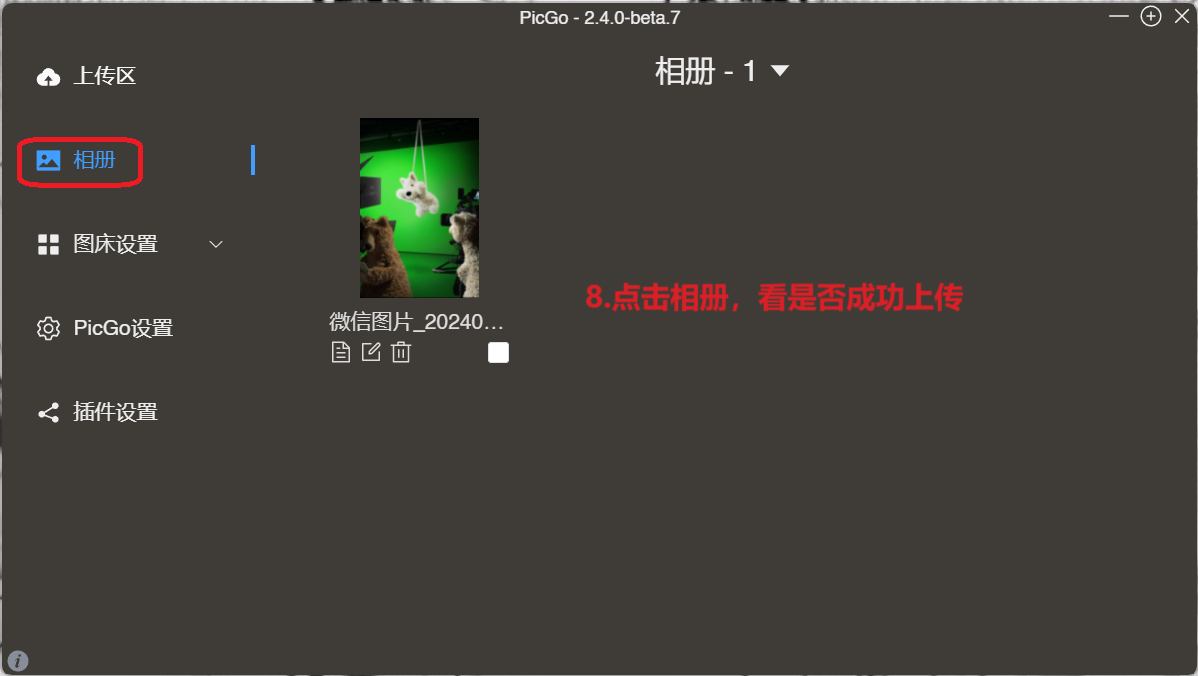
When using PicGo cloud upload, be careful not to enter the wrong account
and database name, and select the Markdown option.
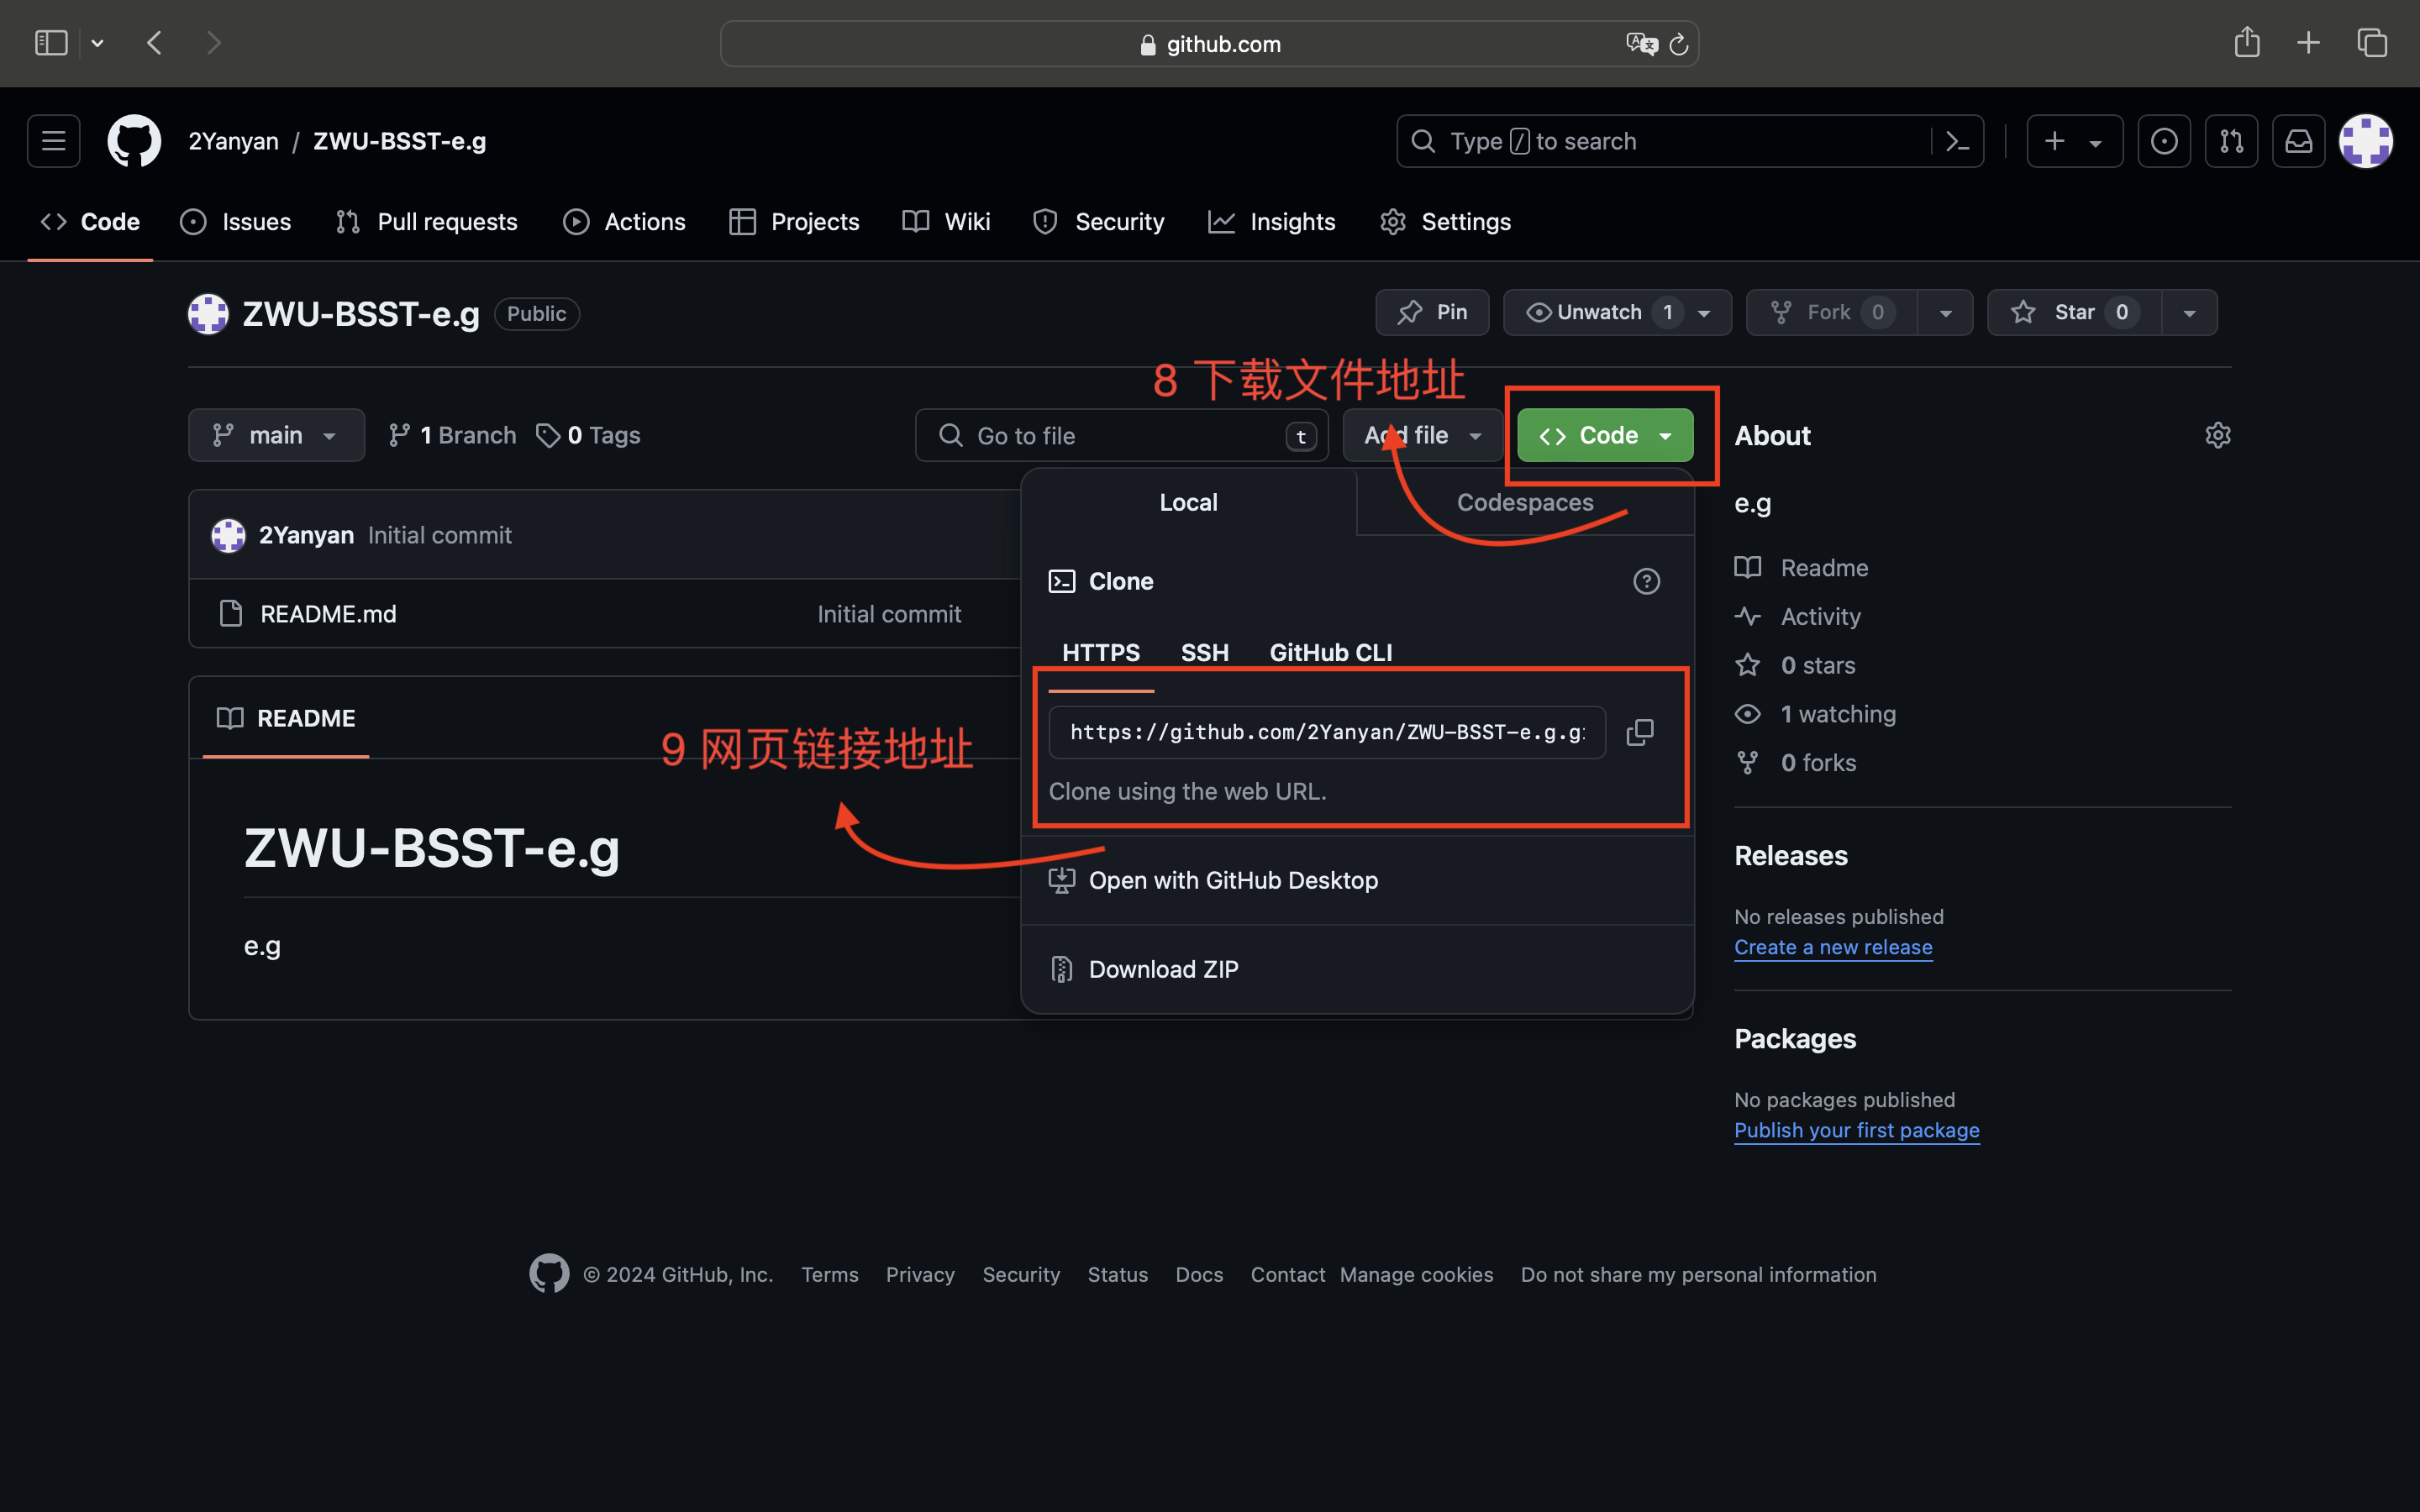
5.File cloning
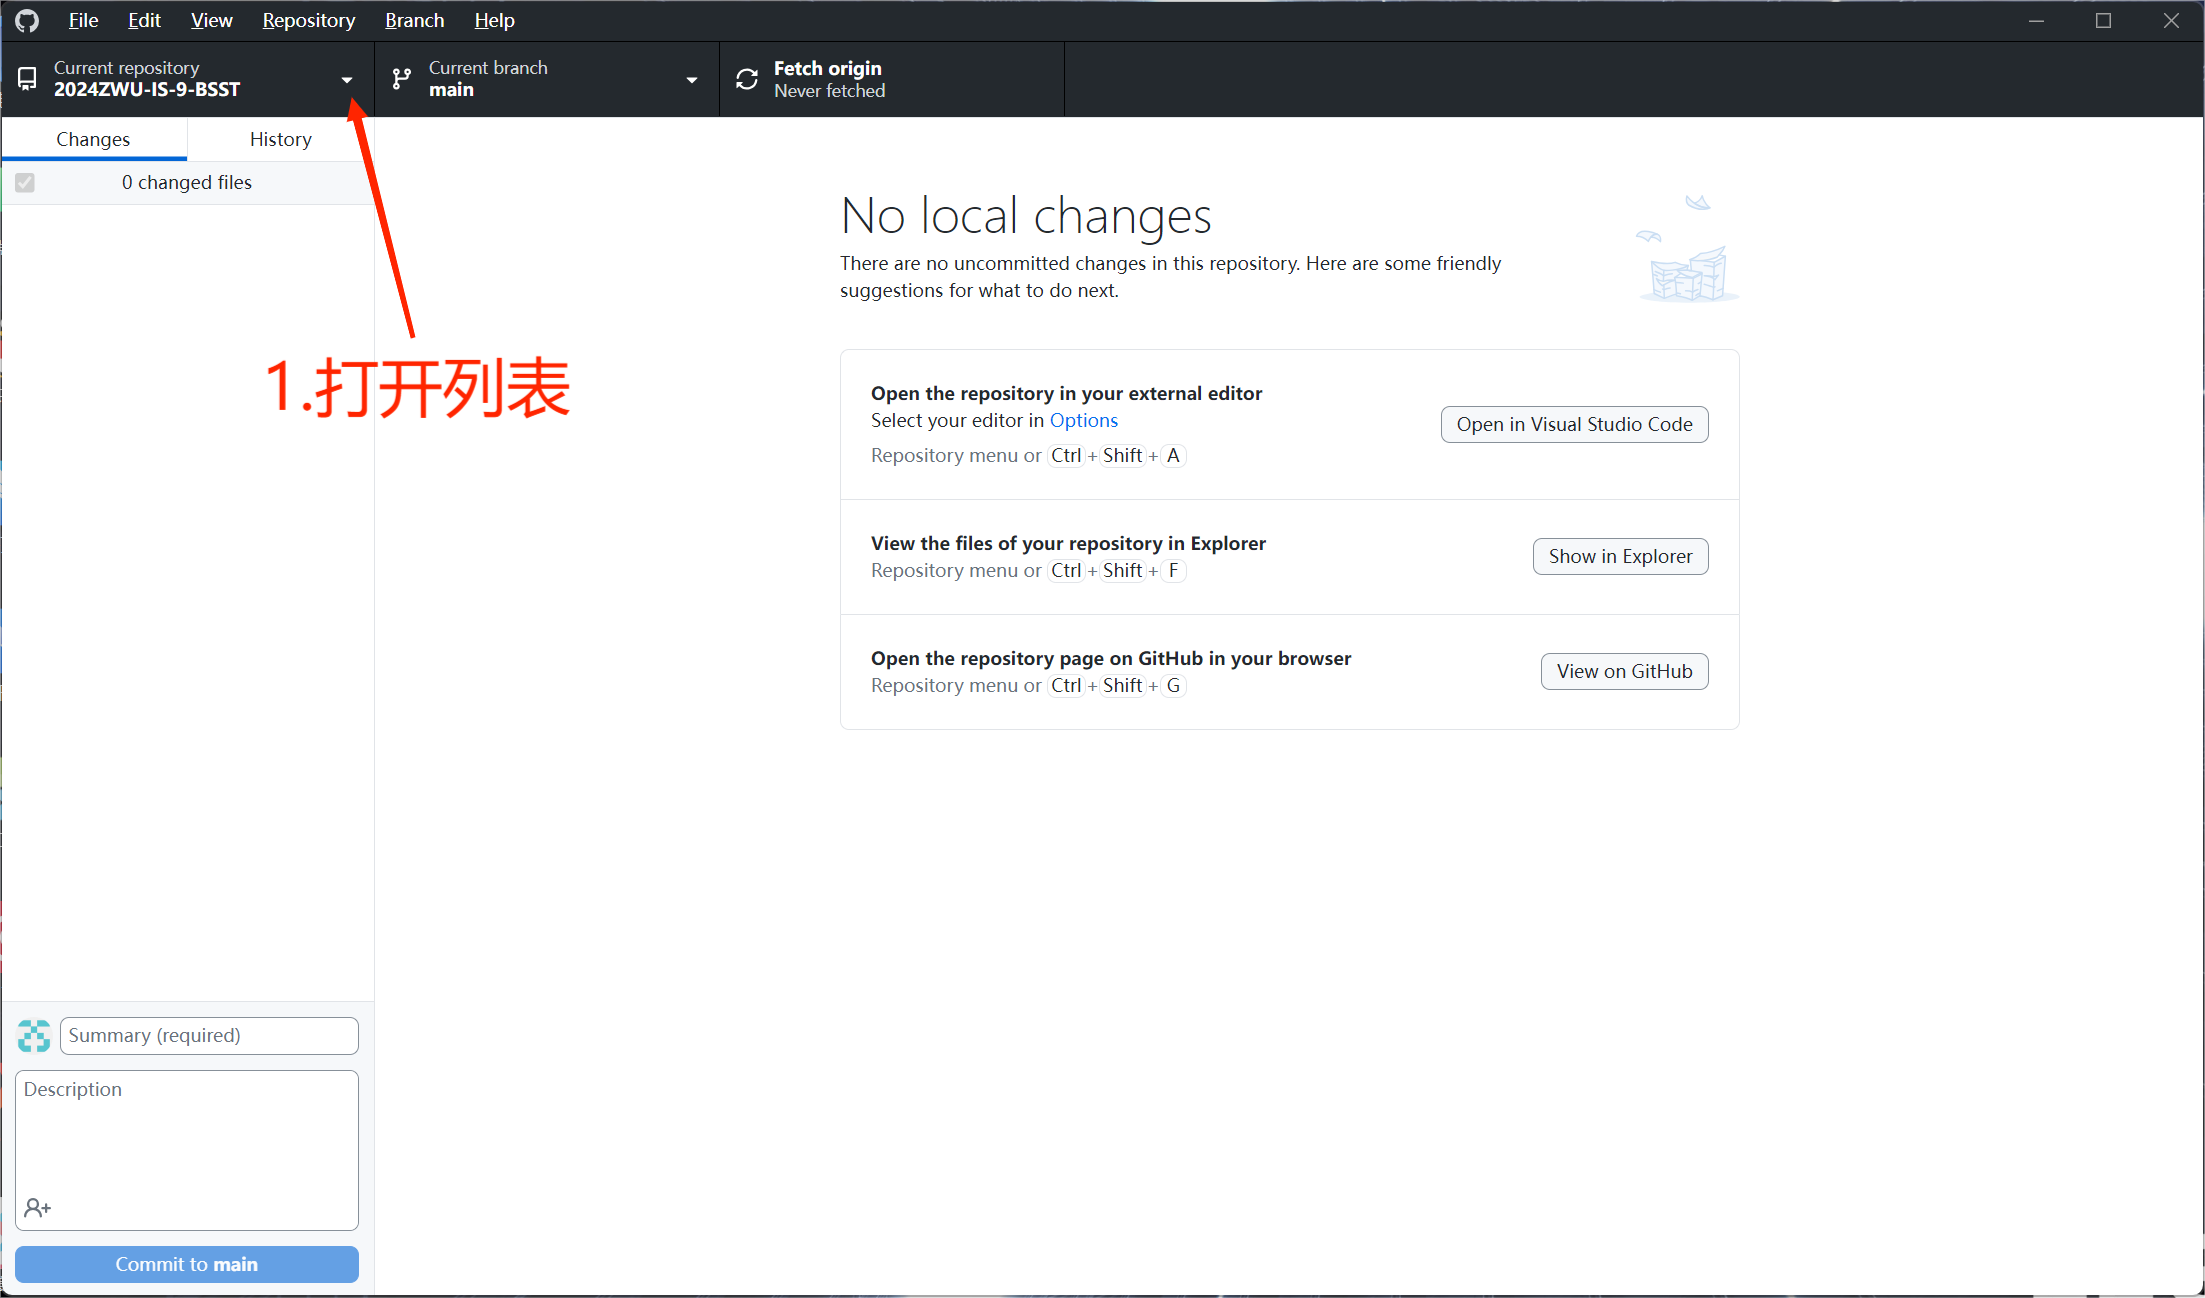
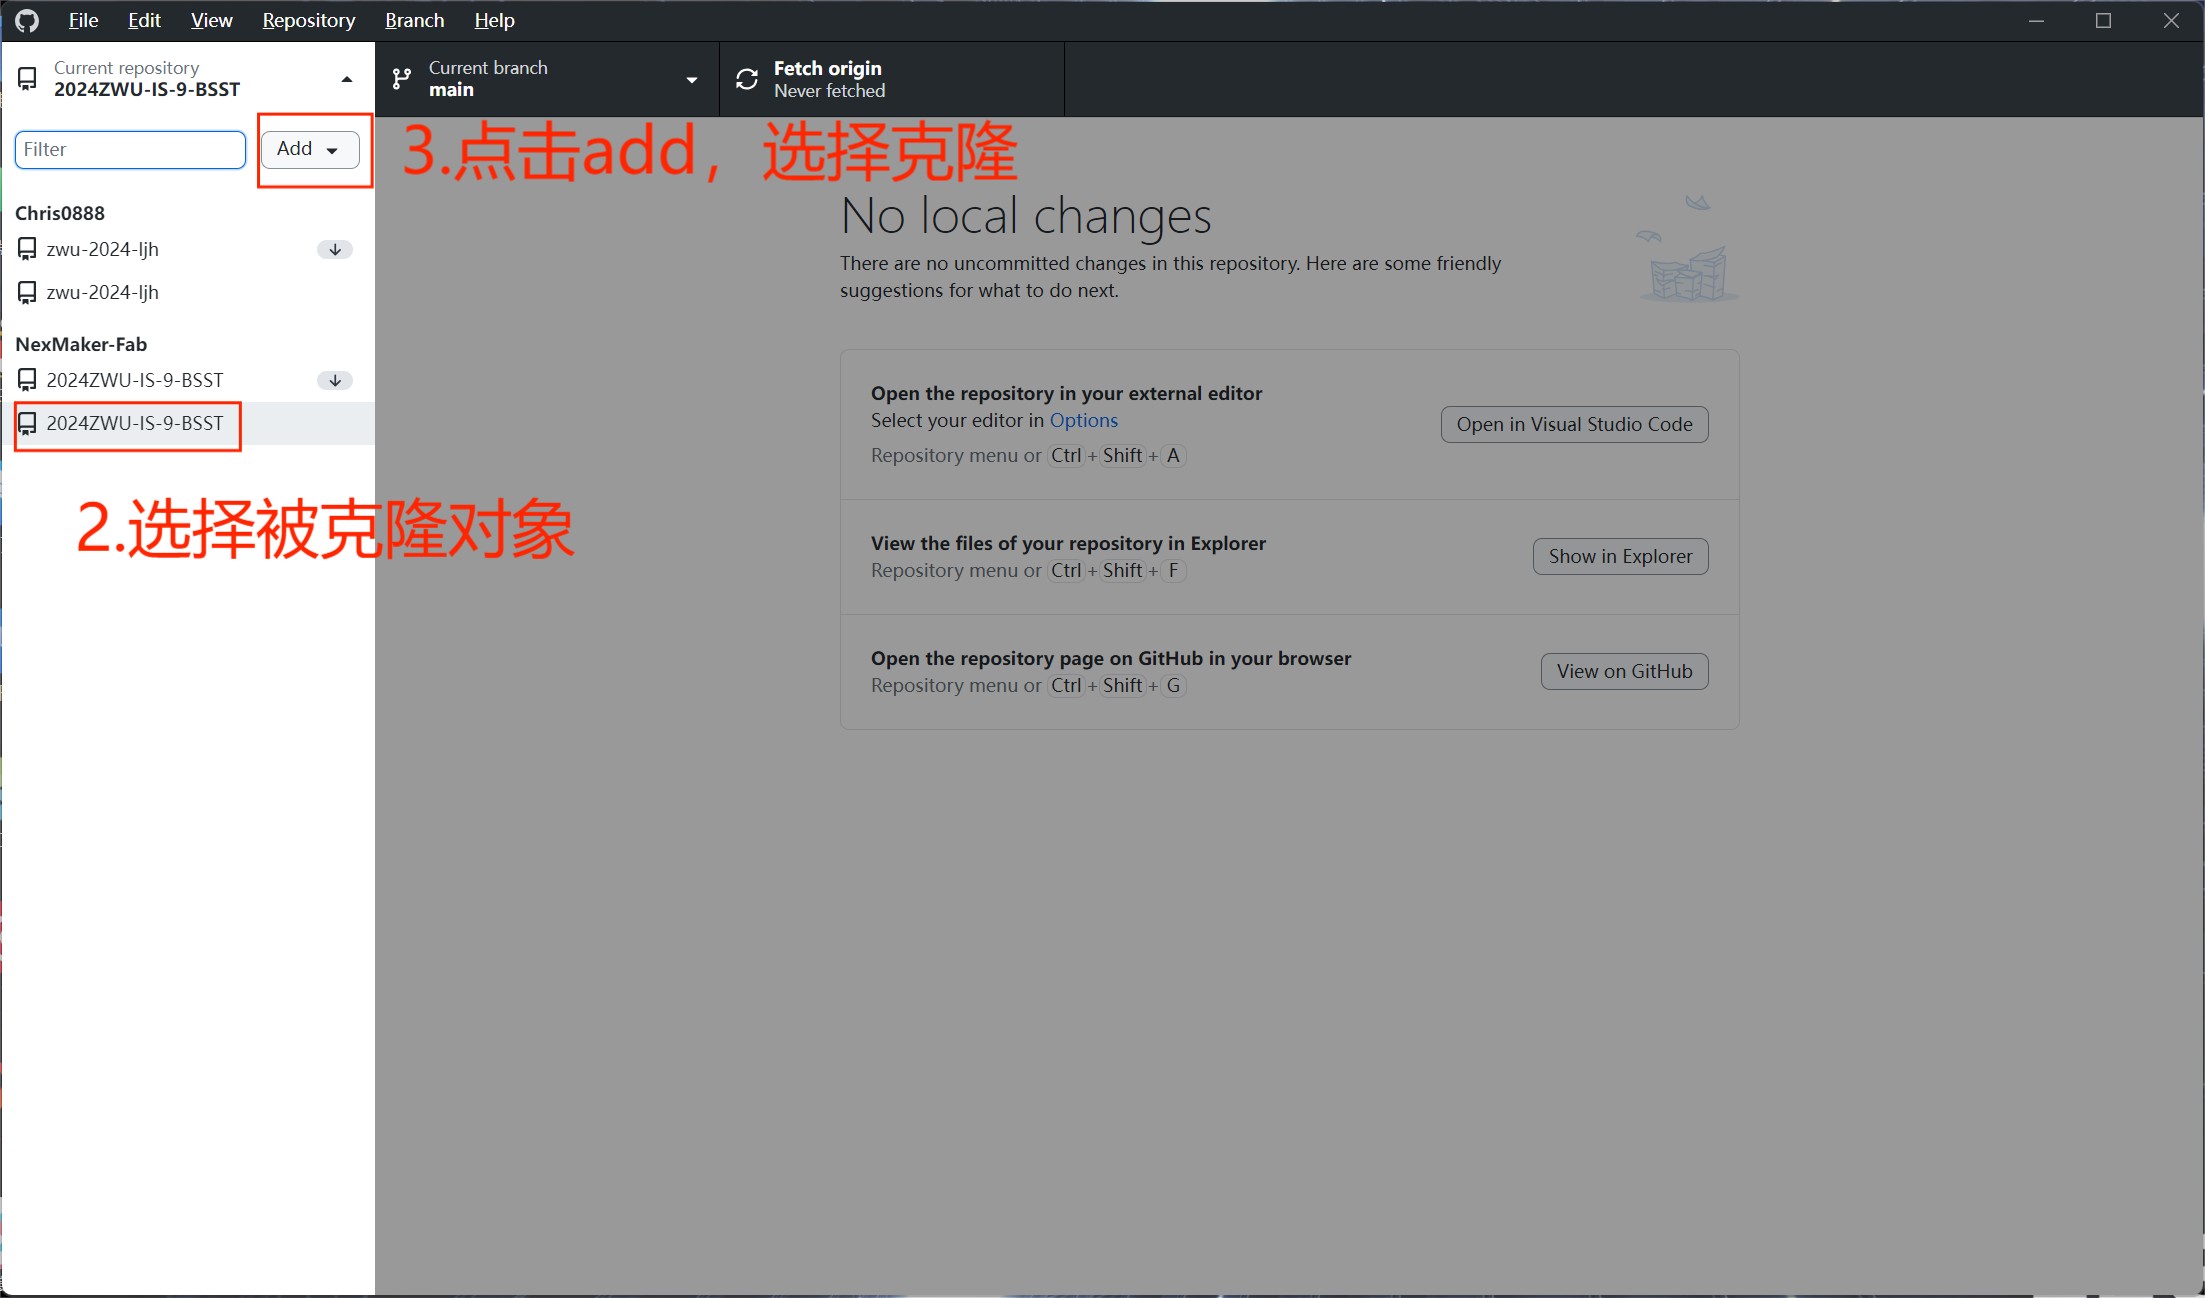
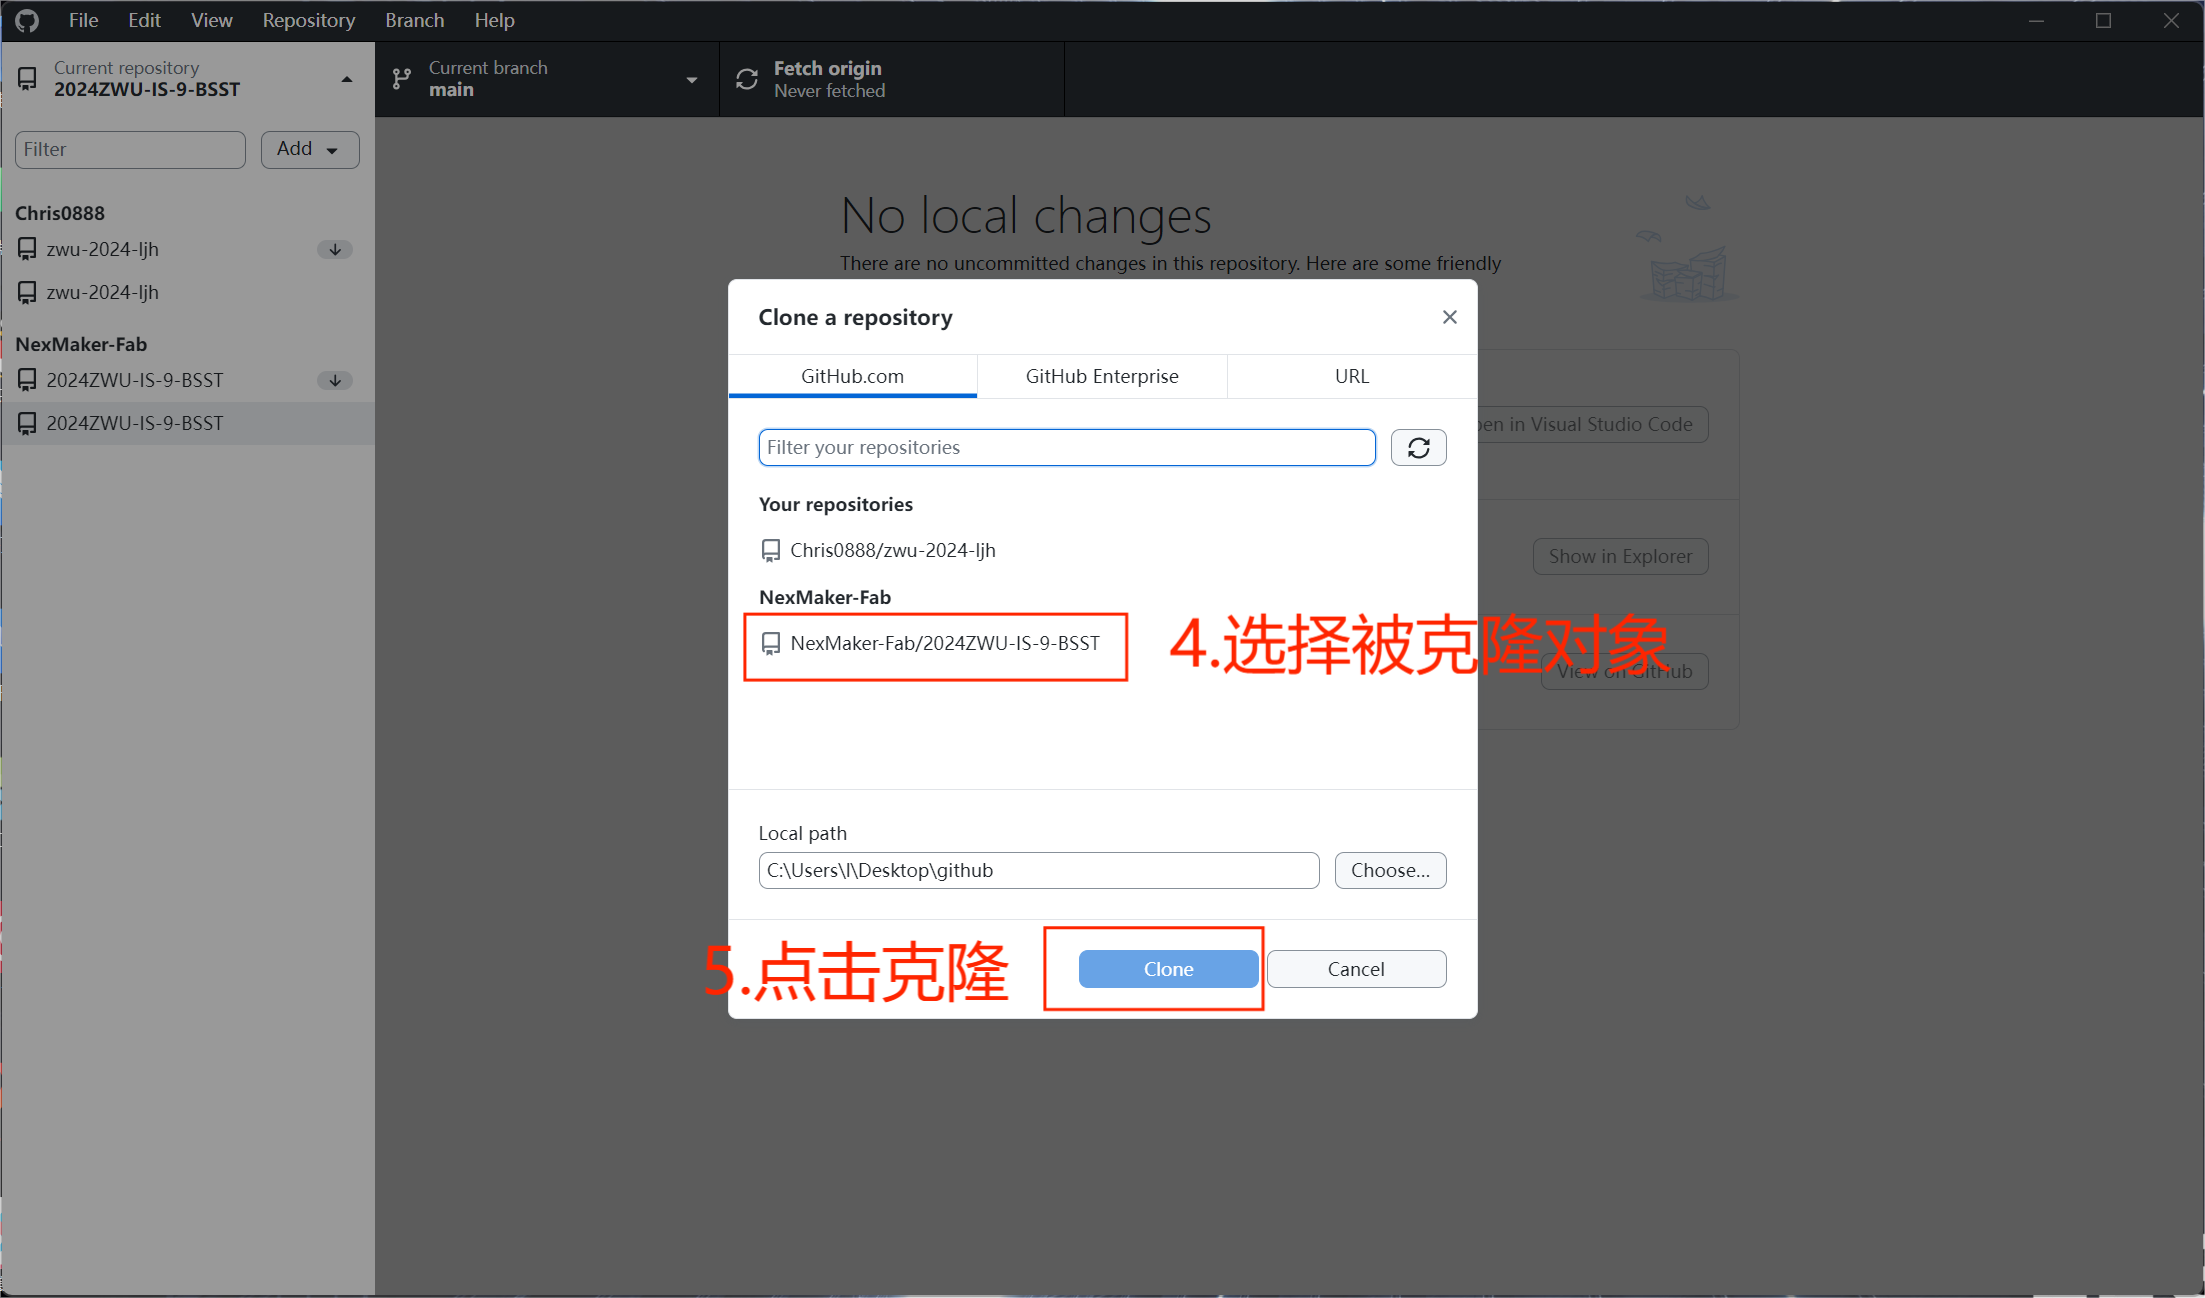
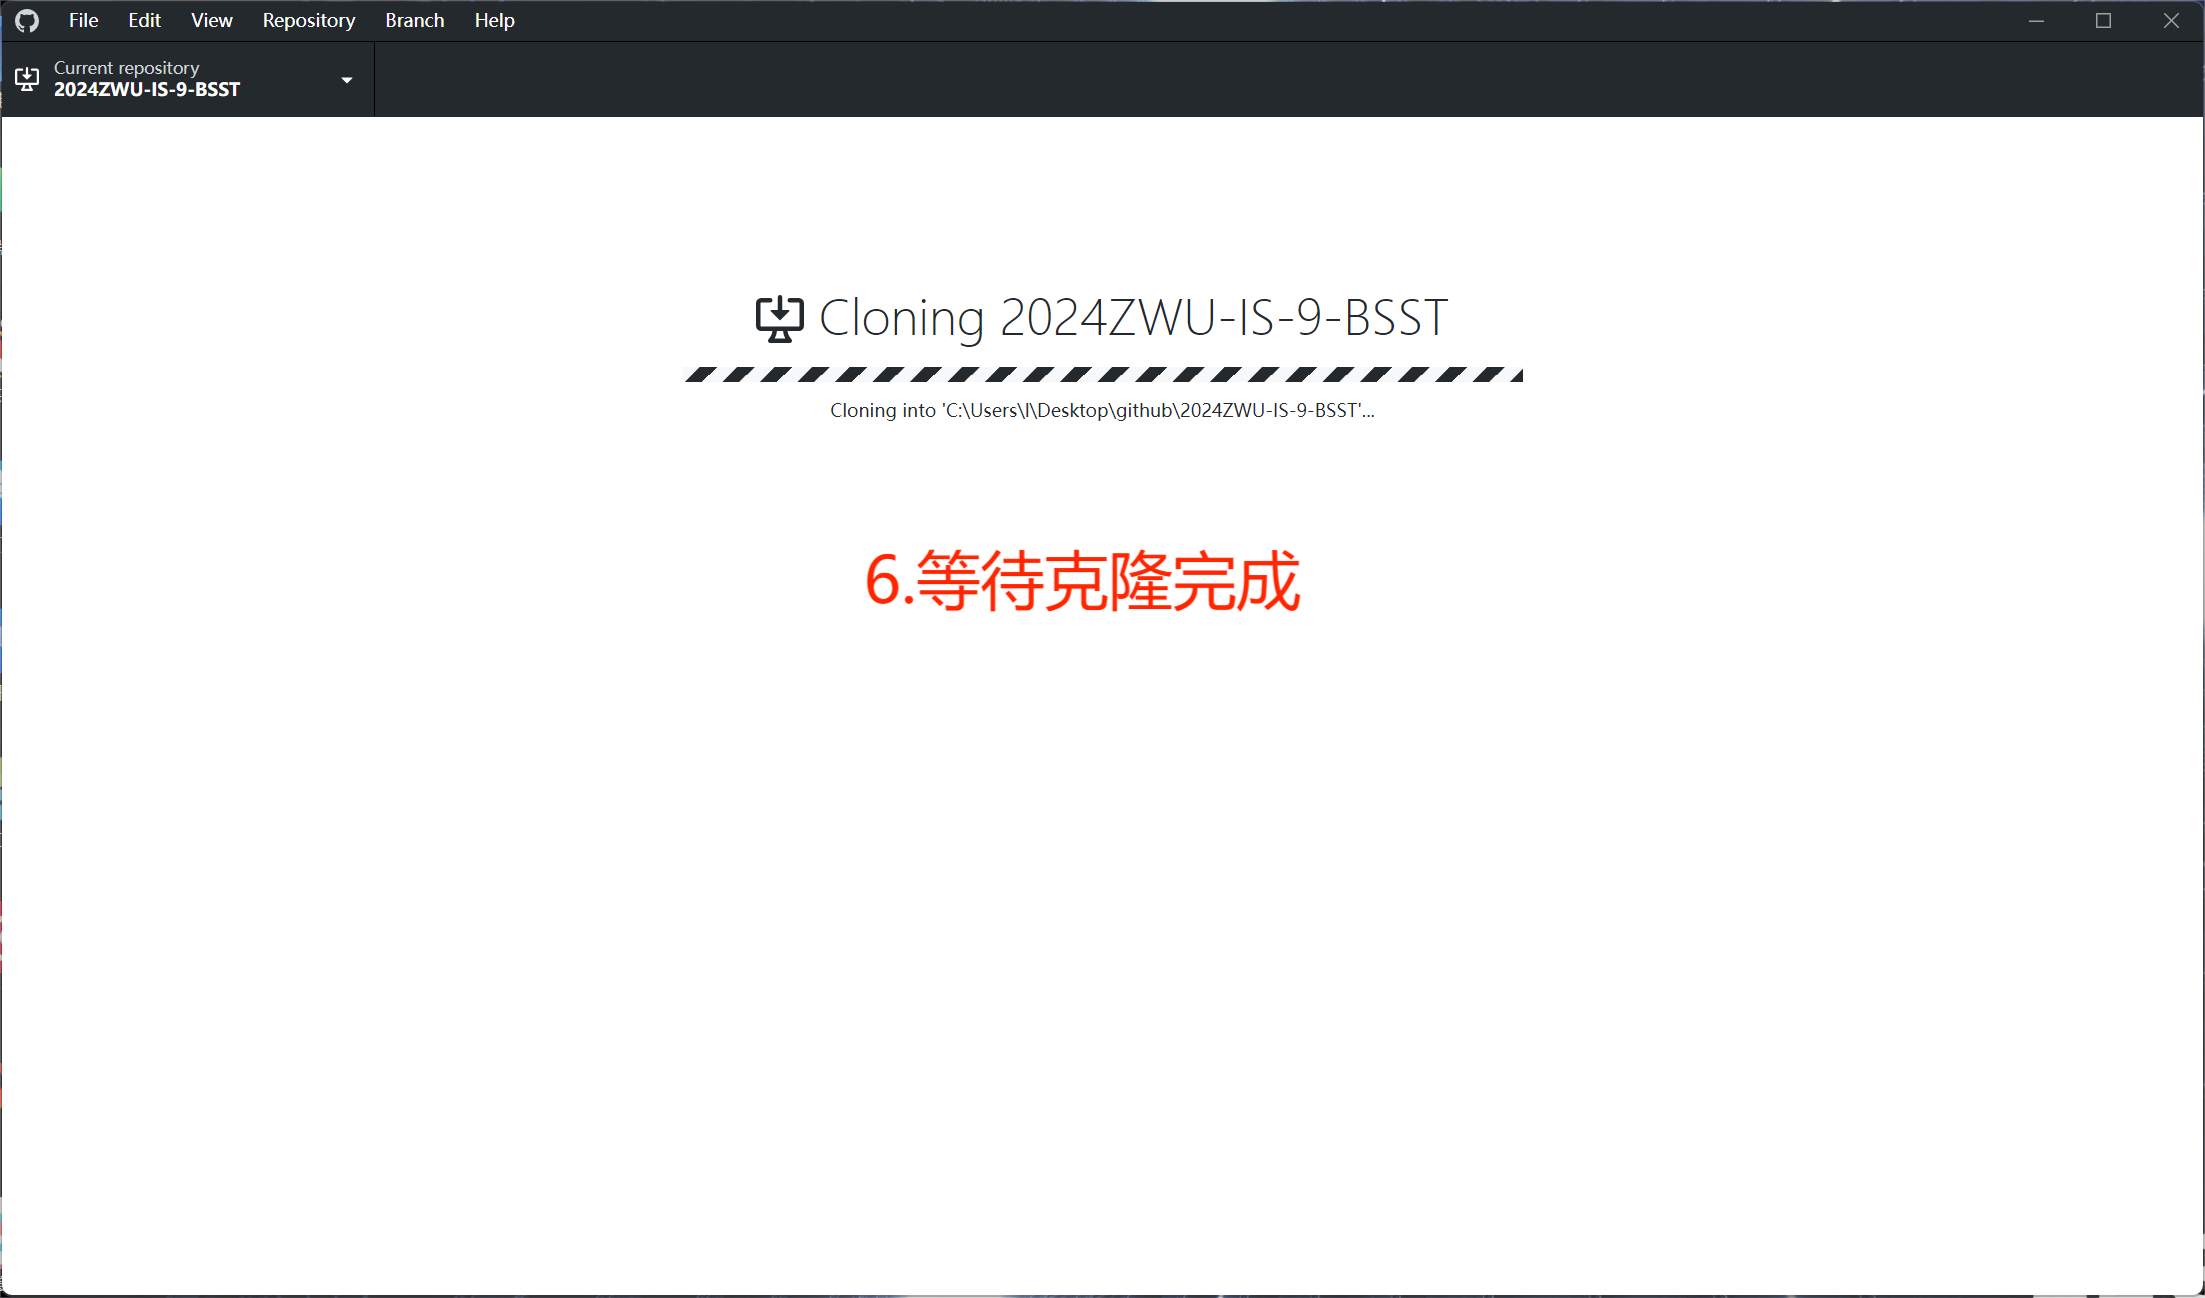
Note:
Duplicate cloning of files requires changing the file name or
deleting files with the same name, otherwise cloning will fail.
6.File upload
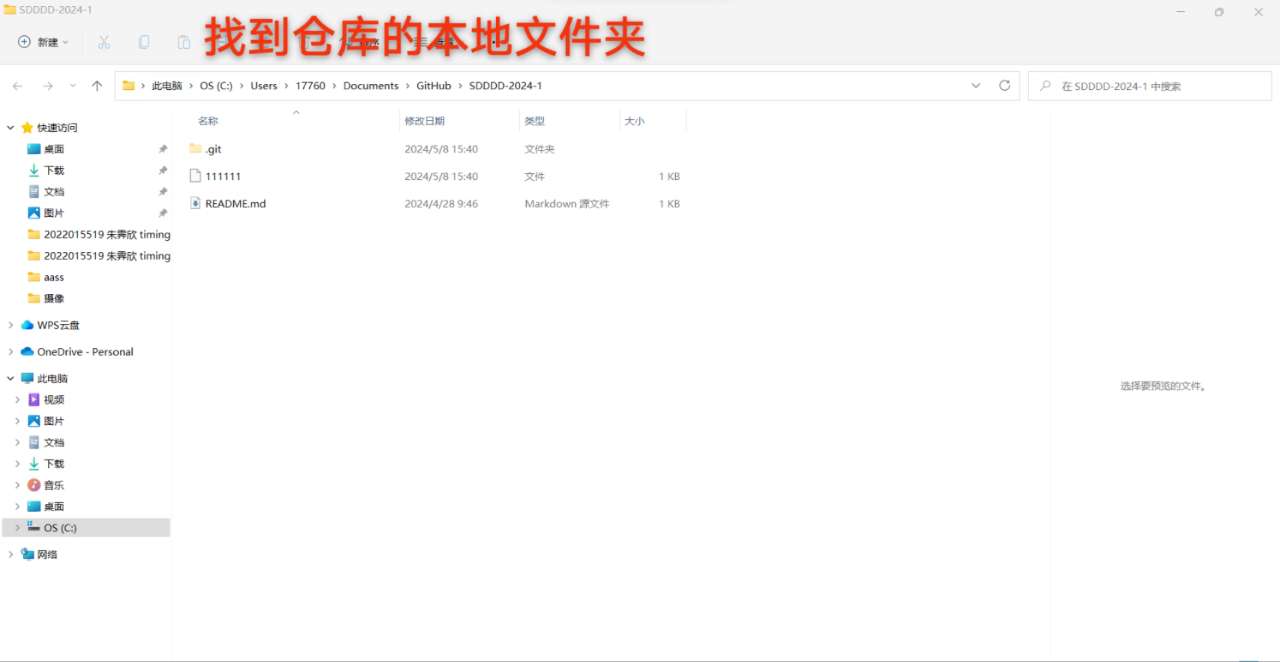

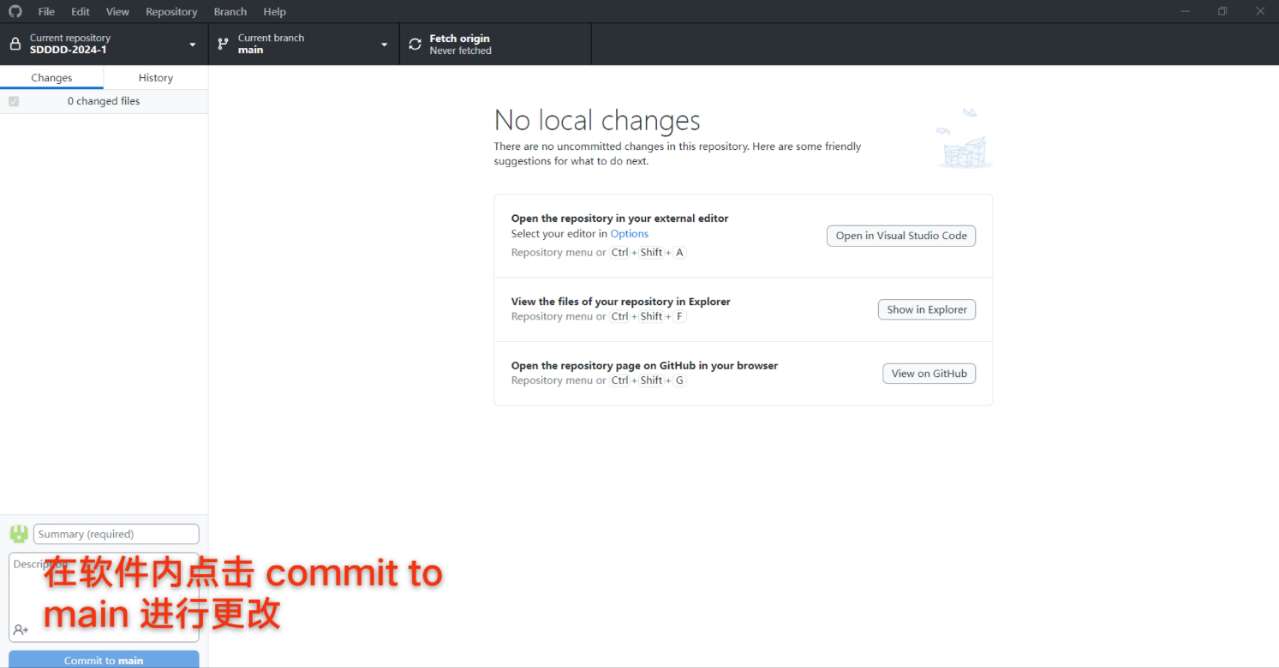
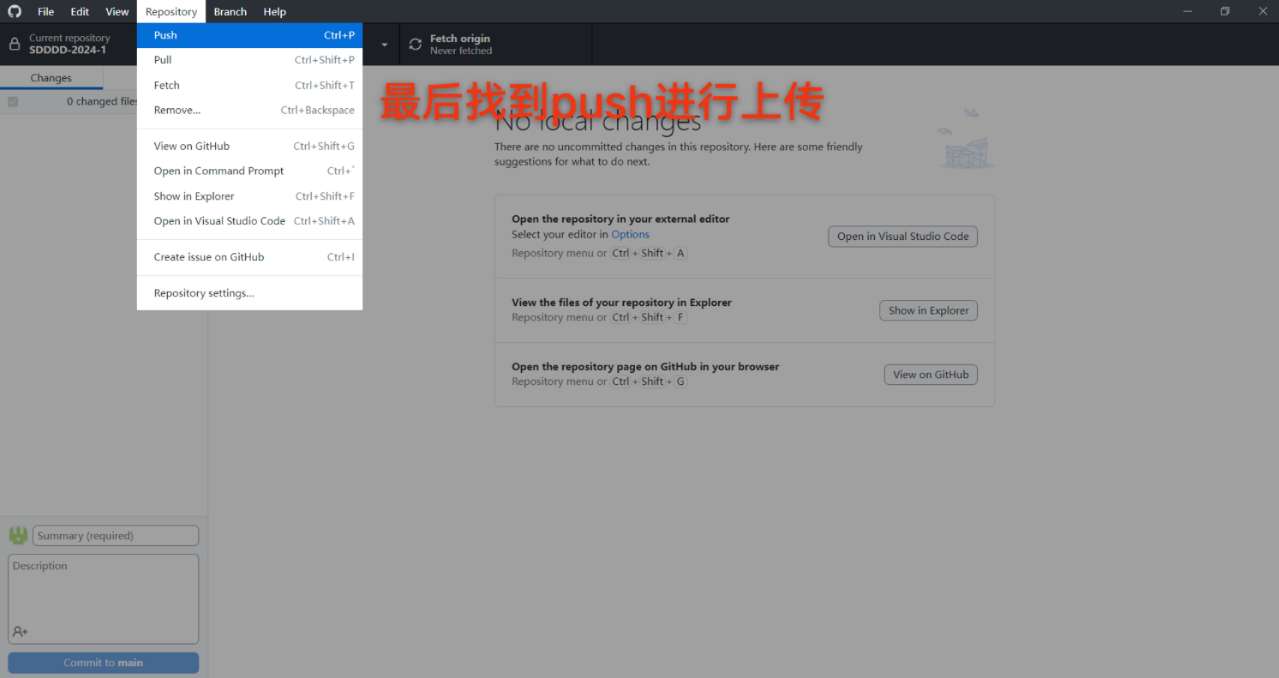
To upload using GitHub software, it is necessary to determine the local
folder of the repository. After each local change, be sure to click on
commit to main for confirmation, and finally find push in the repository
to upload.
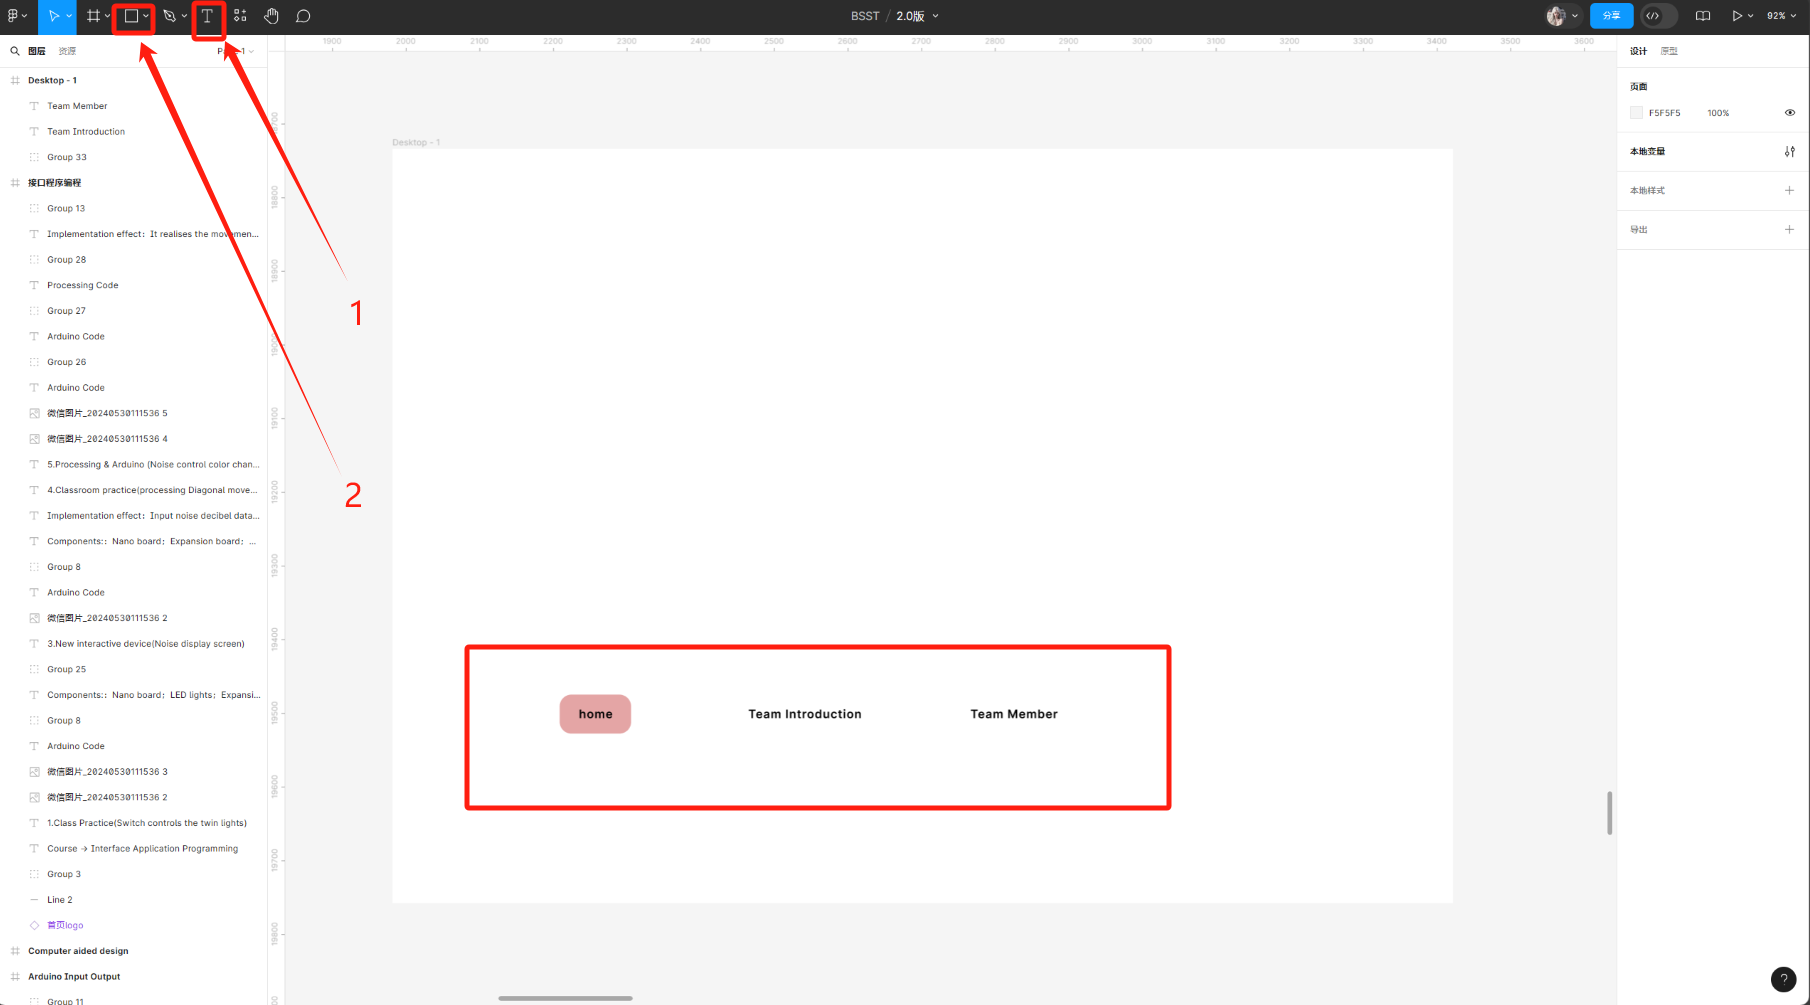
Module 1:
Basic tools such as movement and dragging
Module 2: Content of webpage elements
Module 3: Parameter Adjustment
Module 4: Creating a preview of a webpage
Module 2: Content of webpage elements
Module 3: Parameter Adjustment
Module 4: Creating a preview of a webpage
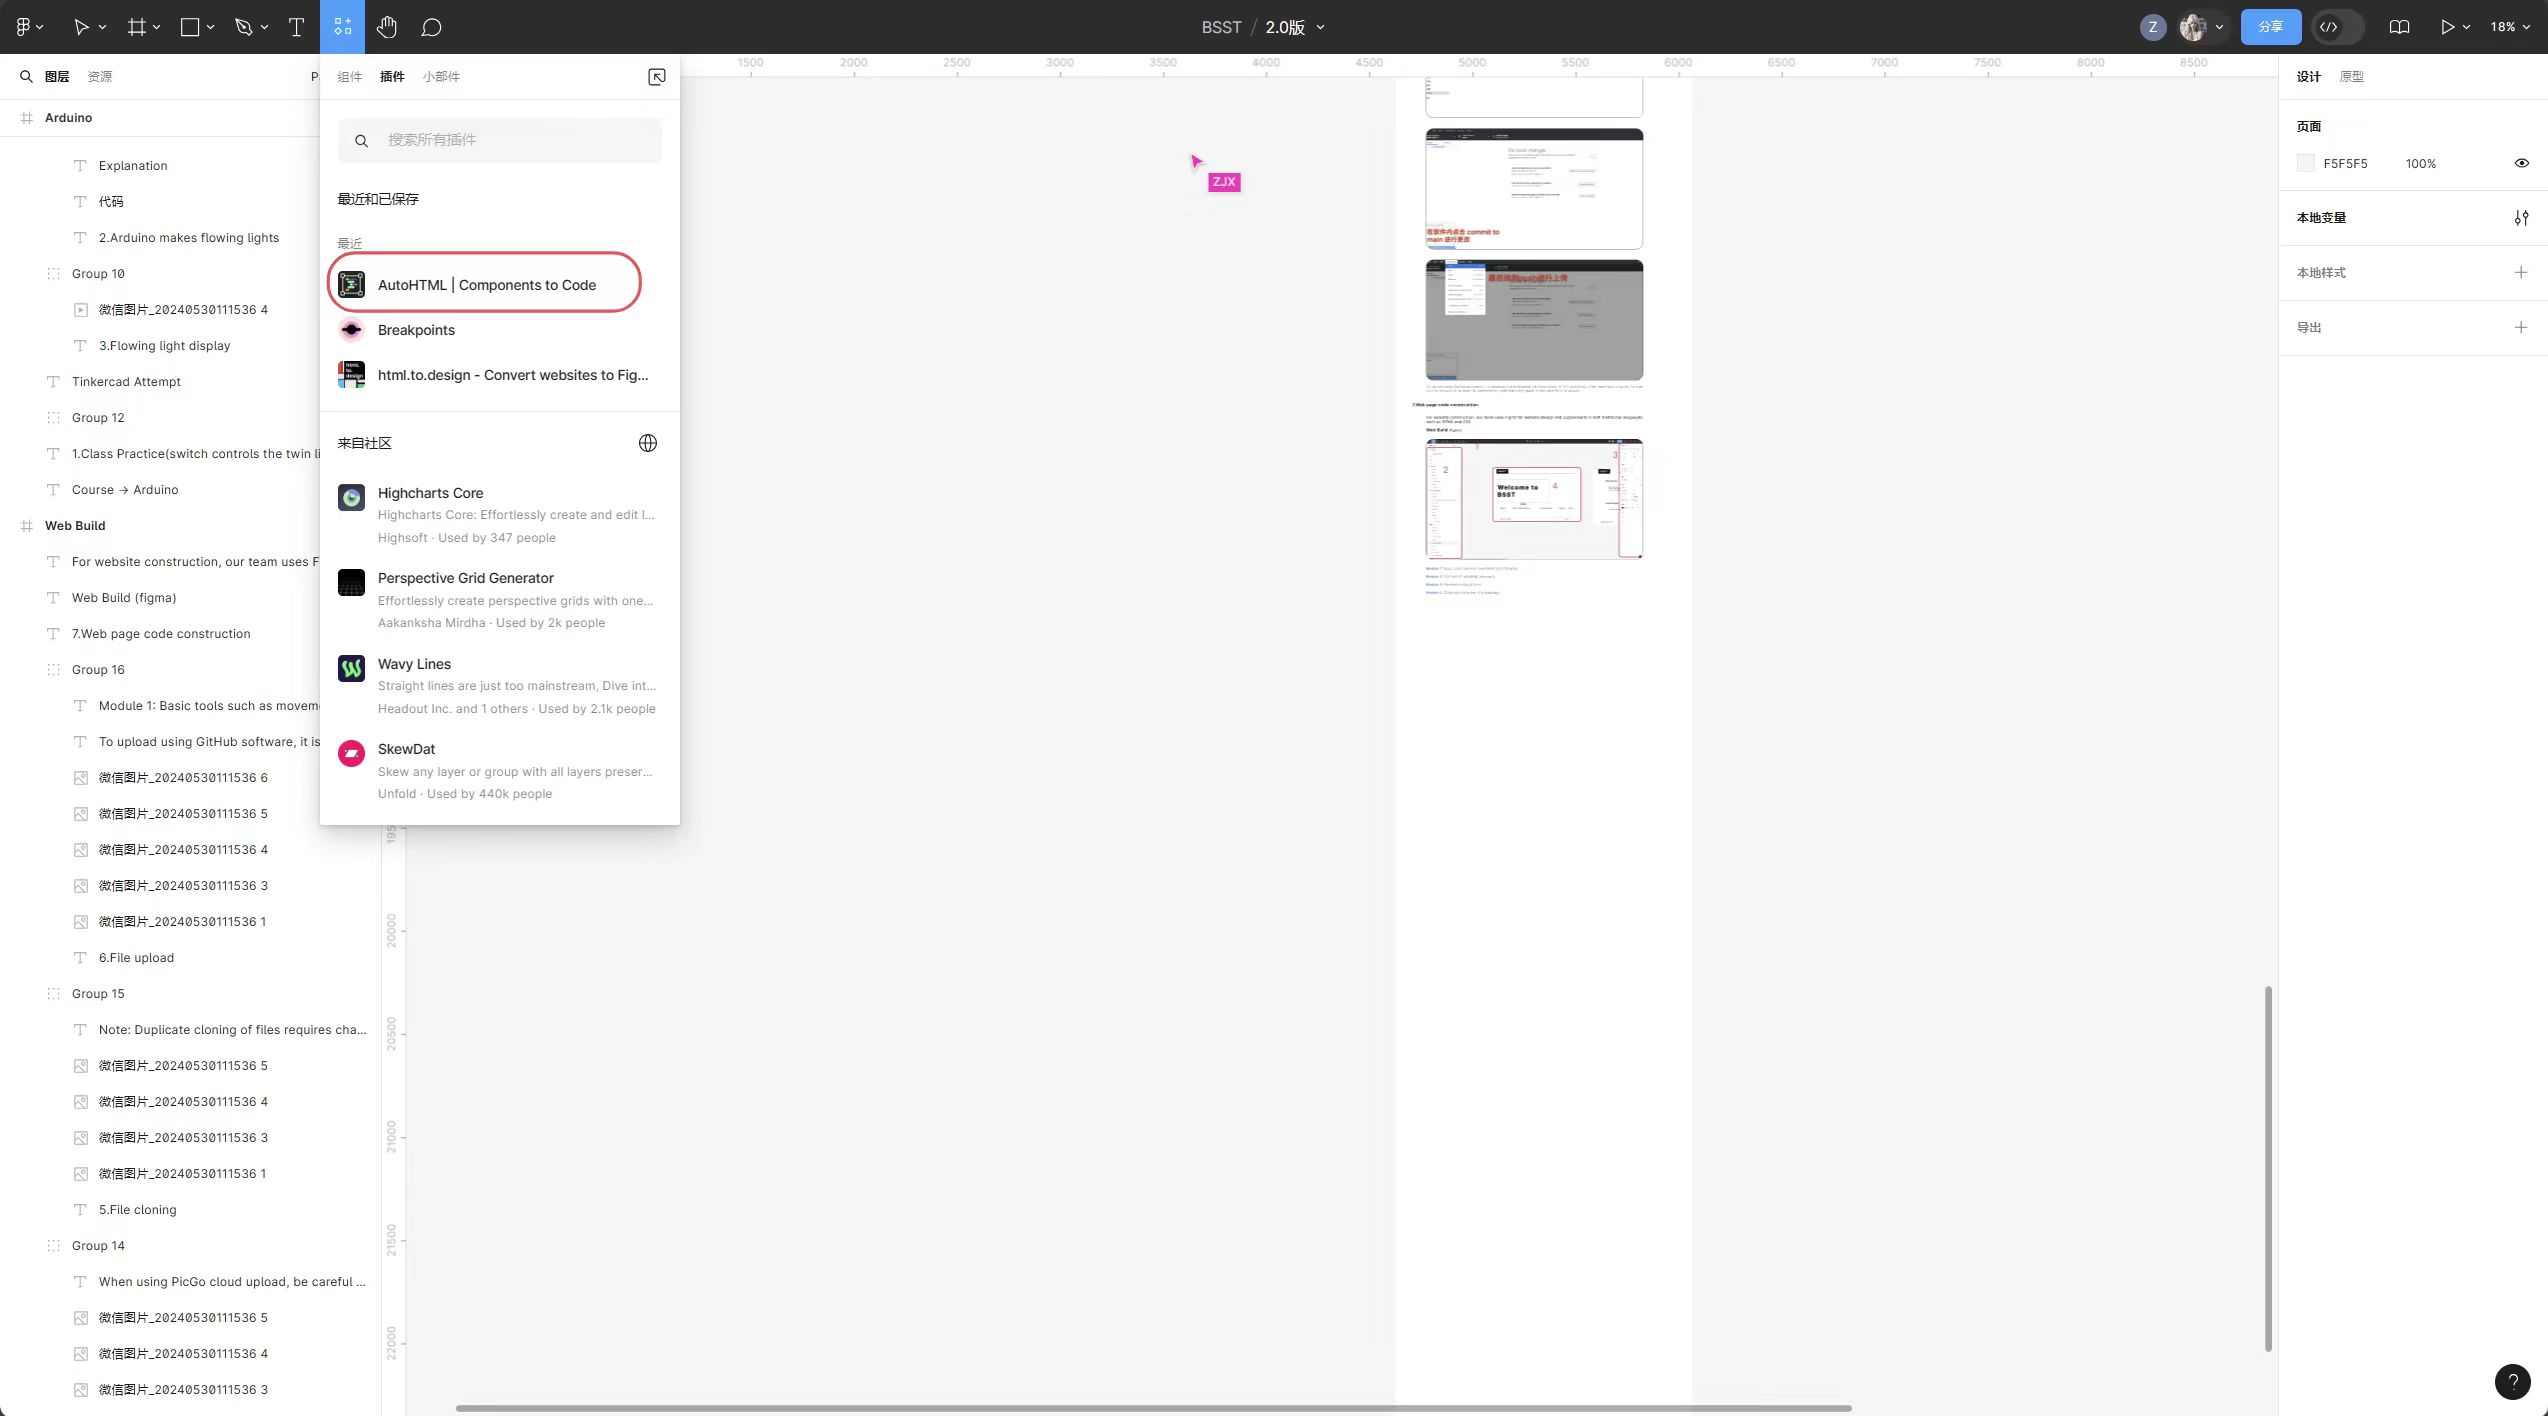
Module 1:
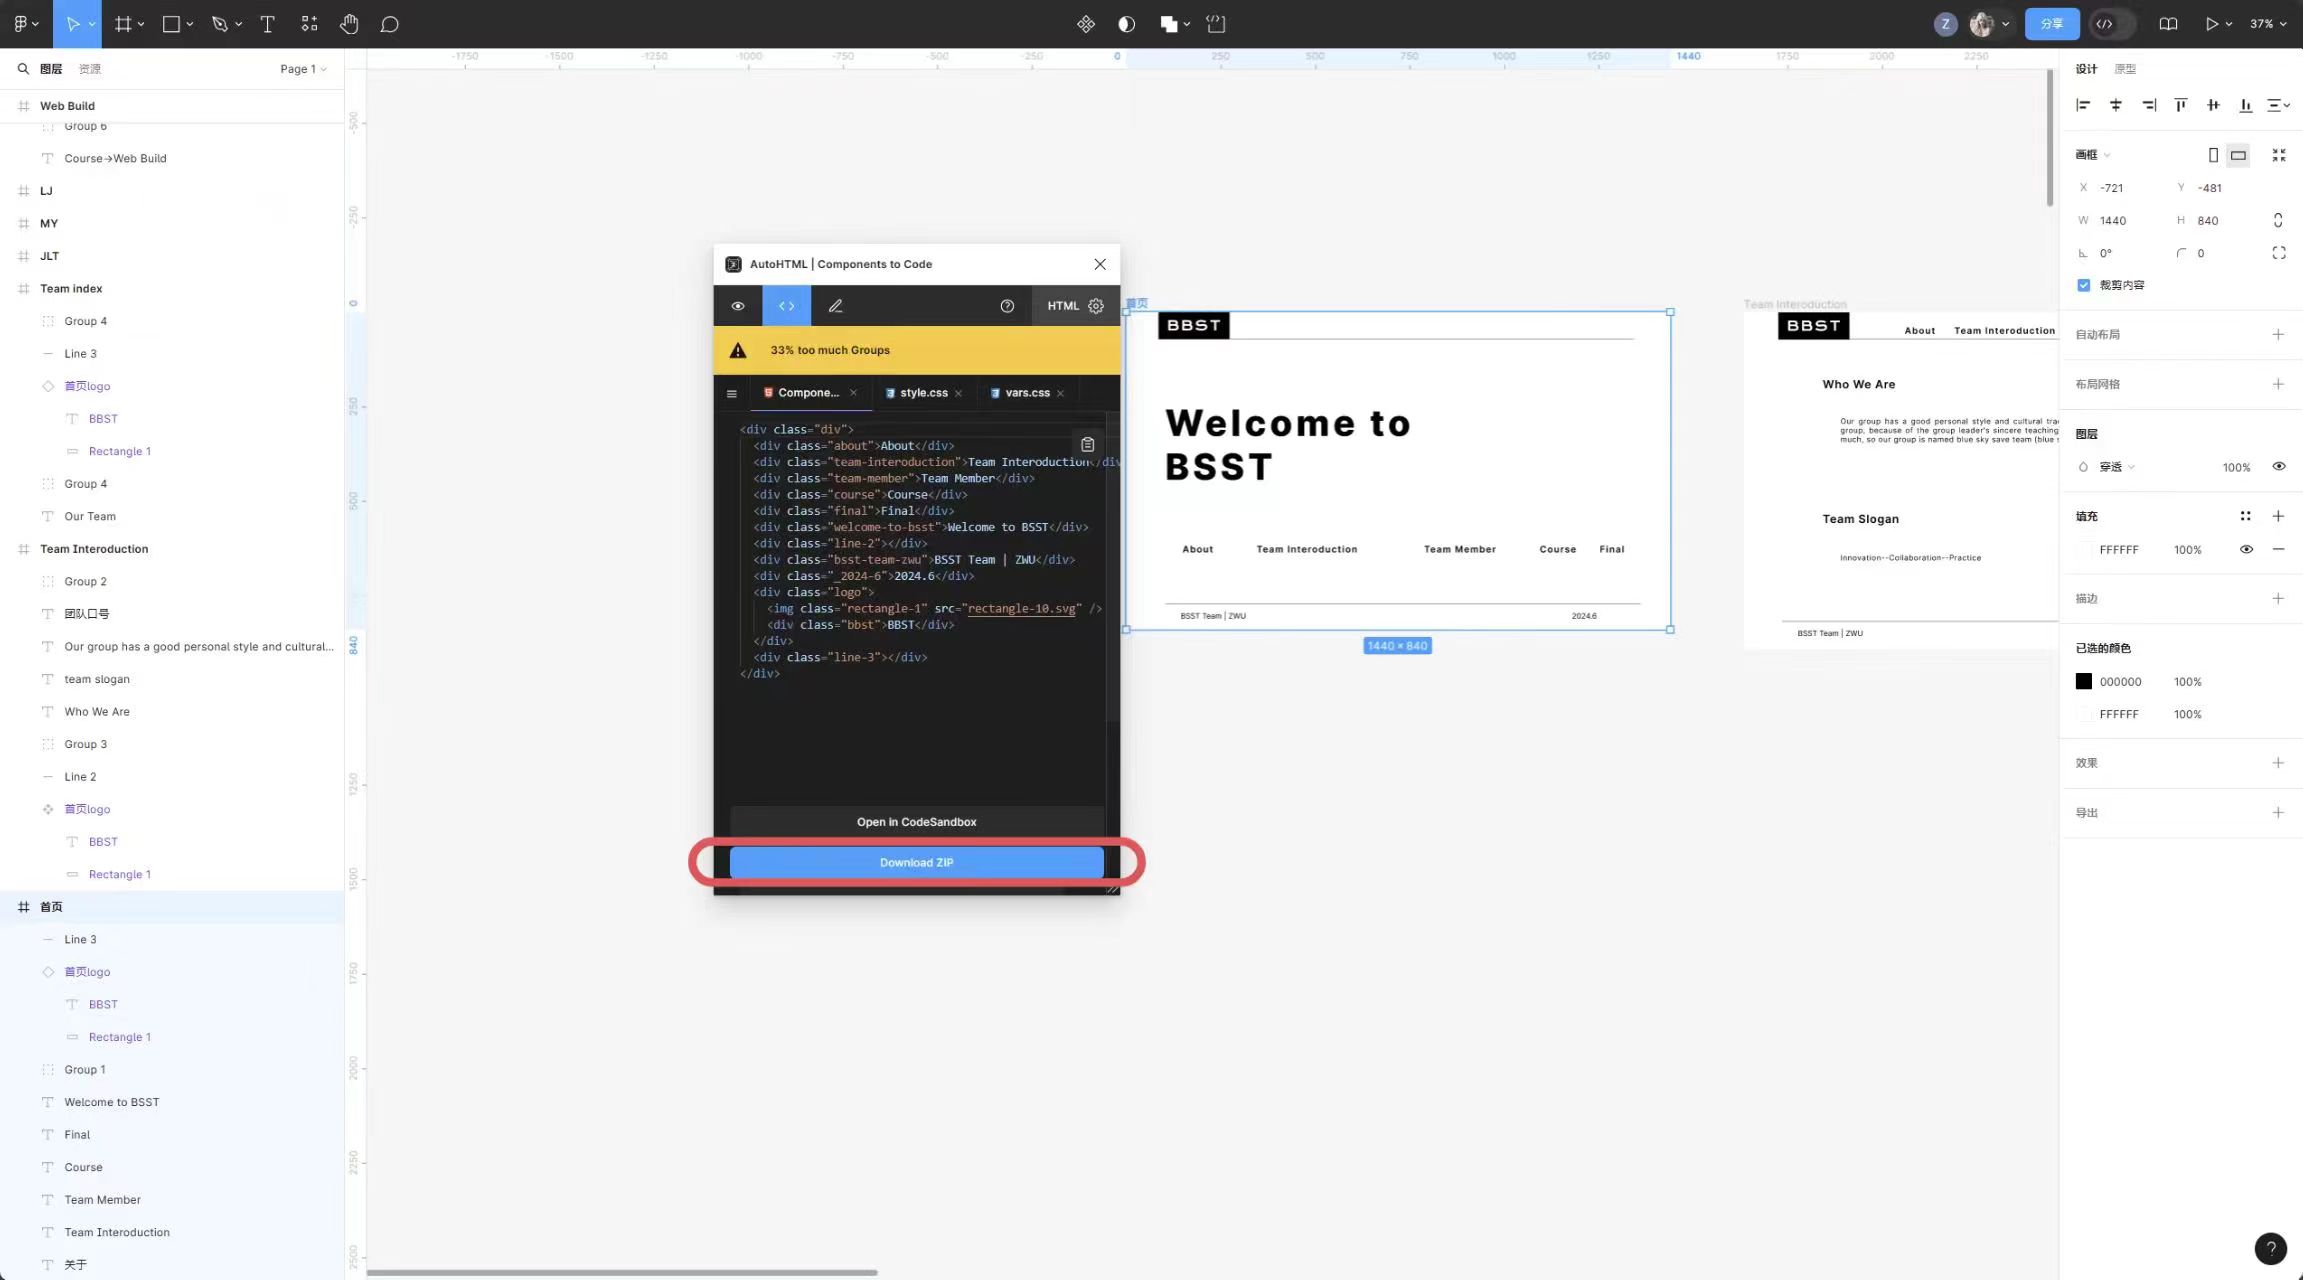
Download the AutoHTML plugin
Module 2: Download the zip file
Module 2: Download the zip file
Module 1:
Here are some web page files, .html are the code for the web page, and
the two CSS files are the beautification code for the web page.
Module 2: Here's the code for a specific file. When opened, it will be displayed here. If you want to change the code, you can do so here.
Module 3: Here's the code for a specific file. When opened, it will be displayed here. If you want to change the code, you can do so here.
Module 2: Here's the code for a specific file. When opened, it will be displayed here. If you want to change the code, you can do so here.
Module 3: Here's the code for a specific file. When opened, it will be displayed here. If you want to change the code, you can do so here.
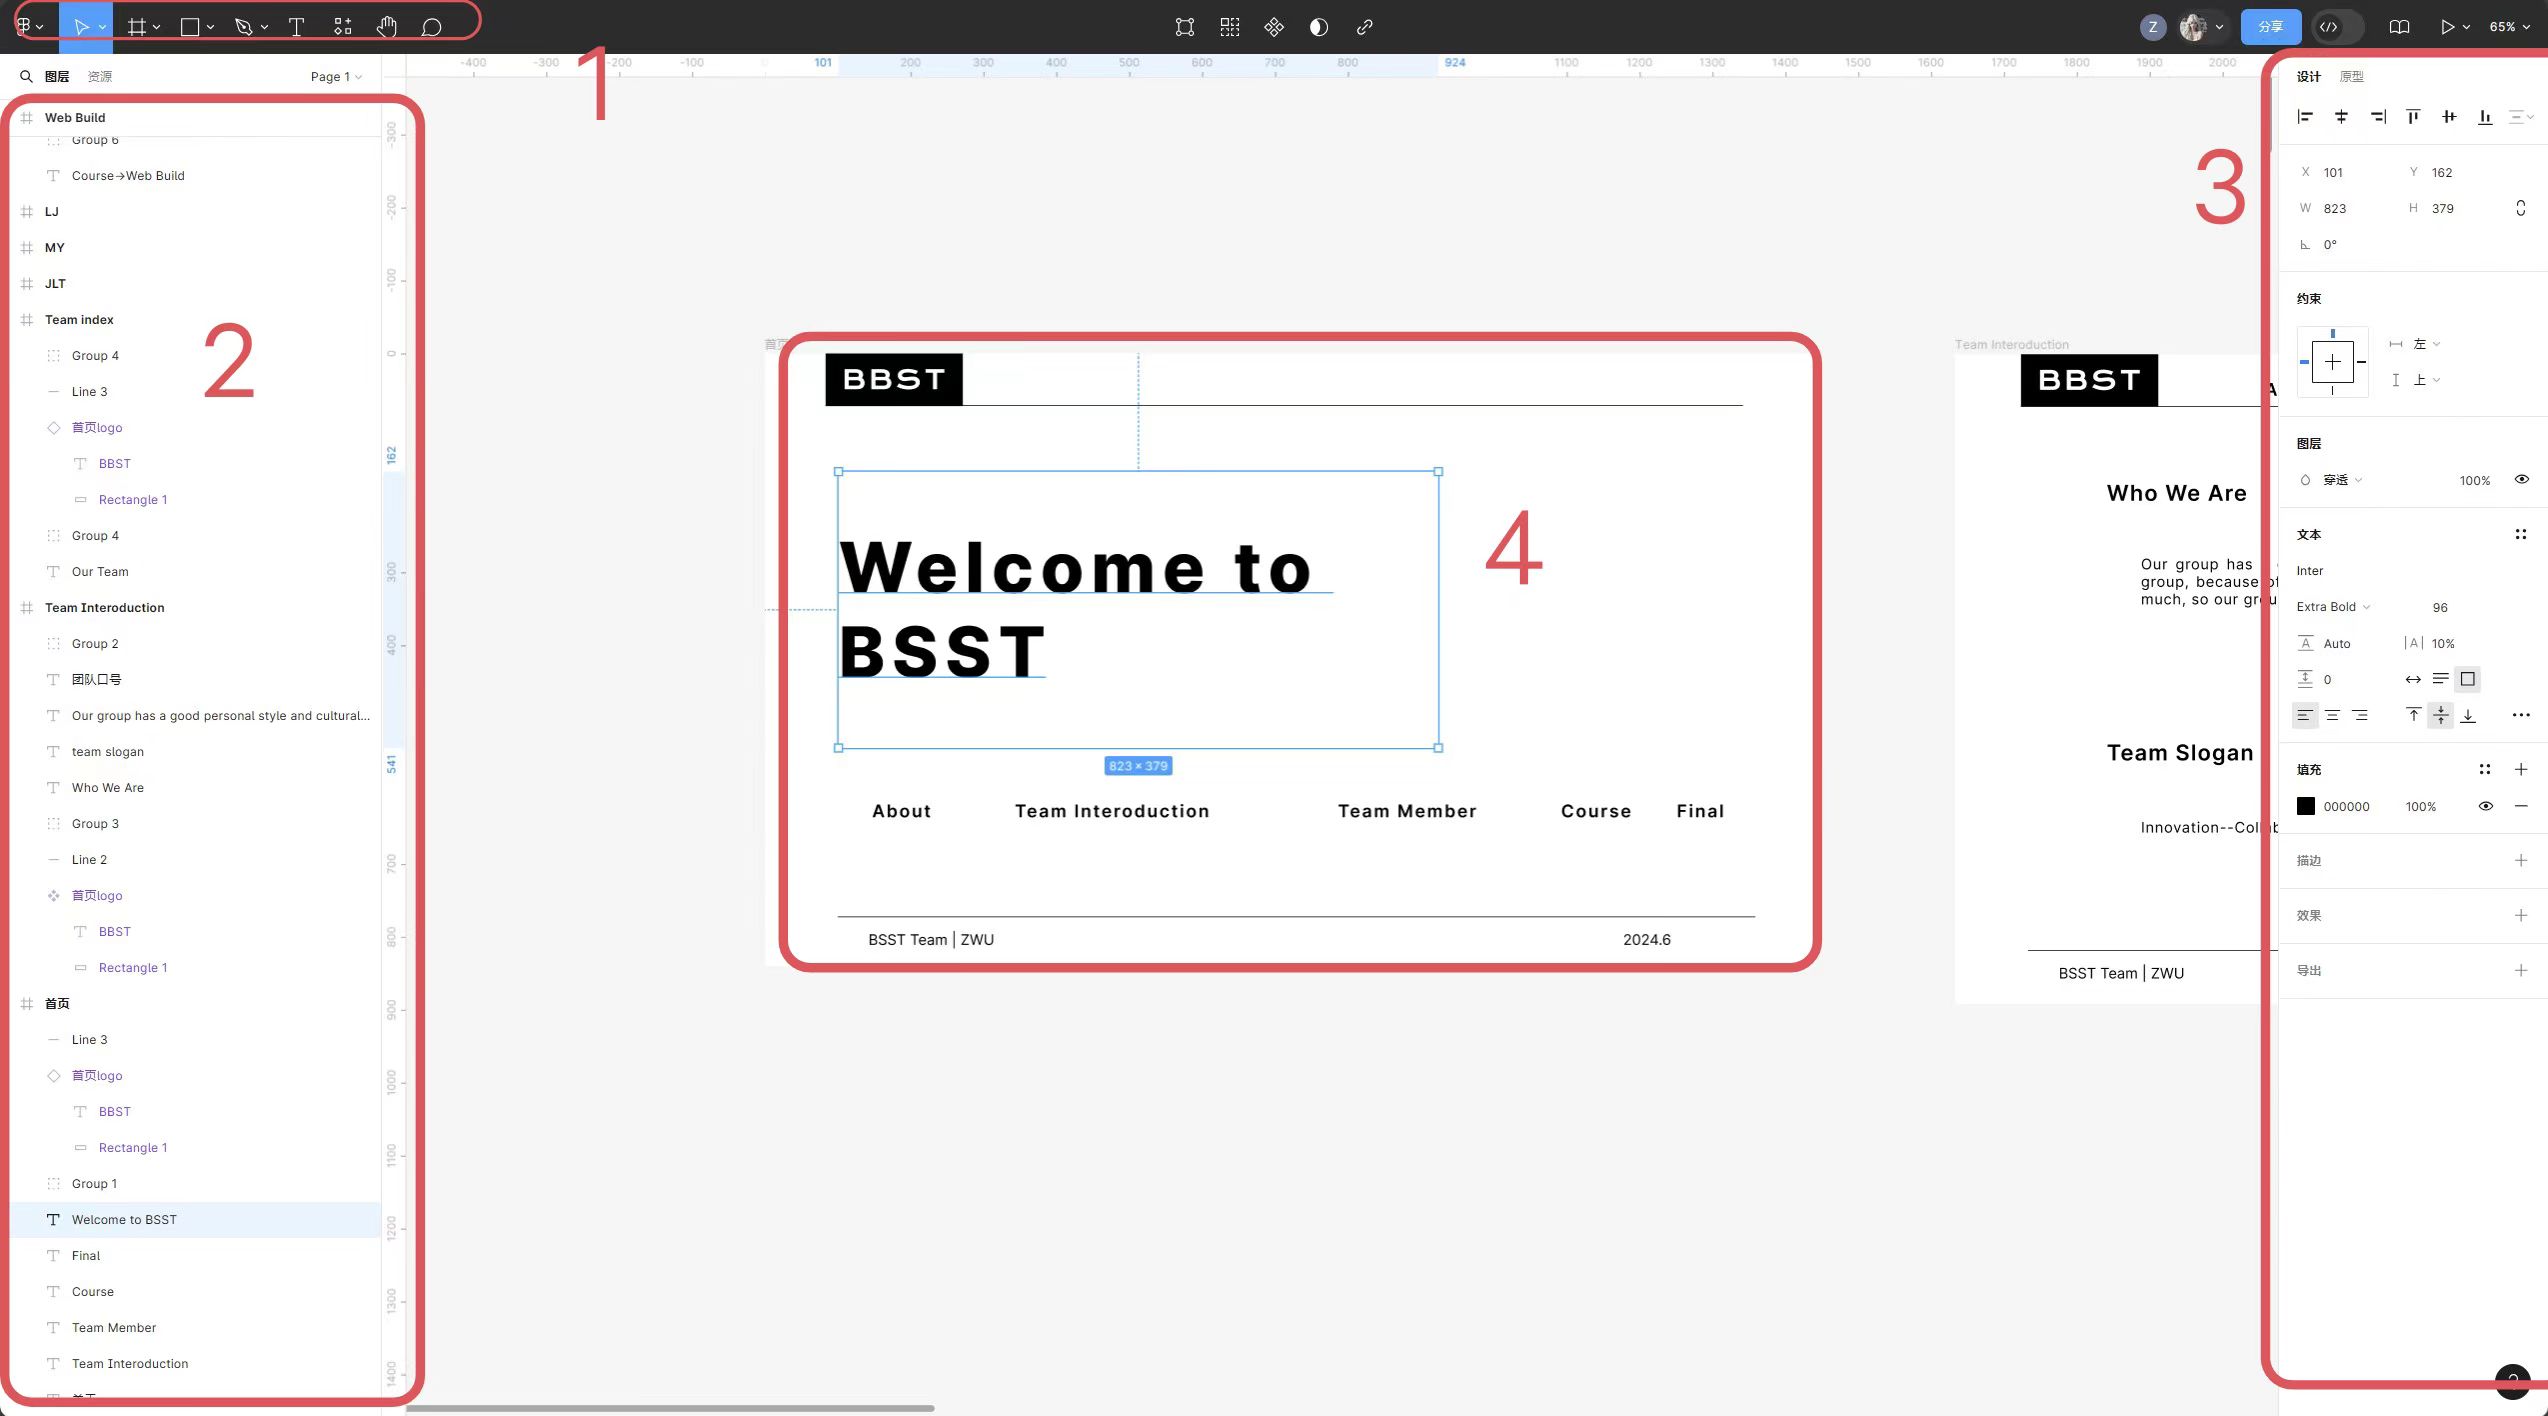
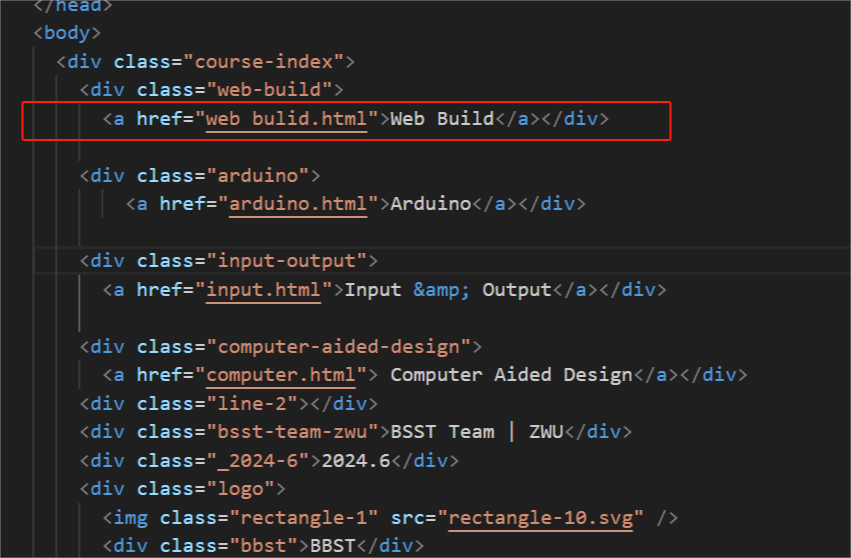
7.Web page code construction
Web Build
(figma)
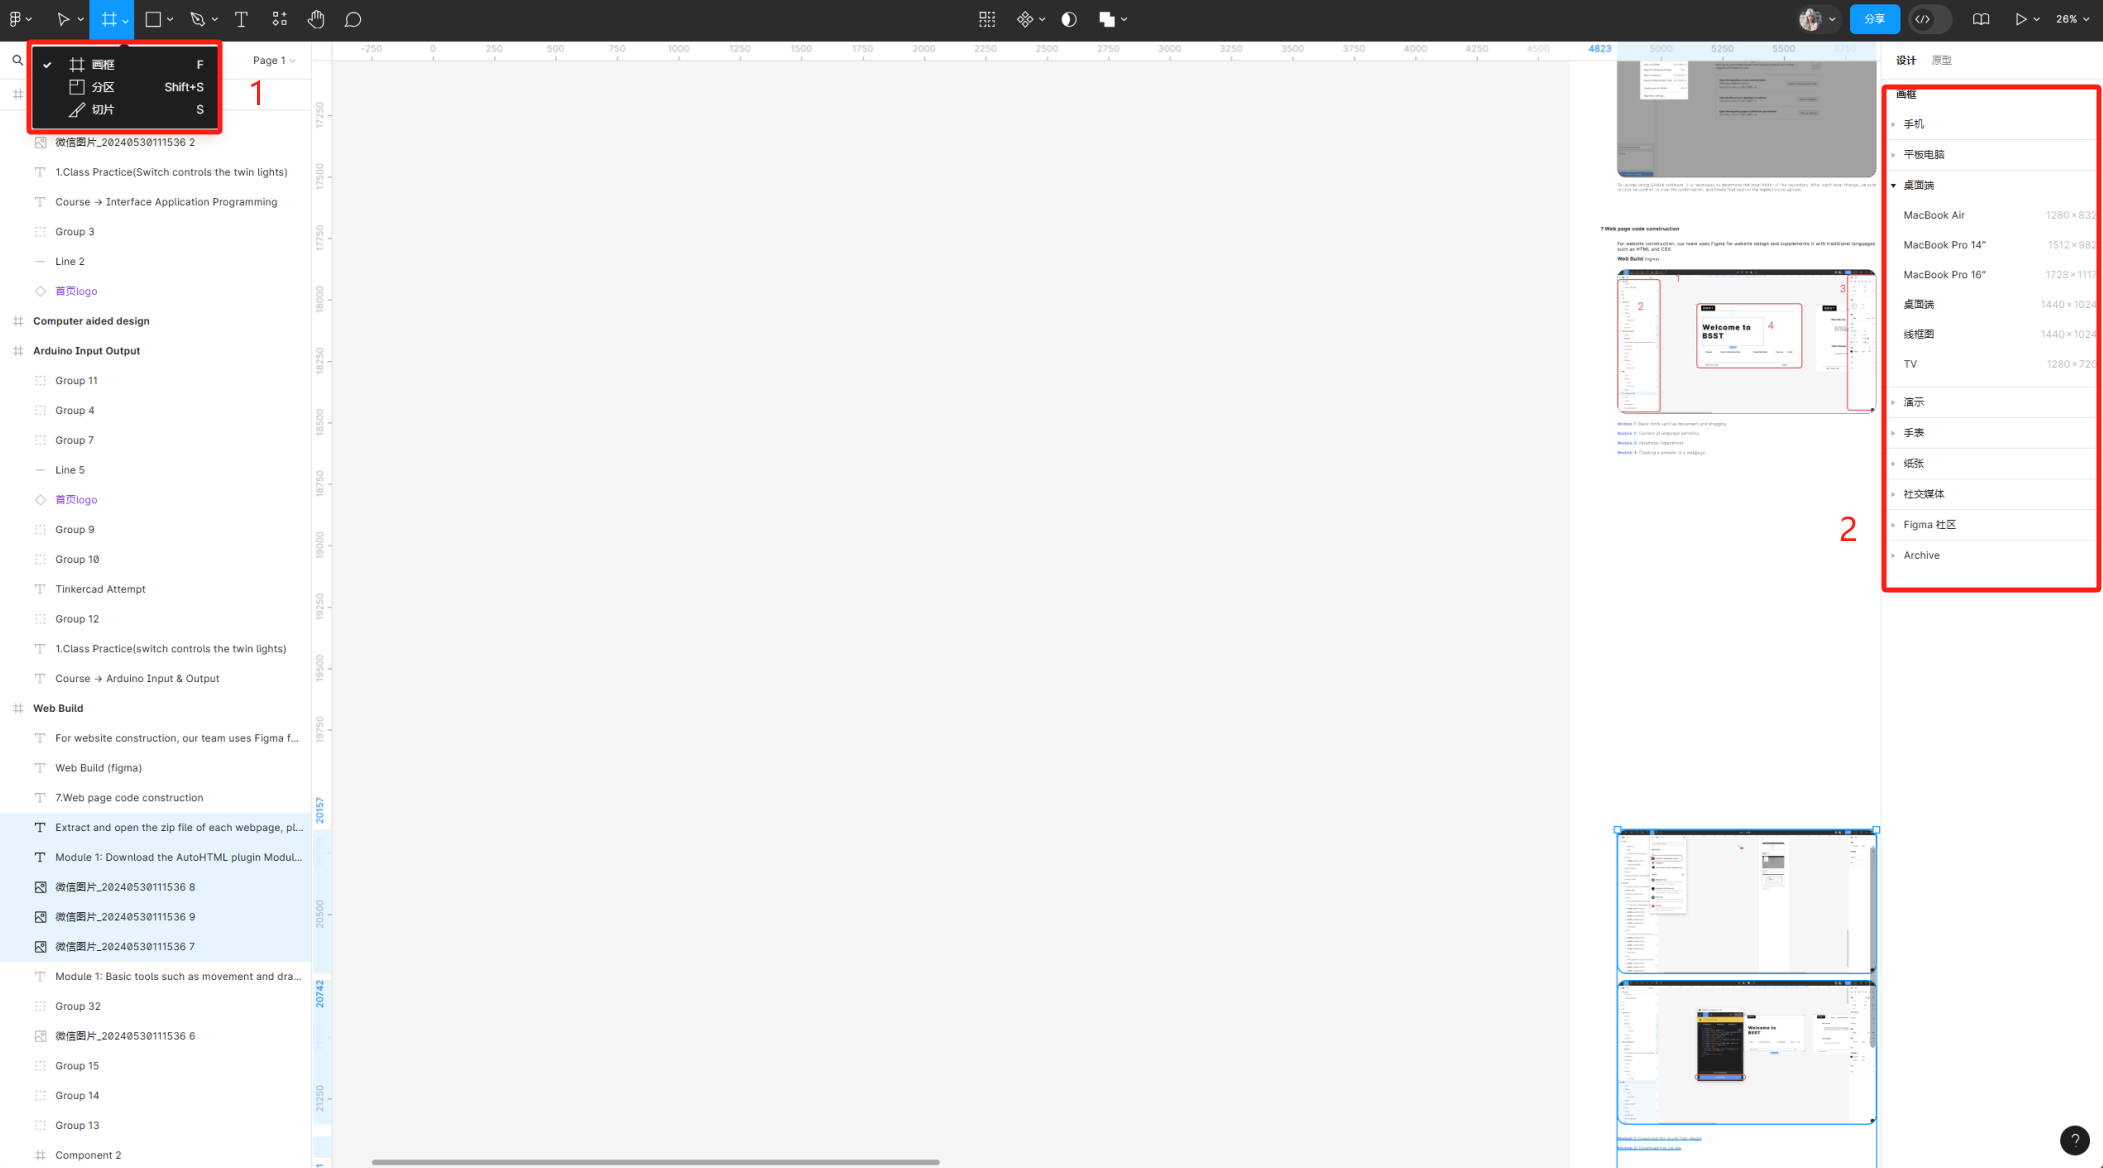

Figma file export
For website construction, our team uses Figma for website design and
supplements it with traditional languages such as HTML and CSS

<div class="example"> //Referencing CSS libraries
<a href=”xxxxxxxx.html”>example</a></div>
<a href=”xxxxxxxx.html”>example</a></div>
Web hyperlink creation